C
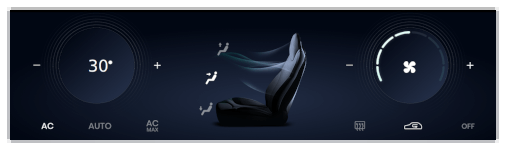
HVAC Control
Demonstrates usage of the Qt IF Generator Extensions for Android Automotive.
This example application utilizes the Qt IF Generator Extensions for Android Automotive. It uses Qt IF, and the Qt for Android Automotive, to handle Android specific data types, and the Android Automotive back end.
This solution is based on the generated code of the back end and the front end components, with the interface defined in an Interface Definition Language (IDL) with the QFace) and the Yaml files for annotations. The UI is defined in the Qt Design Studio project, and communicates with the front end by a Plugin (based on the generated code).
There are two options for communication between the back end and the Qt Car Service:
- Java Native Interface (JNI): the basic communication option on Android environments
- Qt Remote Objects (QtRO): the cross-domain communication framework (by default configuration uses the abstract Unix domain sockets with QtRORegistry)
Both configurations use the same interface definitions (.qface and .yaml files) and the UI definition (Qt Design Studio project).
Running the Example
To run the example from Qt Creator, open the Welcome mode and select the example from Examples. For more information, visit Building and Running an Example.
Using the Back End API
The HVAC back end is generated by Qt IF Generator, based on a QFace API definition (ifvehiclefunctions.qface). To make the application able to access this back end, certain code needs to be added in QML application and C++ implementation.
The HVAC back end can be accessed through the ClimateControl plugin. This plugin is built based on the imports subproject, it exports to the QtIf.Android.VehicleFunctions module as a ClimateControl component. The module needs to be imported to the QML document and then the plugin component instantiated, as shown in the example below:
import QtIf.Android.VehicleFunctions 1.0
In the case of the Qt Remote Objects target, the Remote Objects connection needs to be enabled in the service's main() function as follows:
    QAndroidService app(argc, argv);
    Core::instance()->host()->enableRemoting(QIfClimateControlBackend::instance(),
                                             QStringLiteral("QtIfAndroidVehicleFunctions.QIfClimateControl"));
    return app.exec();
The setup described above enables the use of a connection between the CarService on the Android instance with the QML application.
Note: In this example, the connection to the back end is defined in a distinct QML file,ClimateControlFacade.qml, which separates the UI implementation and the communication to the Qt Car Service. Such an approach facilitates the creation of the ClimateControl stub implementation for Qt Design Studio.
We start by declaring the ClimateControl component.
    ClimateControl {
        id: climateControl
    }
Now, we can exploit the properties defined in the QFace API definition.
    Connections {
        target: climateControl
        function onPowerOnChanged(powerOn) { facade.powerOn = powerOn }
        function onAcOnChanged(acOn) { facade.acOn = acOn }
        function onMaxAcOnChanged(maxAcOn) { facade.maxAcOn = maxAcOn }
        function onAutoOnChanged(autoOn) { facade.autoOn = autoOn }
        function onFanSpeedChanged(fanSpeed) { facade.fanSpeed = fanSpeed }
Passing the values to the back end is done in a similar way.
    Connections {
        target: facade
        function onPowerOnChanged() { climateControl.powerOn = facade.powerOn }
        function onAcOnChanged() { climateControl.acOn = facade.acOn }
        function onMaxAcOnChanged() { climateControl.maxAcOn = facade.maxAcOn }
        function onAutoOnChanged() { climateControl.autoOn = facade.autoOn }
Then, we use the defined ClimateControlFacade in the QML file.
    ClimateControlFacade {
        id: climateControl
    }
And connect the an UI element to the facade.
        AirKnob {
            id: airKnob
            x: 0
            y: 0
            value: climateControl.fanSpeed
            onValueChanged: climateControl.fanSpeed = value
            automode: climateControl.autoOn
            Connections {
                target: climateControl
                onFanSpeedChanged: airKnob.value = climateControl.fanSpeed
            }
        }
Important: As the QML bindings are unidirectional we have to use the signal handler mechanism. Otherwise, each user interaction would disconnect the binding.
Working with the Qt Design Studio
To get familiar with the UI definition in Qt Design Studio, open the project file hvac_ui/ifProject.qmlproject. It is located in the examples folder.
Then from the project files open hvacProject/Hvacapp.ui.qml which defines the UI composition.
The Run button (CTRL+R) executes the preview. In runtime, the Application Output shows the debug log, which contains, among other information, entries regarding the interaction between the UI and the back end stub.
Interacting with the HVAC Example App
- Open the app in the emulator.
- From the emulator's Extended controls > Car data select the VHal Properties tab.
- Select a property to change. For example:
Fan Speed. - Make a change in the app's UI side and observe the sate of the selected property in the
car data window.Note: A property's state can also be observed in the logs of the app either using the relevant Qt IDE log tab or directly with the ADB logcat tool.
See also Qt for Android and Qt IF.
Available under certain Qt licenses.
Find out more.
