Axivion
You can connect to an Axivion dashboard server and map dashboard projects to local projects.
Connecting to a Dashboard Server
To connect to an Axivion dashboard server:
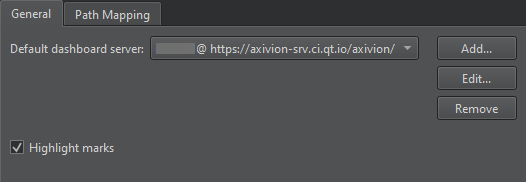
- Go to Preferences > Axivion > General.

- Select Add to add a new connection to an Axivion dashboard server.
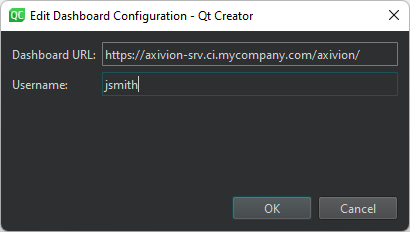
- Select Edit to modify an existing connection to an Axivion dashboard server.

- In Dashboard URL, enter the URL of the server.
- In Username, enter the username to access the server.
- Select Remove to remove the current selected connection to an Axivion dashboard server.
The first time you access the server, you must enter the password that matches the username. It is stored safely in your keychain that is provided by the OS for later use.
Select Highlight marks to highlight found issues on the scrollbar in the editor.
Mapping Paths
Projects on the dashboard might have subprojects that also appear on the dashboard because they are analyzed separately.
To map dashboard projects to local projects:
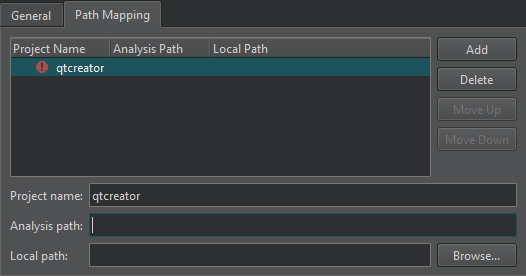
- Go to Preferences > Axivion > Path Mapping.

- In Project name, enter the project name on the dashboard.
- In Local path, enter the path to the project on the computer.
- In Analysis path, enter the path to the analysis of a subproject. You need this only to map analyses of subprojects.
See also Enable and disable plugins and View Axivion static code analysis results.
Copyright © The Qt Company Ltd. and other contributors. Documentation contributions included herein are the copyrights of their respective owners. The documentation provided herein is licensed under the terms of the GNU Free Documentation License version 1.3 as published by the Free Software Foundation. Qt and respective logos are trademarks of The Qt Company Ltd in Finland and/or other countries worldwide. All other trademarks are property of their respective owners.

