Qt Tools for Android Studio
Overview
What you need to know about the Qt Tools for Android Studio 3.0.0 plugin:
Features
With the plugin, you can:
| Feature | Description |
|---|---|
| Import new or existing Qt QML projects to an Android Studio project. | This provides easy integration of your QML project with Android Studio. |
| Utilize Qt QML libraries | A QML project enables you to use any QML parts of Qt’s APIs. For information about the licensing of these APIs, see the Qt Licensing Overview. |
| Edit QML projects | After importing, you can edit the source for these projects in Android Studio. |
| Build and deploy the QML parts | The plugin invokes the Qt build task using the Qt Gradle Plugin, which builds and deploys the QML part of your Android Studio project. |
| Enable QML syntax highlighting | The plugin provides syntax highlighting for common QML keywords, braces, and matching quotes. |
Supported configurations
You can find the host OS, IDE, and Android SDK versions supported here.
Host environments
The plugin has been tested only with supported Android Studio versions on the following operating systems:
- Linux (Ubuntu 22.04)
- Windows (10, 11)
- macOS ARM (Xcode version 15.2)
Android Studio
Android Studio Hedgehog (2023.1.1) to Koala (2024.1.1) is supported.
Licensing
This plugin is covered by the Qt Community Edition license.
Attributions
The plugin may contain third-party modules under the following permissive licenses:
Getting started
The following sections cover installing the plugin, importing an example Qt for Android project, building and running the project on a target device.
Installing dependencies
The dependencies are Android Studio and the Qt Gradle Plugin.
Install Android Studio and the plugin
This plugin is installed like any other IntelliJ plugin: using the Plugins pane or manually downloading the plugin. Here's how you can manually download and install the plugin.
- Download and install a compatible version.
- Head to the plugin's IntelliJ marketplace page to download the plugin's jar file.
- Start Android Studio.
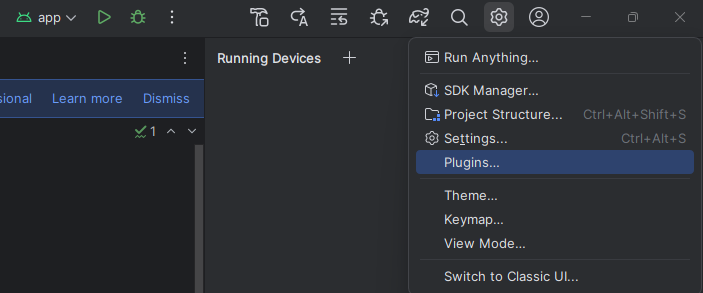
- On top-right corner select Settings(gear-icon)->Install Plugins From Disk
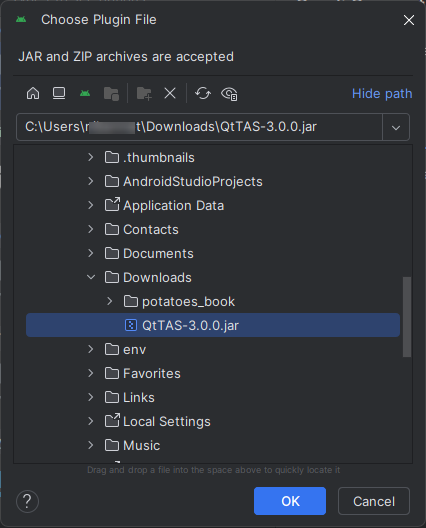
- Select file and select OK.
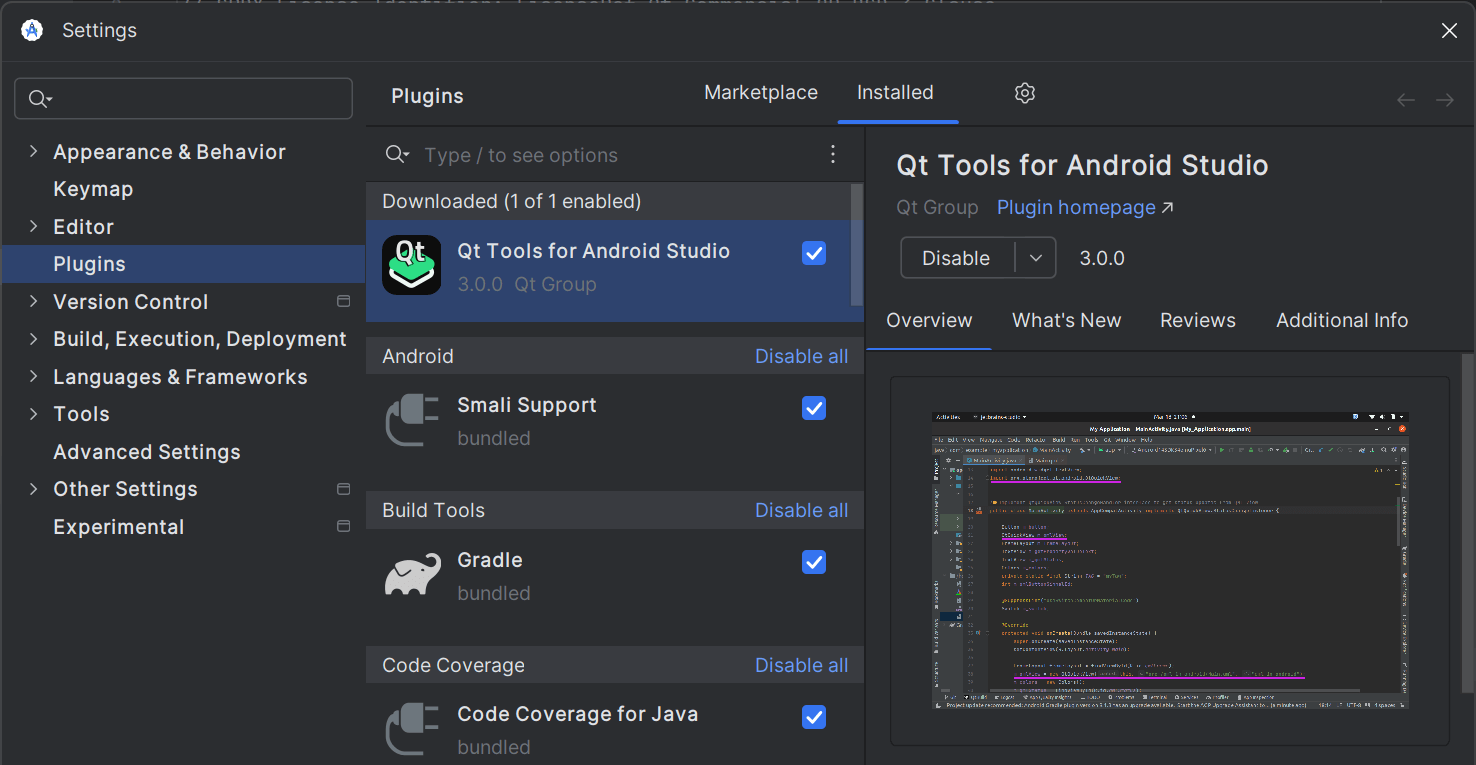
- Check that the plugin is installed.
Configure the plugin
Follow the configuration instructions in the Qt Gradle Plugin's documentation. Take note of your Qt install path, as you will need it when configuring your QML for Android projects in Android Studio.
Running the example
Test your development setup by running the examples shipped with the Qt installation. You'll need to know your Qt folder path first. When using the Qt Online Installer, the default install locations for the Qt folder are:
- Windows: C:/Qt
- macOS: ~/Qt
- Linux: ~/Qt
The example projects are located under your Qt installation directory in Qt/Examples/<qt version>/platforms/android/. To test the examples:
- From Android Studio's welcome screen, select Open.
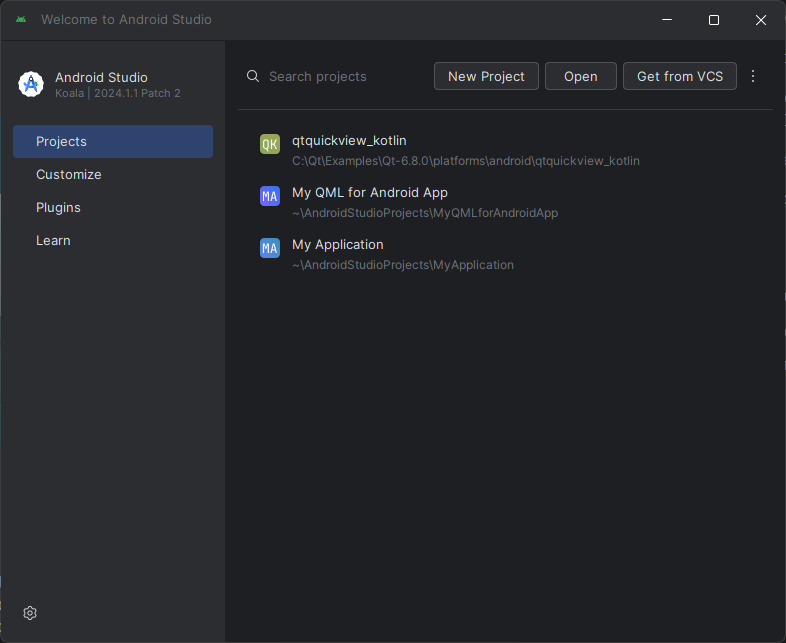
- Select the Qt project example you want.

Compiling and deploying to a target device or emulator
- First, you need to select Sync. You'll need to be online for this step the first time, as this downloads the needed Gradle plugin dependencies.

- To compile and deploy, select Run.
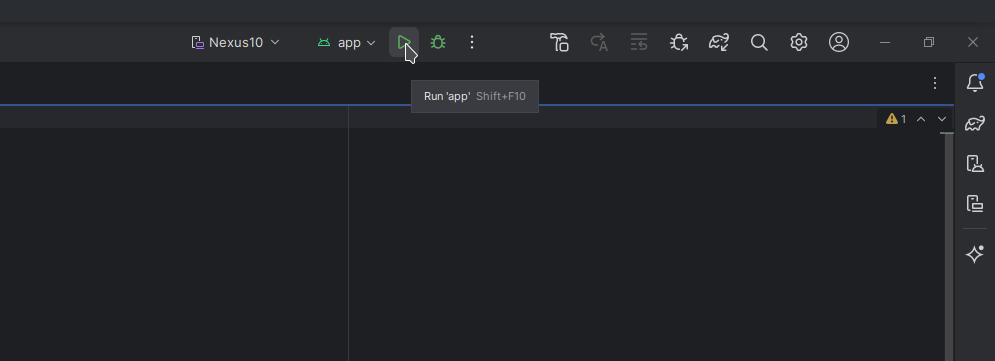
The build button builds the QML and Android projects and runs the resulting packages.
Note: Selecting Make Project will not build the Qt project.
Debugging
Debugging QML or C++ is not possible with the plugin. See Qt Creator for debugging options.
Writing your first application from scratch
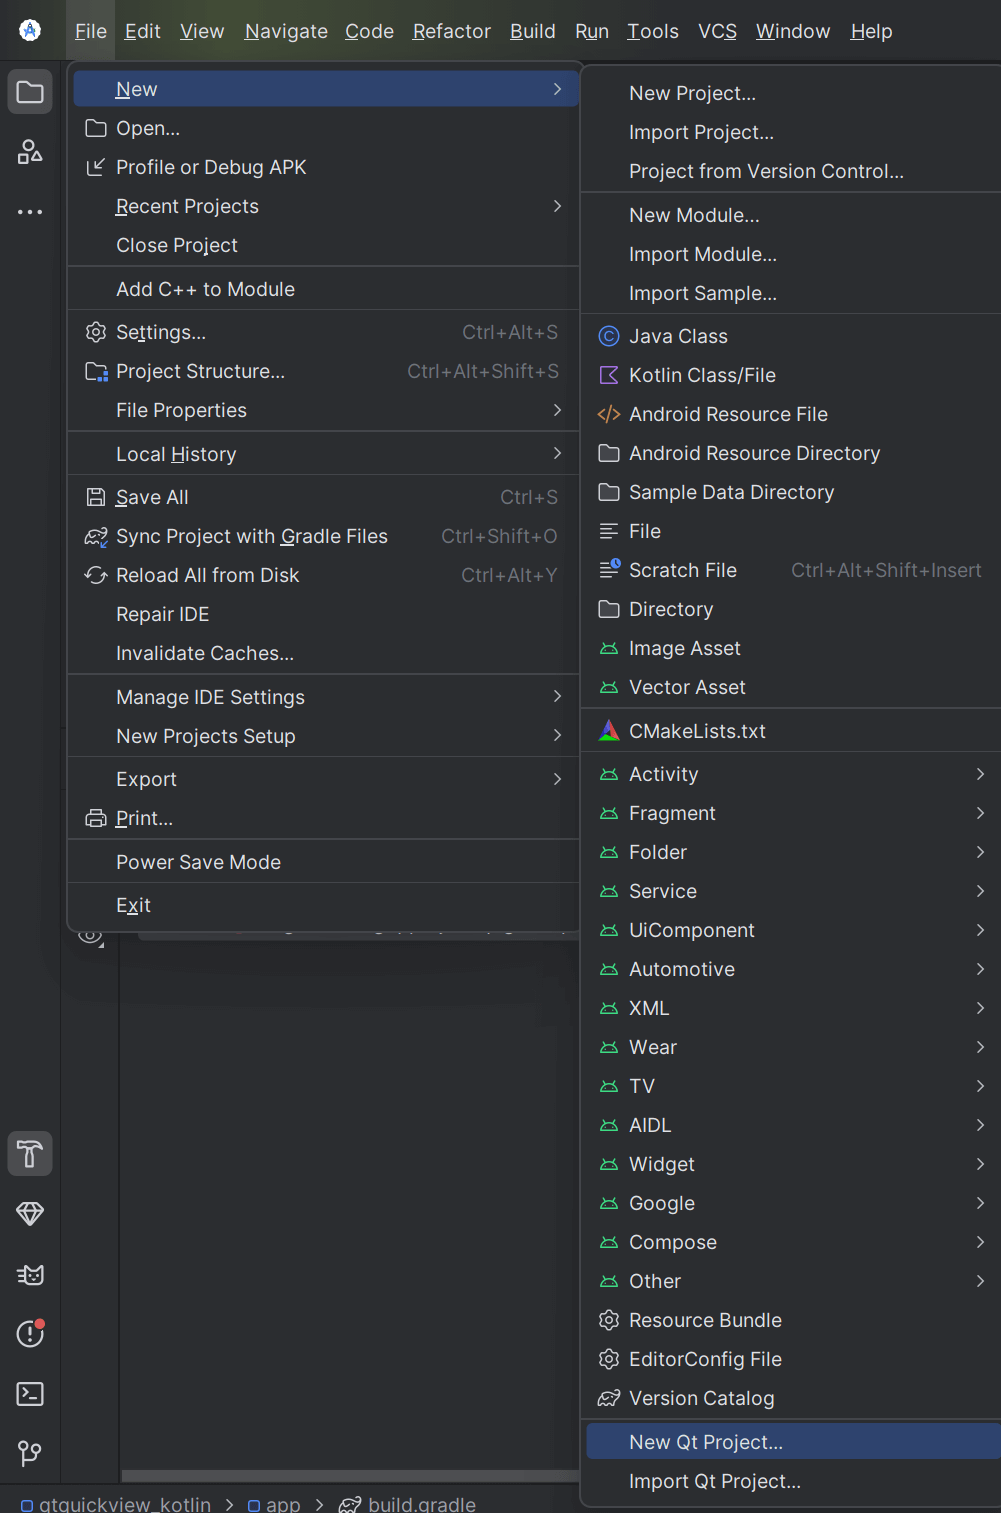
- Open an existing Android Studio project or create a new one.
- From Android Studio top-left select File -> New -> New Qt Project.
- Set the name for the project, select the projects folder, select the
Qt versionand select OK.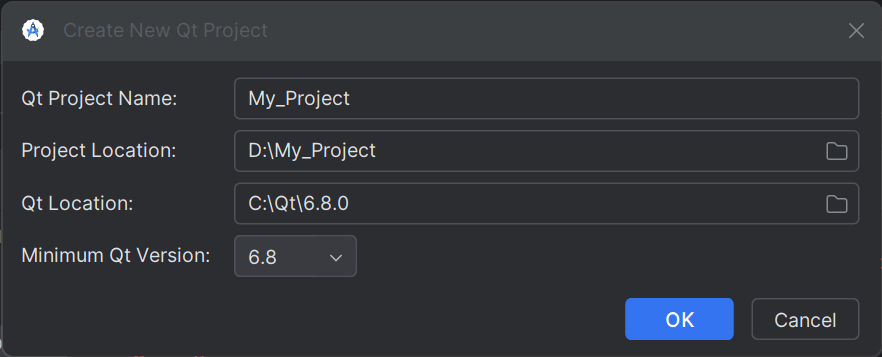
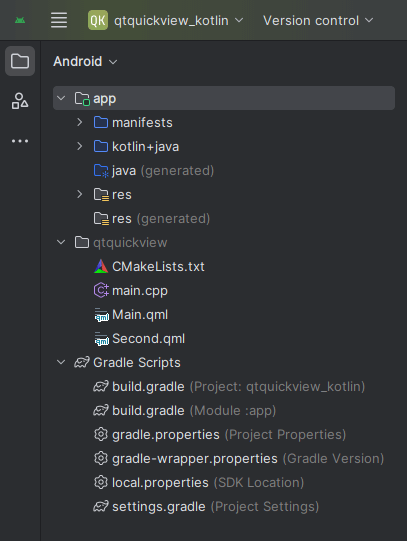
This creates four initial files for the project in a folder with the name you specified for your project.
- The
CMakeLists.txtproject file. - The
main.cppfile. - The
Main.qmlfile. - A
.gitignorefile, to ignore any files within a futurebuilddirectory.
- The
- The plugin will now provide you with a code snippet to copy and paste into the
app/build.gradlefile of your Android project.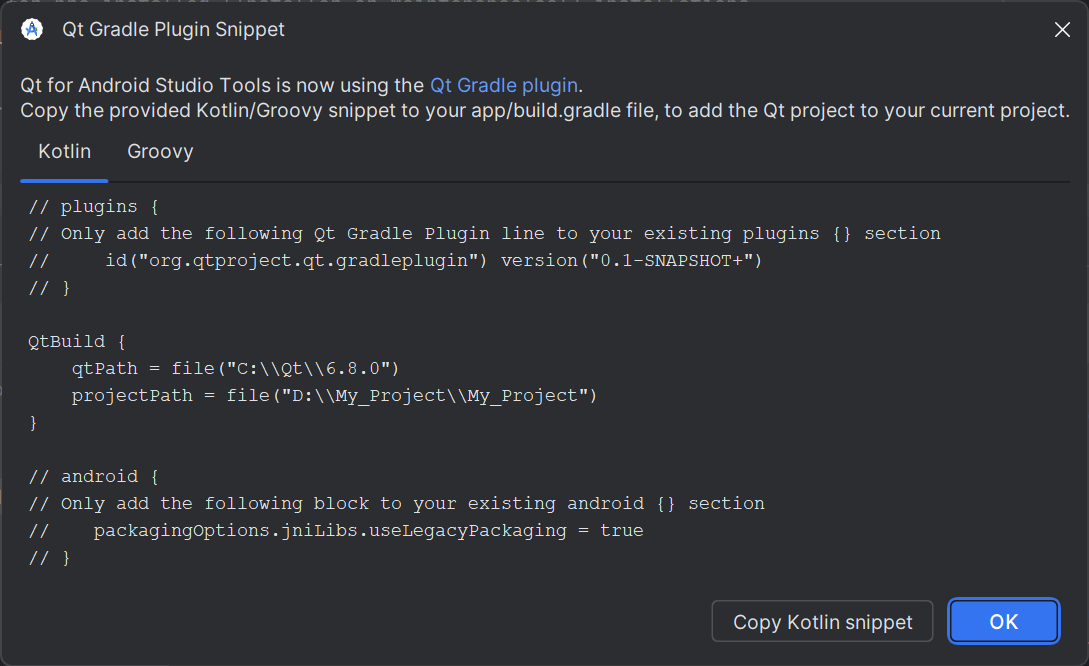
- Once you have done that, press Sync, and your QML project will appear in your Android project tree.
- Start writing your first Qt QML application!
If you are a returning user or just getting started with QML, the QML Reference has what you need.
Integrating QML in an Android application
See the QML for Android overview for information on embedding QML in Android applications.
© 2025 The Qt Company Ltd. Documentation contributions included herein are the copyrights of their respective owners. The documentation provided herein is licensed under the terms of the GNU Free Documentation License version 1.3 as published by the Free Software Foundation. Qt and respective logos are trademarks of The Qt Company Ltd. in Finland and/or other countries worldwide. All other trademarks are property of their respective owners.
