Qt Quick Text Editor Guide - UI
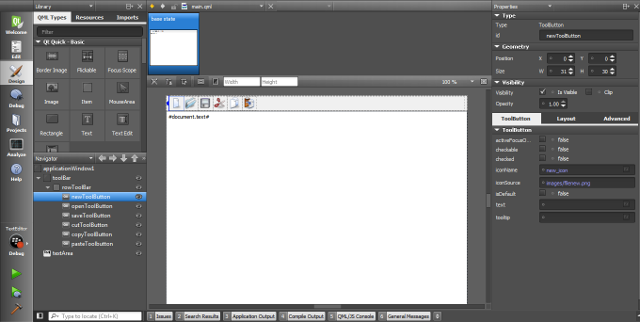
Qt Quick Designer is integrated into Qt Creator, allowing you to switch between Edit and Design modes. To start using Qt Quick Designer, select the QML file, main.qml, and click the Design button on the left panel.
It is important to familiarize yourself with the windows in Qt Quick Designer. This guide uses Qt Quick Designer to add and set up the layout.
Note: The default kit for the project must be a Desktop kit, as Qt Quick Designer cannot yet emulate the styles for a mobile platform.
To start, we can customize the default application created by the wizard. You can delete the MainForm.ui.qml file and remove the following lines from the main.qml file:
MainForm {
    anchors.fill: parent
    button1.onClicked: messageDialog.show(qsTr("Button 1 pressed"))
    button2.onClicked: messageDialog.show(qsTr("Button 2 pressed"))
    button3.onClicked: messageDialog.show(qsTr("Button 3 pressed"))
}

MessageDialog {
    id: messageDialog
    title: qsTr("May I have your attention, please?")

    function show(caption) {
        messageDialog.text = caption;
        messageDialog.open();
    }
}
The default dimension of the ApplicationWindow may remain but you can change the title property to a relevant name such as:
title: qsTr("Text Editor Example")Note: The example uses the qsTr() function to facilitate translation. For more information, visit the Internationalization and Localization with Qt Quick page.
Make sure that Resources tab contains the images from the previous page.
Defining the Application Layout
Our application has a simple layout, which consists of a tool bar and a text area. The tool bar contains the tool buttons that the user can choose to manipulate the text area contents. At the top, there are menus, which perform actions such as saving and opening files to edit.
Adding the Controls
To add a control, you have the following options:
- Drag and drop a control from the QML Types window onto the main design window. This allows you to drop the control onto a specific area of the layout.
- Drag and drop a control from the QML Types window onto the Navigator window. This allows you to set the layout hierarchy.
Both these actions give you several options to quickly set up the layout. Whichever method you use, designer gives you a more direct way of setting up a particular aspect of the control, such as the scene hierarchy or the position of the control.
Afterwards, the various properties are set from within the Properties window on the right side of Qt Creator window.
Setting Up the Tool Bar
First, we need to add the tool bar. We can do this in the Edit mode and typing in a ToolBar type inside the ApplicationWindow type. This configures the ApplicationWindow object as the tool bar's parent.
ApplicationWindow {

    ToolBar {
        id: toolBar
    }
}
In the Design mode, the Properties window lets us set the tool bar id to toolbar.
In the Navigator window, make sure that the tool bar is a child of the application window. To make the tool bar a child of the window, simply drag the tool bar underneath the application window.
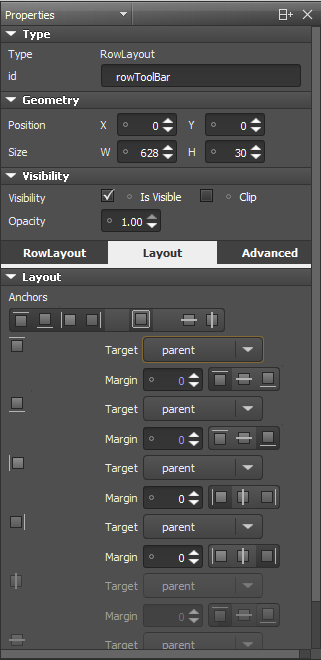
Within the tool bar, we need a row layout. Drag the row layout into the Navigator window and set it to be a child of the tool bar.
Similarly, set these layout properties:
- id - set it to
rowToolbar - click on the fill area button to set the fill area to parent. The parent should be the tool bar.
Adding the Tool Buttons
Tool buttons exist within a tool bar and specifically use the layout within the tool bar. Text Editor has six tool buttons, each performing a specific action, such as copy and paste to and from the clipboard.
The steps for adding the six tool buttons are mainly the same:
- Drag and drop the Tool Button type as a child of the row layout.
- The id should be set to a unique name that is related to the tool button's action. The parent is set to parent and set the margin to
0.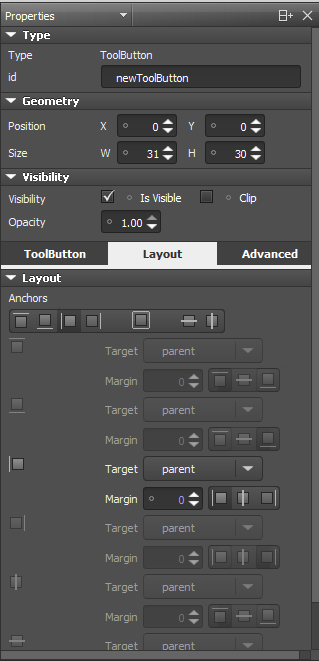
- The first tool button, for example New, should have the left anchor set to the row layout.
- The subsequent tool buttons should have the left anchor set to their previous sibling and the margin to
0. These settings makes sure that the tool buttons are adjacent to each other. - Set the iconName and iconSource properties in the ToolButton tab. The iconName should be set to a unique name identifying the icon name while the iconSource property should be set to the name of the icon for the tool button.
For example, the New tool button has newIcon set as its iconName and images/filenew.png set to the iconSource property. The icons are also viewable in the Resources inside the Library window.
Similarly for the Open tool button, the margins are set to 0 but the left anchor is set to the New tool button.

Note: Dragging and dropping the images from the Resources onto the scene adds the image into the scene as an Image object, instead of setting the iconSource property.
Setting Up the Text Area
Next, add a Text Area onto the scene as a child of the application window and a sibling of toolBar. The tool bar should be above the text area. Similarly, set the following text area properties:
- id - set it to
textArea - set the left, right, and bottom margin to the parent and the top margin to
toolBar.bottomand set the margins to0.anchors.top: toolBar.bottom anchors.right: parent.right anchors.bottom: parent.bottom anchors.left: parent.left
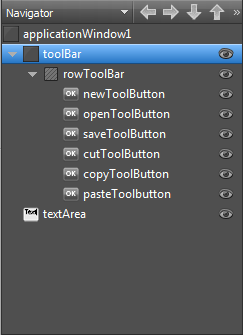
Verify that you have the parent, margins, and icons set up. Your Navigator should look similar to:
Running the application should result in this layout:
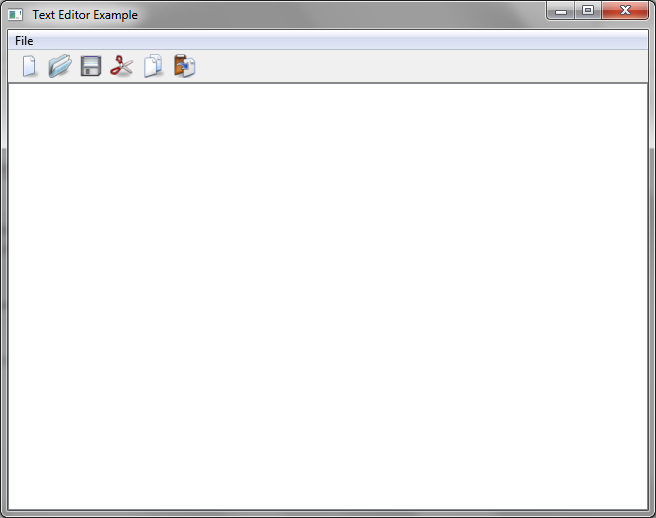
We are now ready to go back to Edit and set the handlers and actions. A QML handler is called when the buttons are pressed and triggers the necessary action associated with the tool buttons. An action collects various QML logic into one code block so it may be reused by several handlers. For more information, visit the Action QML type and Signal and Handler Event System.
Example Files
The accompanying examples files are found in the following page:
© 2024 The Qt Company Ltd. Documentation contributions included herein are the copyrights of their respective owners. The documentation provided herein is licensed under the terms of the GNU Free Documentation License version 1.3 as published by the Free Software Foundation. Qt and respective logos are trademarks of The Qt Company Ltd. in Finland and/or other countries worldwide. All other trademarks are property of their respective owners.
