
StyleKit Custom Delegates Example
Shows how to use custom delegates and shader effects with StyleKit.
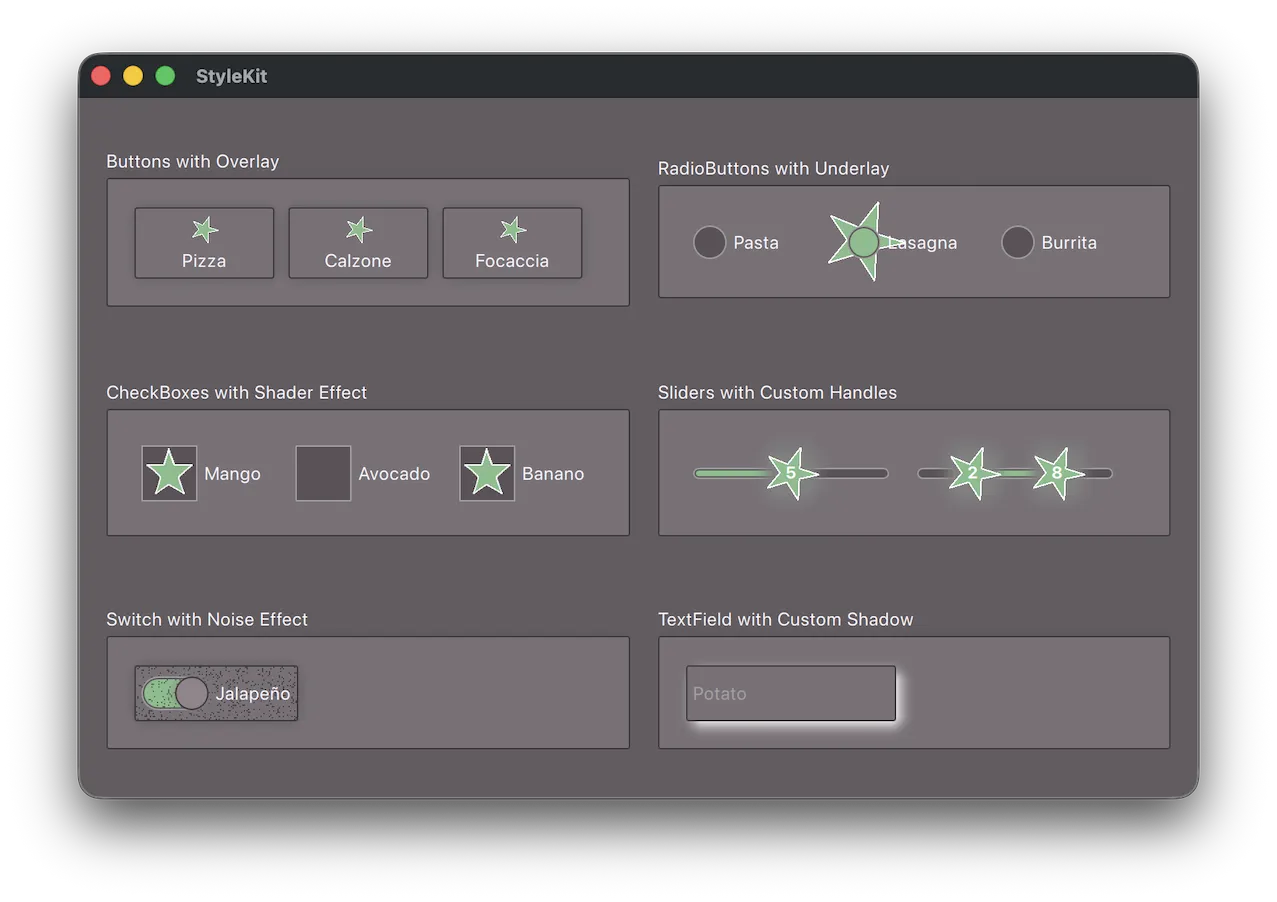
This example shows how to extend StyleKit styling with custom delegates that allow you to render a style beyond what the default rendering provides.
It demonstrates how to:
- Create overlay delegates by subclassing StyledItem and placing custom items on top of the standard delegate rendering.
- Create underlay delegates using a plain Item with
delegateStyleandcontrolproperties, embedding a StyledItem on top for the standard look. - Pass per-state data to a custom delegate using the data property.
- Apply shader-based visual effects using ShaderEffect and ShaderEffectSource in combination with StyledItem.
- Implement a custom shadow delegate to replace the built-in shadow rendering.
- Pass static configuration to a delegate via regular QML properties (e.g. distinguishing the first and second handle of a RangeSlider).
Note: This example requires Qt Shader Tools, an optional library available through the Qt Maintenance Tool.
Running the Example
You can run the example from:
- Qt Creator
Open the Welcome mode and select the example from Examples. For more information, see Qt Creator: Tutorial: Build and run.
- Qt Extension for Visual Studio Code
Run the Qt: Open Qt examples command from the Command Palette, and select the example from the list. For more information, see Qt Extension for Visual Studio Code: Tutorial: Build and run.
See also Qt Labs StyleKit, StyleKit Quick Controls Example, and StyleKit Widgets Example.
© 2026 The Qt Company Ltd. Documentation contributions included herein are the copyrights of their respective owners. The documentation provided herein is licensed under the terms of the GNU Free Documentation License version 1.3 as published by the Free Software Foundation. Qt and respective logos are trademarks of The Qt Company Ltd. in Finland and/or other countries worldwide. All other trademarks are property of their respective owners.
