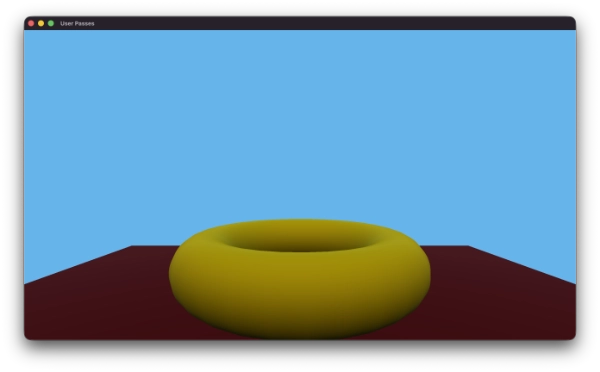
Qt Quick 3D - User Passes Example
Demonstrates creating custom render passes in Qt Quick 3D.
}
The User Passes example demonstrates how to create custom render passes in Qt Quick 3D. It implements a deferred lighting rendering pipeline using multiple user-defined render passes and shows how to handle the complete rendering sequence: opaque geometry, skybox, 2D items embedded in the scene, and transparent geometry.
Disabling internal render passes
By default, Qt Quick 3D uses a set of internal render passes to render the 3D scene. Sometimes you may want to disable these internal passes and implement your own rendering pipeline using user-defined render passes.
To disable the internal render passes, set the renderOverrides property of the View3D to View3D.DisableInternalPasses.
View3D {
    id: view3D
    anchors.fill: parent
    renderOverrides: View3D.DisableInternalPasses
    environment: ExtendedSceneEnvironment {
        backgroundMode: SceneEnvironment.SkyMaterial
        skyMaterial: ProceduralSkyMaterial {}
    }
If you disable the internal render passes, you will need to provide the result of the main color pass for the View3D to be able to display anything on the screen.
Geometry Buffer Pass
In this example, the first custom render pass is a geometry buffer (G-buffer) pass that renders the scene geometry into multiple render targets, storing different material properties in each target. The provided example is a subset of the full material properties provided by Qt Quick 3D materials, focusing on the properties needed for a basic deferred lighting implementation.
Our RenderPass is defined in GBufferPass.qml:
RenderPass {
    id: gbufferPass
    clearColor: Qt.rgba(0.0, 0.0, 0.0, 0.0)

    property alias layerMask: filter.layerMask
    required property RenderPassTexture depthTexture

    RenderPassTexture {
        id: gbuffer0
        format: RenderPassTexture.RGBA16F
        // rgb: baseColor (linear), a: metalness
    }

    RenderPassTexture {
        id: gbuffer1
        format: RenderPassTexture.RGBA16F
        // rgb: normal, a: roughness
    }

    RenderPassTexture {
        id: gbuffer2
        format: RenderPassTexture.RGBA16F
        // rgb: emissive, a: ao/spare
    }

    commands: [
        ColorAttachment { target: gbuffer0; name: "GBUFFER0" },
        ColorAttachment { target: gbuffer1; name: "GBUFFER1" },
        ColorAttachment { target: gbuffer2; name: "GBUFFER2" },
        DepthTextureAttachment { target: gbufferPass.depthTexture },
        RenderablesFilter {
            id: filter
            renderableTypes: RenderablesFilter.Opaque
        }
    ]

    materialMode: RenderPass.AugmentMaterial
    augmentShader: "gbuffer_augment.glsl"
}
It defines 3 color attachments and 1 depth attachment. The pass requires 3 textures which are defined as RenderPassTexture objects inside the RenderPass. These 3 RenderPassTextures are used as the targets for the color attachments of the pass, and the depth attachment uses a depth texture provided from outside the pass.
The RenderPass itself is set to AugmentMaterial mode, which means that it will augment the materials of the rendered objects with additional shader code. The augment shader is provided in the gbuffer_augment.glsl file, which outputs the required material properties to the multiple render targets.
void MAIN_FRAGMENT_AUGMENT()
{
    vec3 baseColor   = BASE_COLOR.rgb;
    float metalness  = METALNESS;
    float roughness  = ROUGHNESS;
    vec3 worldNormal = normalize(WORLD_NORMAL);

    // GBuffer 0: albedo + metalness
    GBUFFER0 = vec4(baseColor, metalness);

    // GBuffer 1: normal (encoded to 0..1) + roughness
    GBUFFER1 = vec4(worldNormal * 0.5 + 0.5, roughness);

    // GBuffer 2: world position
    GBUFFER2 = vec4(qt_varWorldPos, 1.0);
}
Here you see how the base color, metalness, worldNormal, roughness and world position are stored into the 3 color attachments of the G-buffer.
To actually use the G-buffer pass in the rendering pipeline, we need to create an instance of it in Main.qml, and provide the required depth texture:
RenderPassTexture {
    id: mainDepthStencilTexture
    format: RenderPassTexture.Depth24Stencil8
}
GBufferPass {
    id: gbufferPass
    layerMask: ContentLayer.Layer0 | ContentLayer.Layer1
    depthTexture: mainDepthStencilTexture
}

RenderOutputProvider {
    id: gbuffer0Provider
    textureSource: RenderOutputProvider.UserPassTexture
    renderPass: gbufferPass
    attachmentSelector: RenderOutputProvider.Attachment0
}

RenderOutputProvider {
    id: gbuffer1Provider
    textureSource: RenderOutputProvider.UserPassTexture
    renderPass: gbufferPass
    attachmentSelector: RenderOutputProvider.Attachment1
}

RenderOutputProvider {
    id: gbuffer2Provider
    textureSource: RenderOutputProvider.UserPassTexture
    renderPass: gbufferPass
    attachmentSelector: RenderOutputProvider.Attachment2
}
Three RenderOutputProvider instances are created to provide references to the rendered G-buffer textures, which will be used in the subsequent lighting pass.
The layerMask property of the G-buffer pass is set to only render objects that are on ContentLayer.Layer0 and ContentLayer.Layer1. This allows us to control which objects are rendered in the G-buffer pass by setting their layers property accordingly.
Main Color Pass and SubRenderPasses
Rather than a single flat render pass, this example uses a composite mainColorPass that owns the main color and depth textures and orchestrates all rendering through a sequence of SubRenderPass children.
Each SubRenderPass shares the same render targets as the outer pass and executes in order. This makes it straightforward to build a layered rendering pipeline where each stage adds to the result of the previous one.
RenderPass {
    id: mainColorPass
    clearColor: "black"
    // Preserve depth across SubRenderPasses so geometry depth is available
    // when rendering the skybox, transparent objects, and 2D items.
    renderTargetFlags: RenderPass.RenderTargetFlags.PreserveDepthStencilContents

    commands: [
        ColorAttachment {
            target: mainColorTexture
        },
        DepthTextureAttachment {
            target: mainDepthStencilTexture
        },
        RenderablesFilter {
            // Nothing renders directly in the outer pass; all rendering
            // is delegated to the SubRenderPasses below.
            renderableTypes: RenderablesFilter.None
        },

        // 1. Deferred lighting: shade opaque geometry stored in the G-buffer.
        SubRenderPass {
            renderPass: RenderPass {
                id: deferredLightingPass
                materialMode: RenderPass.OriginalMaterial
                commands: [
                    PipelineStateOverride {
                        // The full-screen quad must not write or test depth;
                        // geometry depth was already written by the G-buffer pass.
                        depthWriteEnabled: false
                        depthTestEnabled: false
                    },
                    RenderablesFilter { layerMask: ContentLayer.Layer13 }
                ]
            }
        },

        // 2. Skybox: render the environment behind all scene geometry.
        SubRenderPass {
            renderPass: RenderPass {
                id: skyboxPass
                passMode: RenderPass.SkyboxPass
                commands: [
                    PipelineStateOverride {
                        // The skybox is rendered "at infinity" so it must
                        // depth-test (to be hidden by geometry) but must not
                        // write depth.
                        depthTestEnabled: true
                        depthWriteEnabled: false
                    }
                ]
            }
        },

        // 3. 2D items: render any Qt Quick Items embedded in the 3D scene.
        SubRenderPass {
            renderPass: RenderPass {
                id: item2DPass
                passMode: RenderPass.Item2DPass
            }
        },

        // 4. Transparent objects: render blended geometry on top of everything else.
        SubRenderPass {
            renderPass: RenderPass {
                id: transparentItemPass
                materialMode: RenderPass.OriginalMaterial
                commands: [
                    RenderablesFilter {
                        renderableTypes: RenderablesFilter.Transparent
                        layerMask: ContentLayer.Layer0 | ContentLayer.Layer1
                    },
                    PipelineStateOverride {
                        // Enable alpha blending and depth testing so transparent
                        // objects sort correctly against opaque geometry.
                        blendEnabled: true
                        depthTestEnabled: true
                        targetBlend0.enable: true
                        targetBlend0.srcColor: RenderTargetBlend.SrcAlpha
                        targetBlend0.dstColor: RenderTargetBlend.OneMinusSrcAlpha
                        targetBlend0.srcAlpha: RenderTargetBlend.One
                        targetBlend0.dstAlpha: RenderTargetBlend.OneMinusSrcAlpha
                    }
                ]
            }
        }
    ]
}
The outer pass sets renderableTypes: RenderablesFilter.None so that nothing renders directly in the parent pass — all rendering is delegated to the sub-passes. The PreserveDepthStencilContents flag ensures that depth values written by the G-buffer pass are available to every sub-pass.
Deferred Lighting SubPass
The first sub-pass runs the deferred lighting computation. It renders the full-screen deferredLightingQuad model which samples the G-buffer textures and evaluates lighting for every pixel.
Model {
    id: deferredLightingQuad
    layers: ContentLayer.Layer13
    castsShadows: false
    receivesShadows: false
    geometry: PlaneGeometry {
        // geometry doesn't matter, just need 4 verts
        plane: PlaneGeometry.XY
    }
    materials: [
        CustomMaterial {
            id: lightingPassMaterial
            property TextureInput gbuffer0: TextureInput {
                enabled: true
                texture: Texture {
                    textureProvider: gbuffer0Provider
                }
            }
            property TextureInput gbuffer1: TextureInput {
                enabled: true
                texture: Texture {
                    textureProvider: gbuffer1Provider
                }
            }
            property TextureInput gbuffer2: TextureInput {
                enabled: true
                texture: Texture {
                    textureProvider: gbuffer2Provider
                }
            }
            shadingMode: CustomMaterial.Unshaded
            fragmentShader: "lighting.frag"
            vertexShader: "lighting.vert"
        }
    ]
}
The deferredLightingQuad is placed on ContentLayer.Layer13 so that it is invisible to the G-buffer pass and only rendered by this sub-pass.
A PipelineStateOverride disables both depth writes and depth tests for the quad. The G-buffer pass already wrote correct depth for the scene geometry, so the full-screen quad must not alter or test depth.
Skybox SubPass
The second sub-pass renders the scene environment skybox using the special RenderPass.SkyboxPass pass mode. Qt Quick 3D takes care of drawing the skybox geometry using the skyMaterial and backgroundMode settings from the SceneEnvironment.
A PipelineStateOverride enables depth testing so the skybox is correctly hidden behind scene geometry, while depth writes are disabled because the skybox sits "at infinity" and must never occlude geometry.
Transparent Objects SubPass
Transparent objects cannot be stored in the G-buffer because they require back-to-front sorted blending. Instead they are rendered last using their original materials via a dedicated sub-pass.
The transparent cone in the scene is declared as follows:
Model {
    id: cone
    layers: ContentLayer.Layer1
    source: "#Cone"
    y: 100
    materials: [
        PrincipledMaterial {
            baseColor: Qt.rgba(0.0, 1.0, 0.0, 0.5)
            alphaMode: PrincipledMaterial.Blend
            metalness: 0.0
            roughness: 0.5
        }
    ]
}
The transparent sub-pass uses a RenderablesFilter to select only transparent renderables on the matching layers, and a PipelineStateOverride enables alpha blending while keeping depth testing active so transparent objects sort correctly against opaque geometry.
Transparent objects must be rendered after all opaque passes so that the depth buffer is fully populated before blending occurs.
2D Items in 3D SubPass
Qt Quick 3D can embed standard Qt Quick 2D items inside the 3D scene using Node as a container. To include these items in a custom render pipeline, add a sub-pass with passMode: RenderPass.Item2DPass.
Node {
    x: -200
    y: 100

    Item {
        anchors.centerIn: parent
        ColumnLayout {
            Button {
                text: "Click Me!"
            }
            Rectangle {
                color: "blue"
                implicitWidth: 50
                implicitHeight: 50

                NumberAnimation on rotation {
                    from: 0
                    to: 360
                    duration: 4000
                    loops: Animation.Infinite
                    running: true
                }
            }
        }
    }

    NumberAnimation on eulerRotation.y {
        from: 0
        to: 360
        duration: 6000
        loops: Animation.Infinite
        running: true
    }
}
The Item2DPass mode instructs Qt Quick 3D to render all Qt Quick items that are children of 3D nodes into the current render target, composited with the 3D content already present.
Rendering to the screen
Finally, to display the result of our custom render passes on the screen, we need to ensure that the View3D's main color texture is updated with the result of the main color pass.
SimpleQuadRenderer {
    texture: Texture {
        textureProvider: mainColorPassProvider
    }
}

RenderPassTexture {
    id: mainColorTexture
    format: RenderPassTexture.RGBA16F
}

RenderOutputProvider {
    id: mainColorPassProvider
    textureSource: RenderOutputProvider.UserPassTexture
    renderPass: mainColorPass
    attachmentSelector: RenderOutputProvider.Attachment0
}
The SimpleQuadRenderer is used to blit the main color texture produced by the mainColorPass to the View3D's framebuffer. The RenderOutputProvider exposes the first color attachment of mainColorPass as a texture the SimpleQuadRenderer can sample.
© 2026 The Qt Company Ltd. Documentation contributions included herein are the copyrights of their respective owners. The documentation provided herein is licensed under the terms of the GNU Free Documentation License version 1.3 as published by the Free Software Foundation. Qt and respective logos are trademarks of The Qt Company Ltd. in Finland and/or other countries worldwide. All other trademarks are property of their respective owners.
