Create a base state
To keep the code clean, create a base state that contains all the components you will need in the application. You can then create states, in which you hide and show a set of components and modify their properties. This lets you:
- Align components on different views with each other.
- Avoid excessive property changes. If a component is invisible in the base state, you must define all changes to its child components as property changes, which leads to complicated code.
- Minimize the differences between the base state and the other states to keep the code short and readable and to improve performance.
- Avoid problems when using transitions and animation when changing states.
Use states to create application views
To create views for an application by using states:
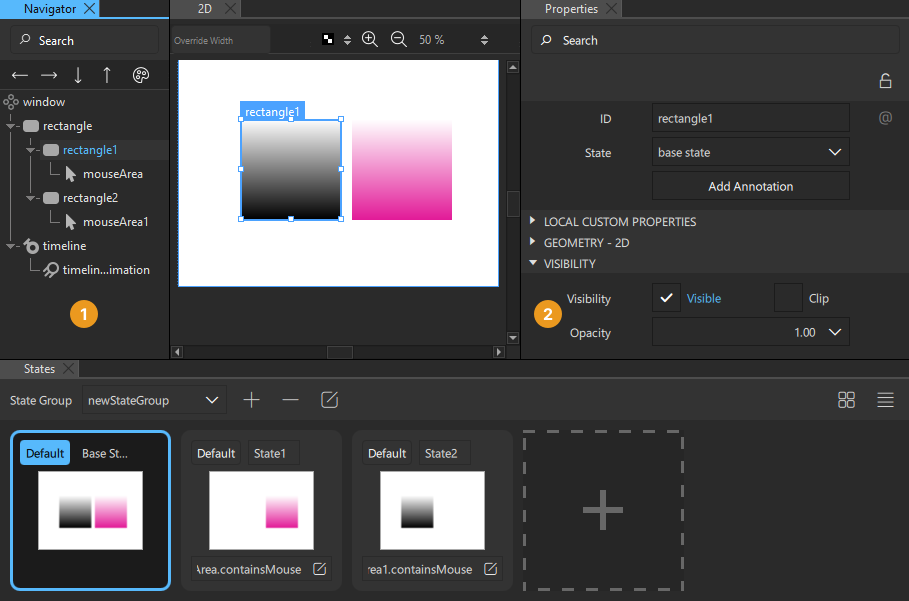
- Go to View > Views > States.
- In the base state, add all components you will need in the application (1). While you work on one view, you can select
 in Navigator to hide components on the canvas that are not part of a view.
 - In States, select the + symbol to create a new state and give it a name. For example,
Normal. - In Properties (2), clear Visibility or set Opacity to 0 for each component that is not needed in this view. If you specify the setting for the parent component, all child components inherit it and are also hidden.
- Create additional states for each view and set the visibility or opacity of the components in the view.
- To determine which state is applied when the application starts, select Default.
Group states
With state groups, you can change the state of certain components independently of other components and their states in the same view.
Each state group has its own property changes and transitions.
By default, there is one default state group.
Extend states
When a state extends another state, it inherits all the changes of that state. The state being extended is treated as the base state in regards to the changes specified by the extending state.
Using extended states can make the user interface and your QML code cleaner.
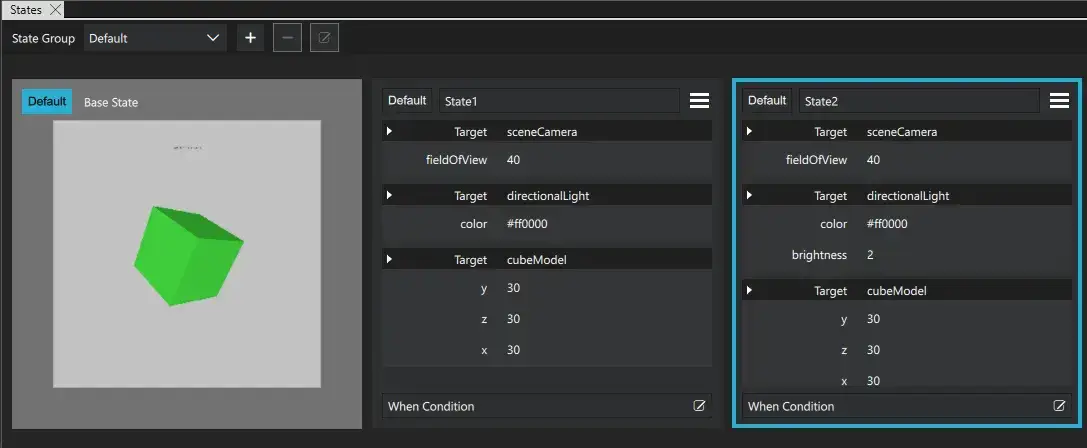
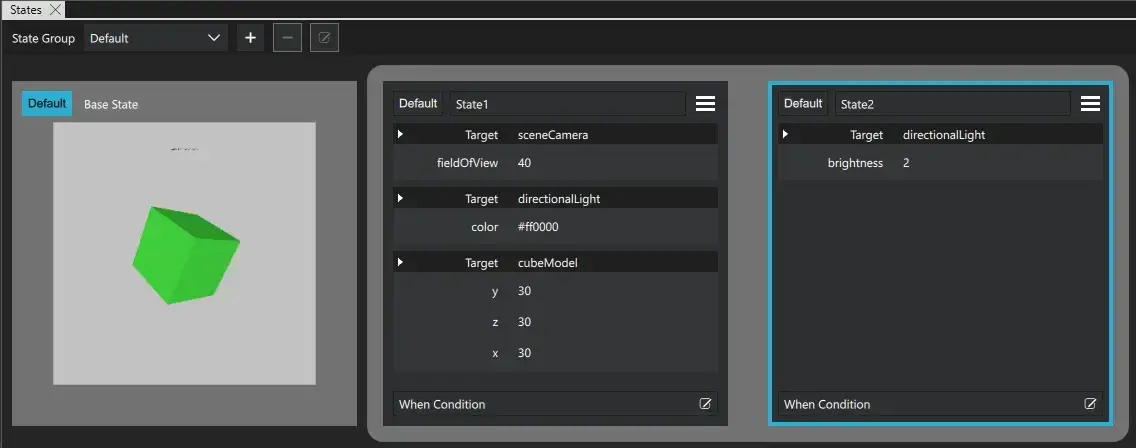
In the following example, the only change between State1 and State2 is the brightness of directionalLight.
Here, extended states are not used:
Here, State2 is extended from State1:
See also How to: Work with states, Qt Quick UI design, and Designing Qt Quick UIs.
Copyright © The Qt Company Ltd. and other contributors. Documentation contributions included herein are the copyrights of their respective owners. The documentation provided herein is licensed under the terms of the GNU Free Documentation License version 1.3 as published by the Free Software Foundation. Qt and respective logos are trademarks of The Qt Company Ltd in Finland and/or other countries worldwide. All other trademarks are property of their respective owners.
