Installing Qt Tools for Android Studio
This video and the following sections cover installing the plugin, importing a Qt for Android example project, and building and running the project on a target device.
Installing dependencies
The dependencies are Android Studio and the Qt Gradle Plugin.
Installing Android Studio and the plugin
This plugin is installed like any other IntelliJ plugin: using the Plugins panel or manually downloading the plugin. The plugin automatically installs the LSP4IJ plugin.
Here's how you can manually download and install the Qt Tools for Android Studio plugin.
- Download and install a compatible version of Android Studio.
- Go to the Qt Tools for Android Studio on Jetbrains Marketplace page to download the plugin's ZIP file.
- Start Android Studio.
- On top-right corner select Settings(gear-icon)->Install Plugins From Disk.
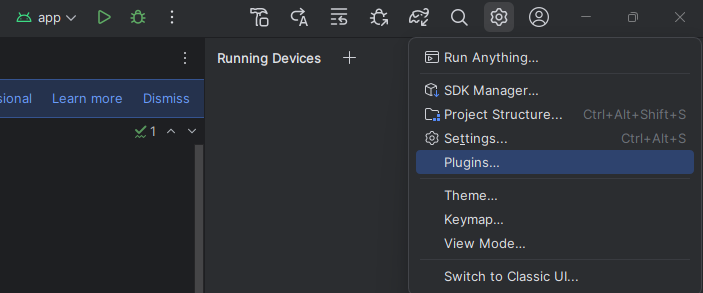
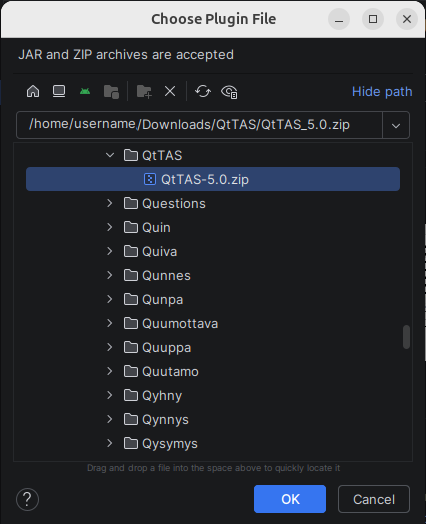
- Select file and select OK.
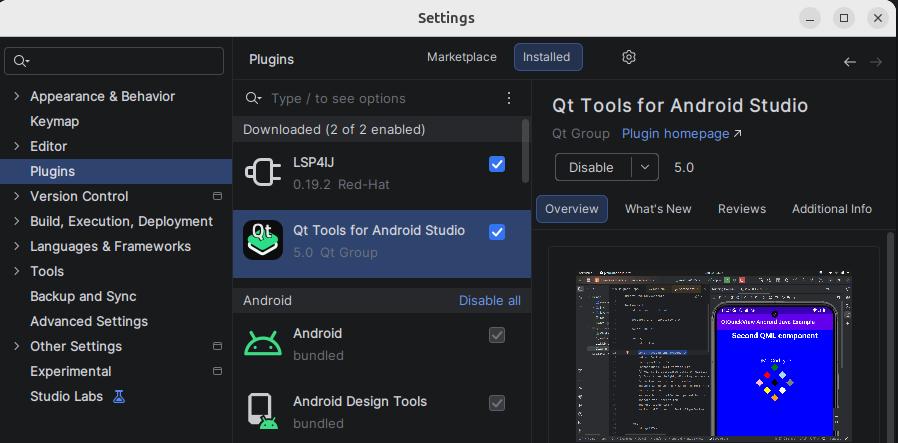
- Check that the plugin is installed.
Configuring the Qt Tools for Android Studio plugin
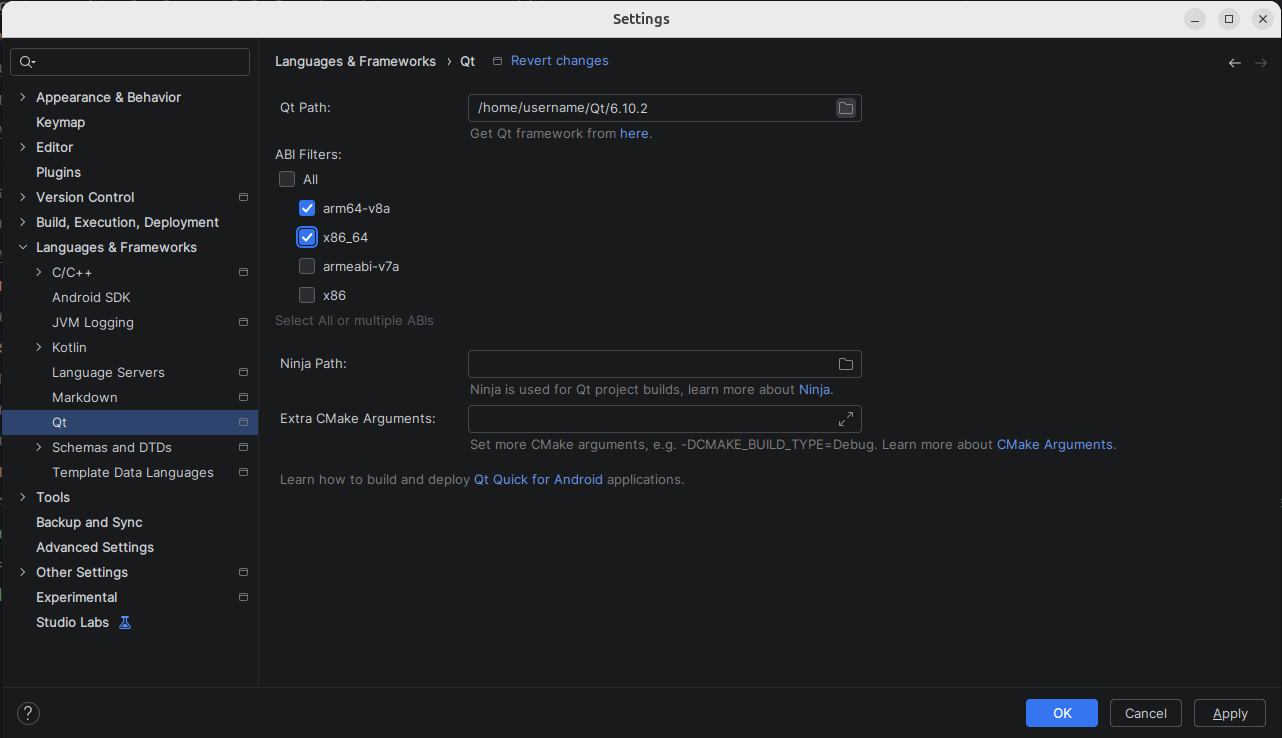
You can configure Qt settings by navigating to File -> Settings -> Languages & Frameworks -> Qt. Apart from Qt Path, the fields are optional and are used for fine tuning your build.
Note: If you have configured Qt Gradle Plugin already, the plugin can pick up those configurations automatically if they are defined in one the following locations:
gradle.propertiesfile at the root of your project (<your-project>/gradle.properties)local.propertiesfile at the root of your project (<your-project>/local.properties)- The QtBuild extension in the
<your-project>/app/build.gradle(.kts)file. The plugin only picks up the Qt Path from this location.Note: Also this method has been deprecated and will be removed in the future.
Here's what each of these options are used for:
Qt Path
The path to the Qt root install or to a specific Android ABI install. For example: C:\Qt\6.10.0 or C:\Qt\6.10.0\android_arm64_v8a.
Selecting ABIs
By default, the All ABIs is selected if you specified the Qt installation root directory. Otherwise if you specified an ABI path, only that ABI would be selected and you won't be able to change this setting. You can leave the All ABIs field checked to build your Qt project for all ABIs, or you can uncheck it and manually select all the ABIs you want to build the Qt project for.
Note: If you have specified abiFilters like Generate code for a specific ABI in your build.gradle(.kts) file, or the Extra CMake Arguments field, the plugin will automatically pick up those values and also overwrite them if you make any changes in this UI.
Ninja Path
Here you can specify a custom Ninja path. This is optional and the Qt Gradle Plugin can automatically pick up Ninja from your Qt installation or environment variables. Using Ninja that is shipped with the official Qt release is the preferred way.
Extra CMake Arguments
Here you can specify additional CMake arguments in this format: -DCUSTOM_FLAG1=ON,-DCUSTOM_FLAG2=ON
Running the example
Test your development setup by running the examples shipped with the Qt installation. You'll need to know your Qt folder path first. When using the Qt Online Installer, the default install locations for the Qt folder are:
- Windows: C:
\Qt - macOS: ~/Qt
- Linux: ~/Qt
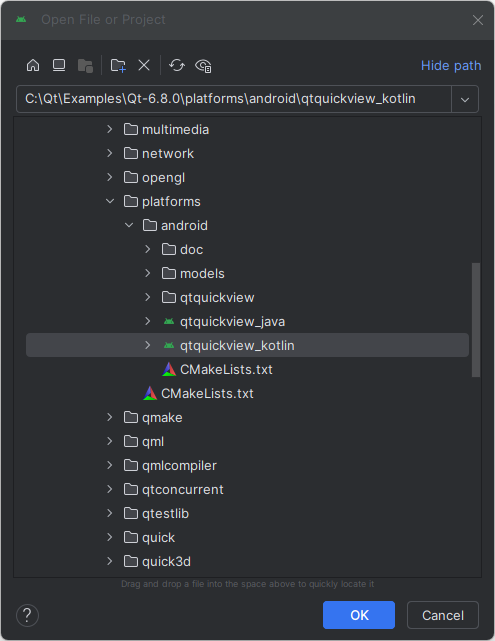
The example projects are located under your Qt installation directory in Qt/Examples/<qt version>/platforms/android/. To test the examples:
- From Android Studio's welcome screen, select Open.
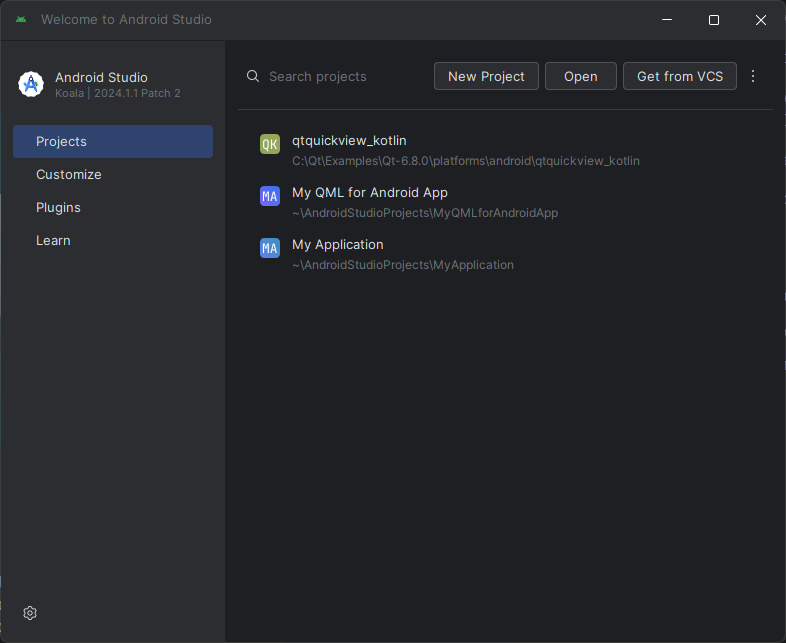
- Select the Qt project example you want.
© 2026 The Qt Company Ltd. Documentation contributions included herein are the copyrights of their respective owners. The documentation provided herein is licensed under the terms of the GNU Free Documentation License version 1.3 as published by the Free Software Foundation. Qt and respective logos are trademarks of The Qt Company Ltd. in Finland and/or other countries worldwide. All other trademarks are property of their respective owners.
