Calqlatr
A calculator designed for landscape and portrait devices. It uses Qt Quick custom components and responsive layouts for the user interface, and JavaScript for the application logic.
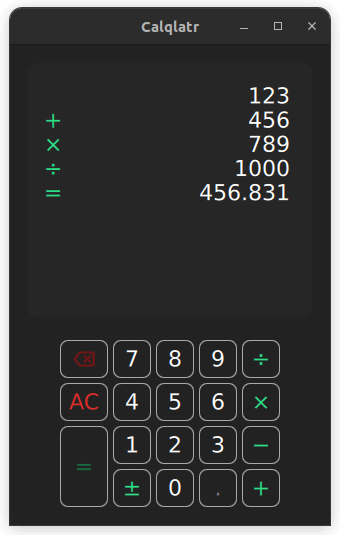
Calqlatr demonstrates various QML and Qt Quick features, such as displaying custom components and using responsive layouts. The application logic is implemented in JavaScript and the UI is implemented in QML.
Running the Example
To run the example from Qt Creator, open the Welcome mode and select the example from Examples. For more information, see Qt Creator: Tutorial: Build and run. After running the example, you should be able to use the application as a standard calculator. Change the phone from portrait to landscape mode - or, on the desktop, resize the main window - to activate the responsive layout.
Using Custom Components
The Calqlatr application uses custom types. Most of them are defined in their own separate .qml file:
Main.qmlcontent/ApplicationState.qmlcontent/BackspaceButton.qmlcontent/CalculatorButton.qmlcontent/Display.qmlcontent/NumberPad.qml
Main.qml contains the top-level window and root item. It makes use of the other custom types in content directory. For example, the NumberPad type (defined by content/NumberPad.qml) is used in Main.qml to create the number pad of the calculator:
        NumberPad {
            id: numberPad
            Layout.margins: root.margin

            isPortraitMode: root.isPortraitMode
            state: state
        }
Inline components allow you to declare multiple components inside of a .qml file. The example uses inline components in NumberPad.qml to define two components, DigitButton and OperatorButton:
    component DigitButton: CalculatorButton {
        onClicked: {
            controller.state.digitPressed(text);
            controller.updateDimmed();
        }
    }

    component OperatorButton: CalculatorButton {
        dimmable: true
        implicitWidth: 48
        textColor: controller.qtGreenColor

        onClicked: {
            controller.state.operatorPressed(text);
            controller.updateDimmed();
        }
    }
Both components are of type CalculatorButton (as defined in CalculatorButton.qml), but provide a custom handler for the clicked signal, and tweak some property defaults. DigitButton and OperatorButton are then instantiated later on in NumberPad.qml:
                DigitButton {
                    text: "e"
                    dimmable: true
                    implicitWidth: 48
                }
                OperatorButton { text: "ln" }
Check out Defining Object Types through QML Documents for more details on defining custom QML components.
Responsive Layouts
In this example, responsive layouts arrange the different UI components for both portrait and landscape modes. You can notice this in Main.qml, which defines a ColumnLayout for portrait mode, and RowLayout for landscape:
        ColumnLayout {
            id: portraitMode
            anchors.fill: parent
            visible: root.isPortraitMode

            LayoutItemProxy {
                target: display
                Layout.minimumHeight: display.minHeight
            }
            LayoutItemProxy {
                target: numberPad
                Layout.alignment: Qt.AlignHCenter
            }
        }

        RowLayout {
            id: landscapeMode
            anchors.fill: parent
            visible: !root.isPortraitMode

            LayoutItemProxy {
                target: display
            }
            LayoutItemProxy {
                target: numberPad
                Layout.alignment: Qt.AlignVCenter
            }
        }
The ColumnLayout represents the portrait layout for the application, and the RowLayout represents the landscape layout. The visible properties handle which layout is used at a given time. The id attribute of the NumberPad and Display components are used to set the target property of the LayoutItemProxy types. This allows both layouts to use the same content items. In addition, properties can be forwarded within the LayoutItemProxy item to the target itself. For example, when the NumberPad is instantiated, both layouts require a different Layout.alignment.
A responsive layout is also used in NumberPad.qml when defining the portrait and landscape layout for the NumberPad itself:
        RowLayout {
            spacing: controller.spacing

            GridLayout {
                id: scientificGrid
                columns: 3
                columnSpacing: controller.spacing
                rowSpacing: controller.spacing
                visible: !controller.isPortraitMode

                OperatorButton {
                    text: "x²"
                    Accessible.name: "x squared"
                }
                OperatorButton {
                    text: "⅟x"
                    Accessible.name: "one over x"
                }
                OperatorButton { text: "√" }
                OperatorButton {
                    text: "x³"
                    Accessible.name: "x cubed"
                }
                OperatorButton {
                    text: "sin"
                    Accessible.name: "sine"
                }
                OperatorButton {
                    text: "|x|"
                    Accessible.name: "absolute value"
                }
                OperatorButton { text: "log" }
                OperatorButton {
                    text: "cos"
                    Accessible.name: "cosine"
                }
                DigitButton {
                    text: "e"
                    dimmable: true
                    implicitWidth: 48
                }
                OperatorButton { text: "ln" }
                OperatorButton { text: "tan" }
                DigitButton {
                    text: "π"
                    dimmable: true
                    implicitWidth: 48
                }
            }

            GridLayout {
                id: mainGrid
                columns: 5
                columnSpacing: controller.spacing
                rowSpacing: controller.spacing

                BackspaceButton {
                    onClicked: {
                        controller.state.operatorPressed(this.text);
                        controller.updateDimmed();
                    }
                }

                DigitButton { text: "7" }
                DigitButton { text: "8" }
                DigitButton { text: "9" }
                OperatorButton {
                    text: "÷"
                    implicitWidth: 38
                }

                OperatorButton {
                    text: "AC"
                    textColor: controller.backspaceRedColor
                    accentColor: controller.backspaceRedColor
                }
                DigitButton { text: "4" }
                DigitButton { text: "5" }
                DigitButton { text: "6" }
                OperatorButton {
                    text: "×"
                    implicitWidth: 38
                }

                OperatorButton {
                    text: "="
                    implicitHeight: 81
                    Layout.rowSpan: 2
                }
                DigitButton { text: "1" }
                DigitButton { text: "2" }
                DigitButton { text: "3" }
                OperatorButton {
                    text: "−"
                    implicitWidth: 38
                }

                OperatorButton {
                    text: "±"
                    implicitWidth: 38
                }
                DigitButton { text: "0" }
                DigitButton {
                    text: "."
                    dimmable: true
                }
                OperatorButton {
                    text: "+"
                    implicitWidth: 38
                }
            }
        } // RowLayout
Depending on controller.isPortraitMode, the number pad contains only the buttons of a simple calculator (mainGrid), or also some more advanced functionality via the scientificGrid.
Animating Button Text Colors
In the CalculatorButton.qml file, the text colors of the number pad buttons are also animated.
        ...
        color: button.getTextColor()
        Behavior on color {
            ColorAnimation {
                duration: 120
                easing.type: Easing.OutElastic
            }
        }
    }
The color changes are animated by defining a Behavior on the color property. When a button is set to dimmed = true, the button appears darker. When a button is pressed, it lights up green. In order to dynamically change the dimmed property of all the buttons on the NumberPad, the buttonPressed signal calls the NumberPad's updateDimmed() function.
    function updateDimmed() {
        for (let i = 0; i < mainGrid.children.length; i++) {
            mainGrid.children[i].dimmed = state.isButtonDisabled(mainGrid.children[i].text);
        }
        for (let j = 0; j < scientificGrid.children.length; j++) {
            scientificGrid.children[j].dimmed = state.isButtonDisabled(
                        scientificGrid.children[j].text);
        }
    }
Performing Calculations
The calculator.js and ApplicationState.qml files define the calculator's engine. calculator.js contains the logical state of the calculator, as well as operations to change the state. ApplicationState.qml exposes this API through a QML type.
Let's first have a look at calculator.js:
let accumulator = 0
let pendingOperator = ""
let lastButton = ""
let digits = ""
accumulator, pendingOperator, lastButton, represent the logical state of the calculator.
function isOperationDisabled(op, display) {
    ...
}
isOperationDisabled() returns true if an operation op should be disabled, based on the current engine and display state. Otherwise, it returns false.
function digitPressed(op, display) {
    ...
}

function operatorPressed(op, display) {
    ...
}
digitPressed() and operatorPressed() functions update the engine and display state based on the pressed buttons.
ApplicationState.qml is exposing the JavaScript functions defined in calculator.js behind a nicer QML API:
import QtQml
import "calculator.js" as CalcEngine
calculator.js is imported under the name CalcEngine.
QtObject {
    required property Display display

    function operatorPressed(operator) {
        CalcEngine.operatorPressed(operator, display);
    }
    function digitPressed(digit) {
        CalcEngine.digitPressed(digit, display);
    }
    function isButtonDisabled(op) {
        return CalcEngine.isOperationDisabled(op, display);
    }
}
required property makes sure that an instance of Display.qml is always available in the ApplicationState under the name display. display is in turn used in the operatorPressed(), digitPressed() and isButtonDisabled() functions.
Source Files
Squish GUI testing
This application comes with Squish GUI tests targeted for Qt for Android. The tests are made with Squish for Qt and are written in Python and can be found under the application test directory.
When using Squish for Qt for Android, make sure to use the Qt built-in hook and forward Squish port with adb. If you are getting the error "Cannot load library" with dlopen failing, disable QT_USE_TARGET_ANDROID_BUILD_DIR from CMake configuration, or clear it from Projects->Build Settings->CMake->Current Configuration in Qt Creator.
If you don't have a Squish license, you can get a free trial.
See also QML Applications.
© 2026 The Qt Company Ltd. Documentation contributions included herein are the copyrights of their respective owners. The documentation provided herein is licensed under the terms of the GNU Free Documentation License version 1.3 as published by the Free Software Foundation. Qt and respective logos are trademarks of The Qt Company Ltd. in Finland and/or other countries worldwide. All other trademarks are property of their respective owners.
