Apply states to components
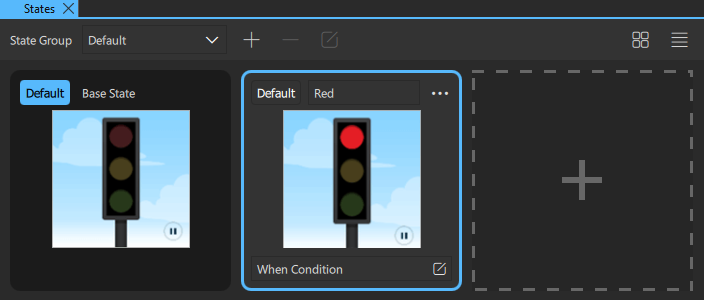
The States view displays the different states of a UI.
To open the States view, select View > Views > States.
Initially, States displays a base state that shows the selected component in its initial state. To add states, select  in the States view.
For more information, watch the following video:
Set when conditions
To determine when a state is applied, select  in the When Condition field. In Binding Editor, specify a when property for the state. Set the value of the property to a boolean expression that evaluates to
 true when you want the state to be applied.
This enables you to evaluate the truthfulness of several components' properties and move the UI to the state in which these conditions apply. You can evaluate whether something is true or false, greater than or equal to something else, and so on. You can also use operators, such as AND or OR, to evaluate the truthfulness of several components.
The when conditions are evaluated from left to right and in order of appearance in the code. Therefore, if you have two conditions for two different states that both evaluate to true, the first state is applied.
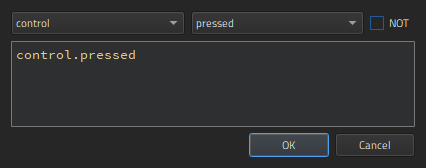
In Binding Editor, select the component and property to create the expression. For example, to change the state when a button is pressed, you could select a button component and its pressed property.
When you compose the expressions in Binding Editor, the code completion feature lists the components and their properties you can use in the expressions.
Summary of logical operators
You can use the following logical operators in the expressions to combine several conditions in one expression:
| Operator | Meaning | Evaluates to true if |
|---|---|---|
| ! | NOT | The condition is not met. |
| && | AND | Both conditions are met. |
| || | OR | Either of the conditions is met. |
| < | Less than | The left operand is less than the right operand. |
| > | Greater than | The left operand is greater than the right operand. |
| >= | Greater than or equal | The left operand is greater than or equal to the right operand. |
| <= | Less than or equal | The left operand is less than or equal to the right operand. |
| == | Equal | The operands are equal. |
| === | Strict equal | The operands are equal and of the same type. |
| != | Not equal | The operands are not equal. |
| !== | Strict not equal | The operands are of the same type but not equal, or are of different type. |
In addition, you can use arithmetic operators to compare numbers before checks. However, we recommend that you create separate properties for this purpose whenever possible.
Examples of when conditions
To apply a state to a button when the button is pressed, you could simply write:
when: control.pressed
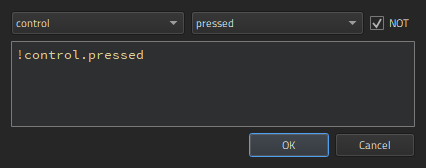
To apply a state when the button is not pressed, select NOT.
To apply a state when the button is not pressed, selected, nor hovered on, you could combine conditions, as follows:
when: !control.pressed && !control.checked && !control.hovered
To apply a state when the button is pressed or selected, but not hovered on, you could write:
when: control.pressed || control.checked && !control.hovered
See also How to: Design Qt Quick UIs, Qt Quick UI design, and Designing Qt Quick UIs.
Copyright © The Qt Company Ltd. and other contributors. Documentation contributions included herein are the copyrights of their respective owners. The documentation provided herein is licensed under the terms of the GNU Free Documentation License version 1.3 as published by the Free Software Foundation. Qt and respective logos are trademarks of The Qt Company Ltd in Finland and/or other countries worldwide. All other trademarks are property of their respective owners.
