Create timeline animations
You can create timelines and keyframe-based animations for linear interpolation through intermediate values at specified keyframes instead of immediately changing to the target value.
You can also bind the timeline to a property value of a component such as a slider and control the animation this way.
Add a timeline
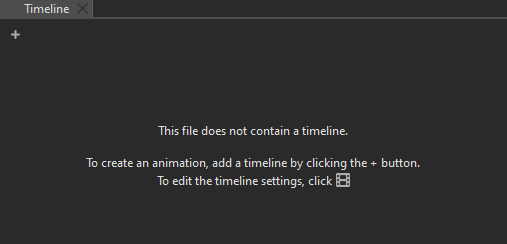
Use the timeline and keyframe based editor in the Timeline view to animate the properties of components. The view is empty until you create a timeline.
The following video shows how to insert keyframes for component properties and to animate them in Timeline:
Create a timeline
To create a timeline to animate a UI component:
- Go to View > Views > Timeline.
- Select
 (Add Timeline) to specify settings for the timeline and running the animation.
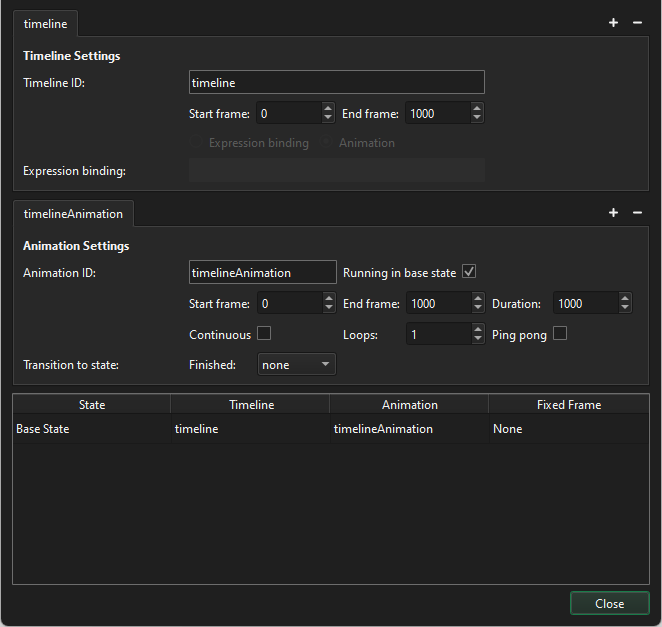
- In Timeline Settings:
- In Timeline ID, enter an ID that describes the timeline.
- In Start frame, set the first frame of the timeline. Negative values are allowed.
- In End frame, set the last frame of the timeline.
- In Animation Settings:
- In Animation ID, enter an ID for the animation.
- In Start frame, set the first frame of the animation.
- In End frame, set the last frame of the animation.
- In Duration, set the length of the animation in milliseconds.
See the tooltips for the purpose of the optional animation settings.
- Select Close to close the dialog and save the settings.
You can now set the keyframes for the properties to animate.
Set keyframe values
When you create a timeline, Qt Quick Designer creates one animation for the timeline. You can create as many animations for a timeline as you want. For example, you can create animations to run just a small section of the timeline or to run the timeline backwards.
To animate components in the Timeline view, you set keyframe values for the property to animate. Qt Quick Designer automatically adds keyframes between two keyframes and sets their values evenly to create, for example, movement or transformation.
To set keyframe values for a component property:
- In the Navigator view, select the component to animate.
- In the Properties view, select
 (Actions) > Insert Keyframe for the property that you want to animate.
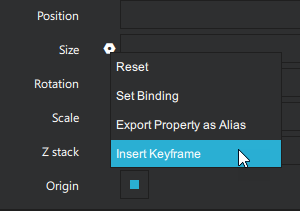
- In Timeline view, select the Per Property Recording button to start recording property changes.
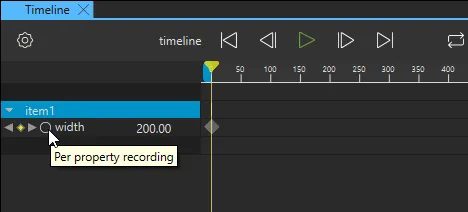
- Ensure that the playhead is in frame 0 and enter the value of the property in the field next to the property name on the timeline. Select Enter to save the value.
- Move the playhead to another frame on the timeline and specify the value at that frame. For more information, see Navigate the timeline.
- When you have specified as many values as you need, select Per Property Recording again to stop recording.
Create timelines for use in states
You can create more than one timeline to use in states that you add in the States view.
To create a timeline for a second state:
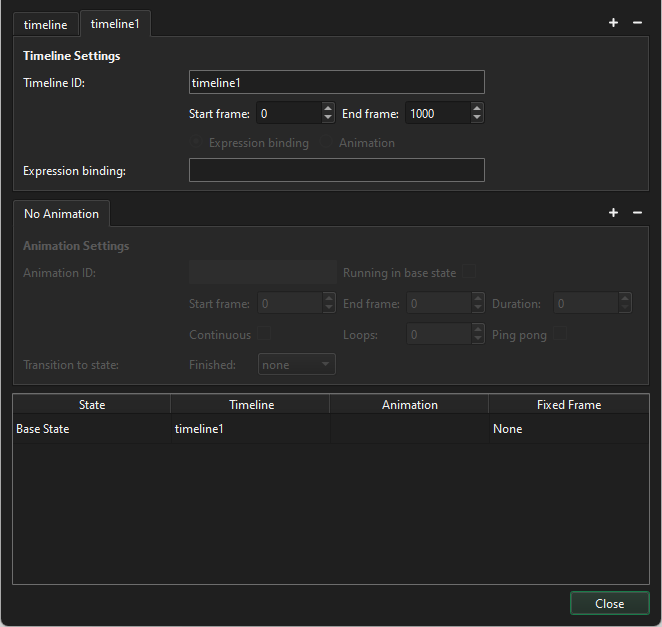
- Go to Timeline > Timeline Settings.
- Select to create another timeline.
- In the table below Animation Settings tab, set the timeline for the state where you want to use it.
Bind a timeline to a property
When you bind a timeline to a component property, the animation's current frame is controlled by the value of the property.
In this example, you bind the timeline to a slider component.
With a timeline created and keyframe values set:
- From Components, drag a slider to the 2D or Navigator view.
- In Navigator, select slider and in Properties, set To to 1000.
Note: The From and To values of the slider should match the Start Frame and End Frame values of the timeline if you want to control the complete animation with the slider.
- In the Timeline Settings dialog, select
 next to the Animation Settings tab to delete the animation. If you have several animations, delete all.
 - In Expression binding, enter
slider.value.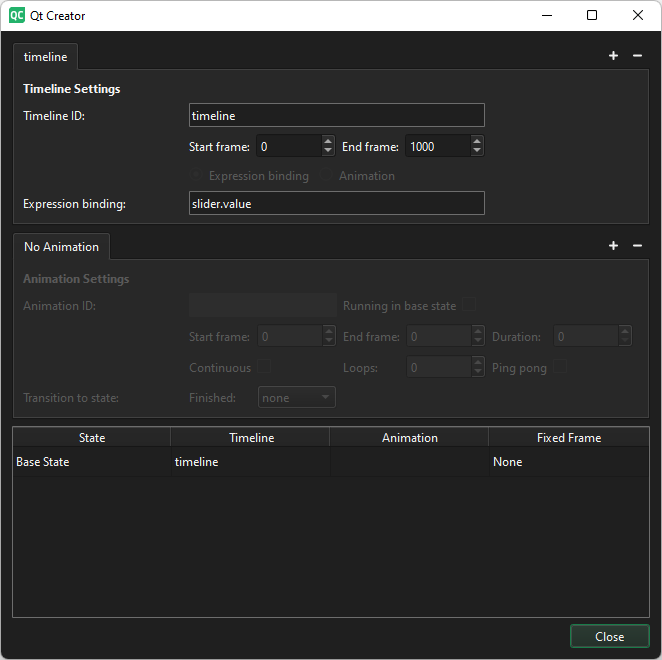
Bind animations to states
Bind animations to states to run them when you enter the state.
In the table at the bottom of the Timeline Settings dialog:
- Double-click the value in Timeline and select the timeline with the animation you want to bind to the state.
- Double-click the value in Animation and select the animation you want to bind to the state.

To bind a state to a certain keyframe in an animation without running the animation, set the keyframe in Fixed Frame.
Manage keyframes
Edit keyframes
To remove all the changes you recorded for a property, right-click the property name on the timeline and select Remove Property.
To add keyframes to the keyframe track of a component at the current position of the playhead, right-click the component name on the timeline and select Add Keyframes at Current Frame.
Keyframes are marked on the timeline by using markers of different colors and shapes, depending on whether they are active or inactive or whether you have applied easing curves to them.
Edit keyframe values
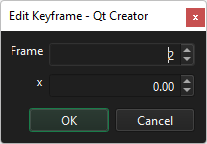
To fine-tune the value of a keyframe, double-click a keyframe marker or right-click it and select Edit Keyframe in the context menu.
The Edit Keyframe dialog displays the name of the property you are animating and its current value at the frame specified in the Frame. You can change both the keyframe and its value.
Copy keyframes
You can copy the keyframes from the keyframe track for a component and paste them to the keyframe track of another component.
To copy all keyframes from one track to another:
- Right-click the component ID and select Copy All Keyframes in the context menu.
- Right-click the other component ID, and select Paste Keyframes in the context menu.
Delete keyframes
To delete a keyframe, right-click it and select Delete Keyframe in the context menu.
To delete all keyframes from the selected component, right-click the component name in Timeline and select Delete All Keyframes in the context menu.
Navigate the timeline
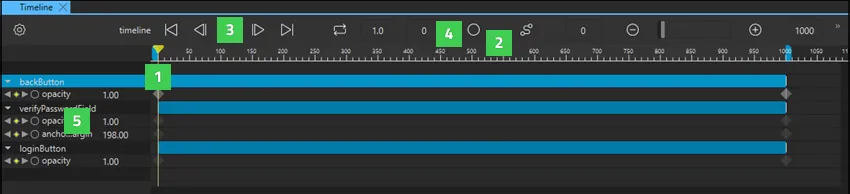
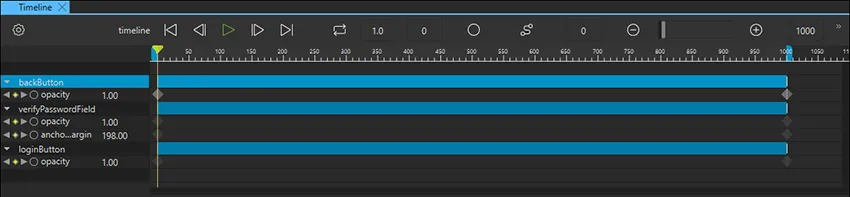
You can navigate the timeline in the following ways:
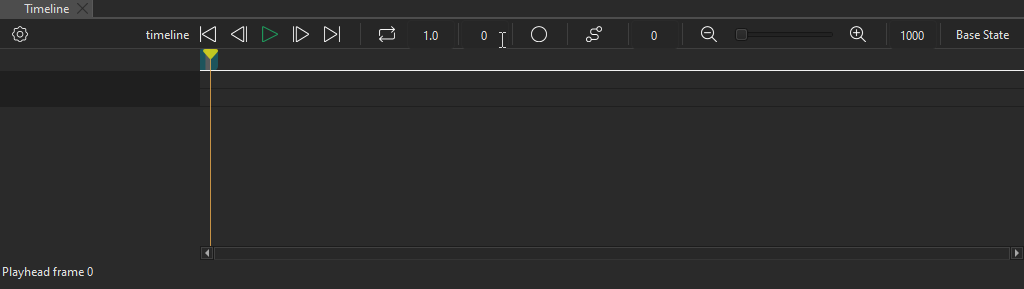
- Drag the playhead (1) to a frame.
- Click on the ruler (2) to move to a frame.
- Select the Start Frame (Home), Previous Frame (,), NextFrame (.), or End Frame (End) buttons (3), or use the keyboard shortcuts to move to the first, previous, next, or last frame on the timeline.
- Enter the number of a frame in the current keyframe field (4) to move to that frame.
- Select the Previous and Next buttons next to a property name on the timeline (5) to move to the previous or next keyframe for that property.
Zoom the timeline
Use the slider on the toolbar to set the zooming level in Timeline. Select the  and
and  buttons to zoom out of or into the view.
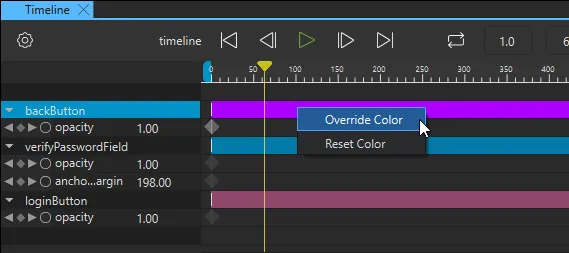
Set keyframe track color
To change the color of a keyframe track, select Override Color in the context menu, and then select a color in the color picker. To reset the color, select Reset Color.
View the animation
To preview your animation, do one of the following in the Timeline view:
- Drag the playhead along the timeline.
- Select
 (Play) or Space.
To preview the whole UI, select the run dropdown from the top toolbar, and then select Live Preview, or select Alt + P.
Animate rotation
To animate components that rotate around a central point, you can use the Item component as a parent for the rotating component. Then create a timeline for the Item, and set the rotation property for the start and end keyframes.
Animate shapes
You can use the Qt Quick Shapes Design Helpers to animate the following shapes:
See also How to: Add animation, Qt Quick UI design, and Designing Qt Quick UIs.
Copyright © The Qt Company Ltd. and other contributors. Documentation contributions included herein are the copyrights of their respective owners. The documentation provided herein is licensed under the terms of the GNU Free Documentation License version 1.3 as published by the Free Software Foundation. Qt and respective logos are trademarks of The Qt Company Ltd in Finland and/or other countries worldwide. All other trademarks are property of their respective owners.
