Jenkins CI integration
Jenkins CI is a popular continuous integration tool. Coco can be run under Jenkins, and the changes of the coverage over time displayed by a plugin. The following sections describe the necessary setup.
Prerequisites
Configuring the License Service
After Coco has been installed on the Jenkins machine, the Coco license must be set up.
Under Jenkins, jobs typically run under a special account, such as jenkins on Linux or SYSTEM on Windows. Since the License Service must always be configured for a specific account, it can only be configured from a Jenkins job.
So the following must be done. It is in principle the same as that what is described in Section "The Qt License Service", but adapted for use in a script.
- Create a new Jenkins job.
- Under Linux or macOS, the job consists of the following shell commands:
SQUISHCOCO=<path to SquishCoco installation>

$SQUISHCOCO/bin/cocolic --set-license-provider=QLS
$SQUISHCOCO/license-service/qtlicd --register
$SQUISHCOCO/license-service/qtlicensetool --accept-terms-and-conditions

# If you use the Qt License Service:
export QT_ACCOUNT_LOGIN_EMAIL=<email>
export QT_ACCOUNT_LOGIN_PASSWORD=<password>
$SQUISHCOCO/license-service/qtlicensetool -l

# If you use your own license server:
# $SQUISHCOCO/license-service/qtlicensetool --set-server-address <license server URL>

$SQUISHCOCO/bin/cocolic --check
Under Windows, where the variable
SQUISHCOCOis set by the installer, use the following commands:"%SQUISHCOCO%\cocolic" --set-license-provider=QLS "%SQUISHCOCO%\license-service\qtlicd" --register "%SQUISHCOCO%\license-service\qtlicensetool" --accept-terms-and-conditions REM If you use the Qt License Service: set QT_ACCOUNT_LOGIN_EMAIL=<email> set QT_ACCOUNT_LOGIN_PASSWORD=<password> "%SQUISHCOCO%\license-service\qtlicensetool" -l REM If you use your own license server: REM "%SQUISHCOCO%\license-service\qtlicensetool" --set-server-address <license server URL> "%SQUISHCOCO%\cocolic" --check - Adapt the script to your needs. For security reasons, the password should NOT be hard-coded in the script, but rather passed as an environment variable using secrets or similar mechanisms.
- Run this job and verify that
cocolicreports a successful execution.
Getting an EMMA plugin
Coco uses the EMMA-XML format to communicate the coverage results to Jenkins. Jenkins needs a plugin to display EMMA data. We use a fork of the EMMA plugin which you can get from the Coco Download Center. It is packaged as a Jenkins plugin, in a file called cocoemma-latest.hpi, which you can install into Jenkins from the Advanced tab, Deploy Plugin action in the Jenkins Plugin Manager.
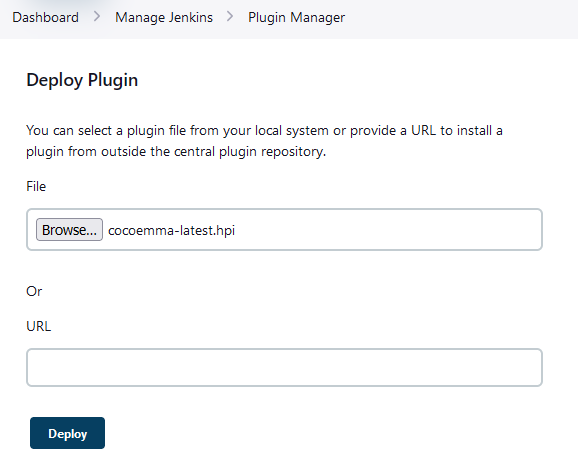
Installing Jenkins EMMA plugin
Adaption of the project to Jenkins
We will assume here that you can already compile and run your project under Jenkins, and that you can also generate coverage information, but not yet under Jenkins.
With the license installed, code coverage should now work under Jenkins.
The build process must now be configured in such a way that a single .csmes file is generated that contains all the execution data. This is done with cmcsexeimport.
Now extend your build process such that at the end a report in EMMA-XML format is generated. This is done by calling
<Windows Coco>cmreport -m project.csmes --emma=report.xml
where project.csmes must be replaced with the name of your results file.
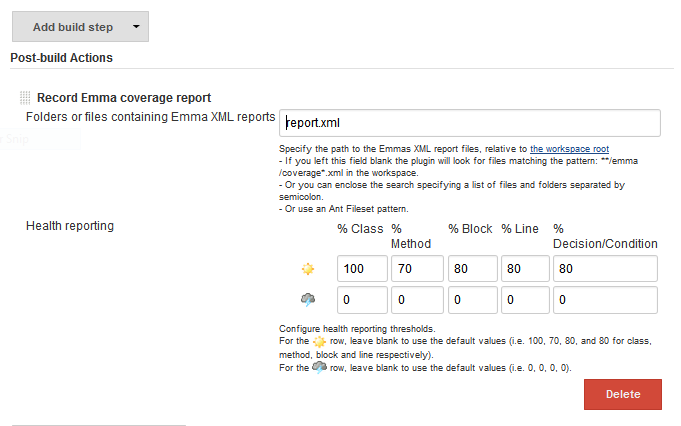
We then use the plugin to display data from the file report.xml. To do this, select the configuration section of your Jenkins project and add a post-build action. Since the plugin is installed, the Add post-build action menu contains an entry Record Emma coverage report. Select it, and in the field Folders or files containing Emma XML reports enter report.xml.
After the next build, a coverage report will be generated.
Generating a coverage report from report.html with Jenkins CI
Assuming that the build is started, runs, and is successful, and the Emma XML report can be found by the plugin, we should see something like this:
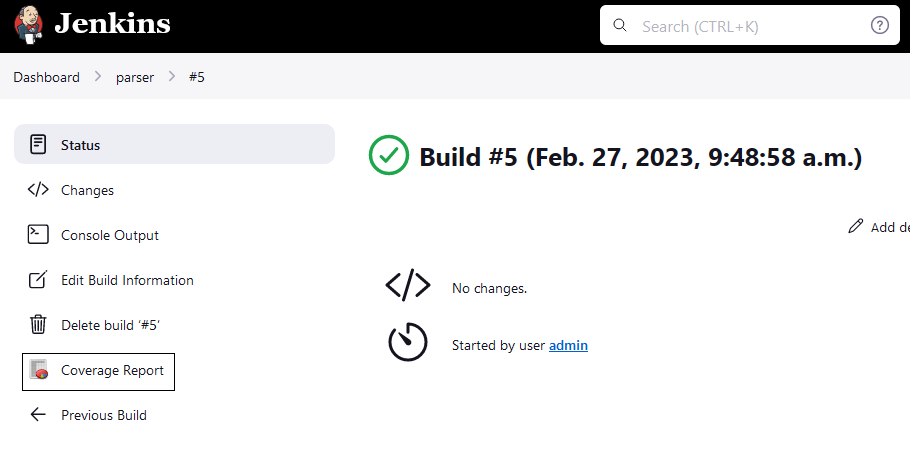
The Coverage Report button
We can now click on the Coverage Report button to see the coverage results. The XML data is presented in a table with progress bars.
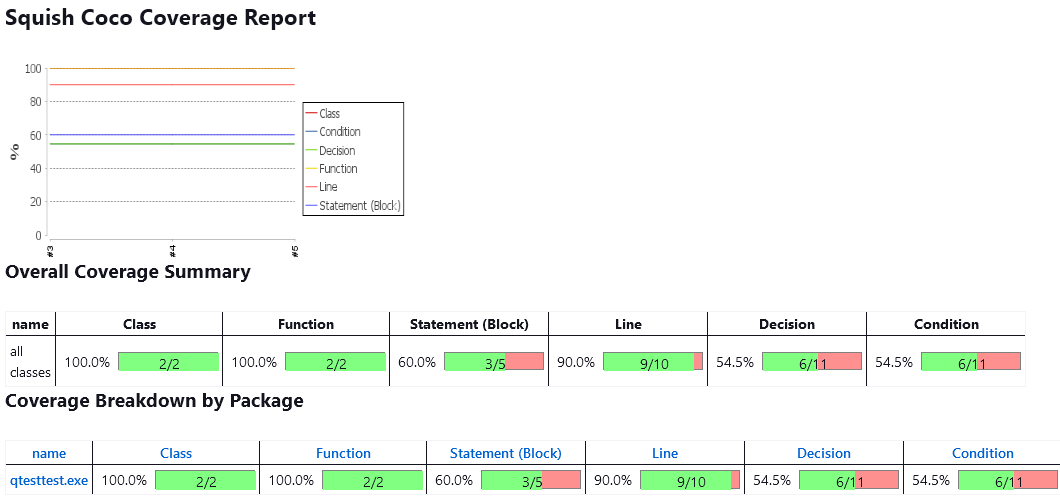
Jenkins EMMA Coco coverage report
Coco v7.6.0 ©2026 The Qt Company Ltd.
Qt and respective logos are trademarks of The Qt Company Ltd. in Finland and/or other countries worldwide. All other trademarks are property
of their respective owners.
