Setting up Windows kernel driver coverage
This section describes how to setup Coco to measure code coverage in a WindowsKernel driver. For these instructions, there are two Windows machines used, a Development Machine and a Target Device. This setup was tested with the Kernel-Mode Driver Framework (KMDF). A Virtual Machine is used for the Target Device. We recommend running the same version of Windows on both systems.
Preparing the Development Machine
First, we must prepare the Development Machine by installing Visual Studio 2022, Coco, and a Windows Kernel development environment.
It is not necessary to install these things on the Target Device.
Create a CoverageScanner option file
For this example it is convenient to use the --cs-option-file option, so various Coco parameters don't need to be given as command line parameters in the options of Visual Studio. Read more about this option in Miscellaneous. Create a text file and add the following lines:
--cs-on
--cs-memory-pool=64000
--cs-architecture=Kernel
--cs-condition
--cs-line
--cs-function
--cs-hit
--cs-coverage-save-function=coverage_init
--cs-trigger-function=DriverEntry
--cs-custom-library-source=%SQUISHCOCO%\samples\windows-kernel-coverage\coverage.h
You may need to replace %SQUISHCOCO% with the proper install location of Coco.
Note: If the DRIVER_INITIALIZE object of your driver is still named DriverEntry, you do not have to change anything in the parameters listed above. Otherwise you would have to rename the switch --cs-trigger-function=<DriverEntry> to the name of your driver's DRIVER_INITIALIZE object.
Configure Visual Studio Kernel Driver Project
Open your Windows Kernel Driver project in Microsoft Visual Studio.
Add the following line --cs-option-file=<path to option file> to the Visual Studio Settings under Project > Properties > C/C++ > Command Line > Additional options and also Properties > Linker > Command Line > Additional options.
Change the <path to option file> to point to the Coco options file that you created earlier.
Disable Driver Signing
These steps do not require a valid certificate, so we will disable driver signing by going to
Project > Properties > Configuration Properties > Driver Signing and turn Sign Mode to Off.
Build Driver
Build the Kernel Driver in release mode. Ours is called BasicDriver. If things are successful, you should find a BasicDriver.sys.csmes file in the parent folder of the deployable-target, which should contain basicdriver.cat, BasicDriver.inf, and BasicDriver.sys.
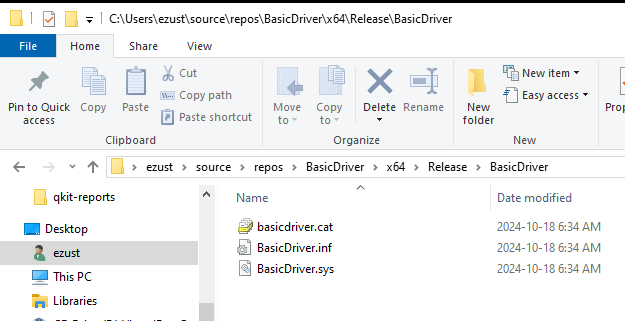
These are the files you will deploy to the Target Device.
Prepare Target Device for Test Signing Mode
These commands are all executed on the Target Device.
Open an Administrator Terminal command line shell and issue the following command:
C:\> Bcdedit.exe -set TESTSIGNING ONTo Disable Driver Signing Enforcement, we must reboot the system twice, following these steps.
Update and Security > Recovery > Advanced > Advanced Startup and click Restart Now to reboot the first time.
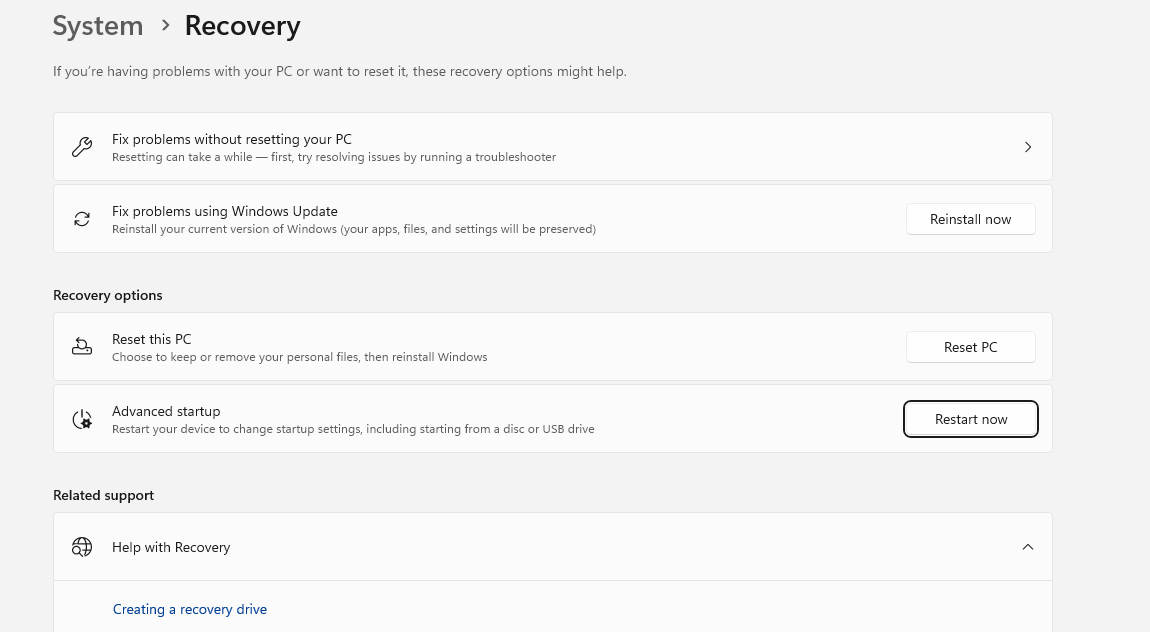
Click TroubleShoot:
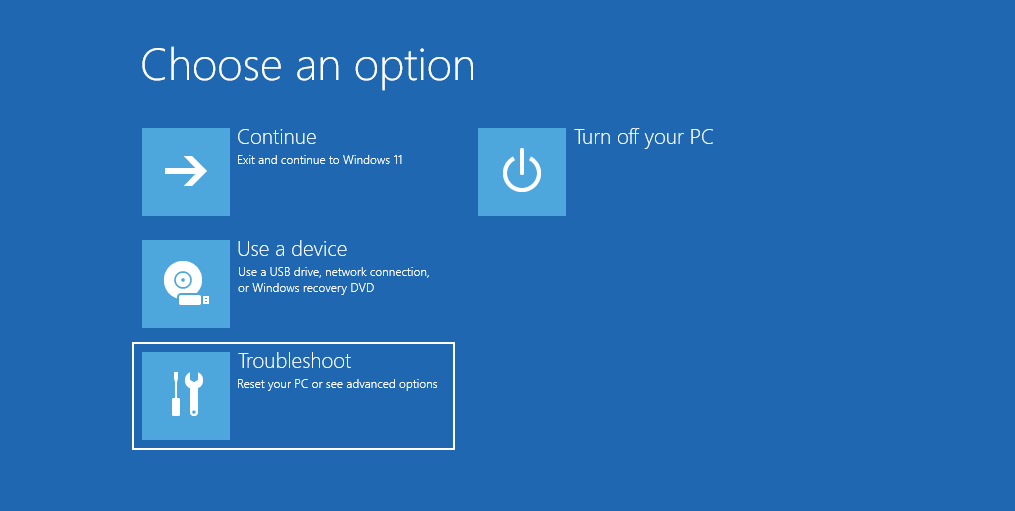
Click Advanced Options
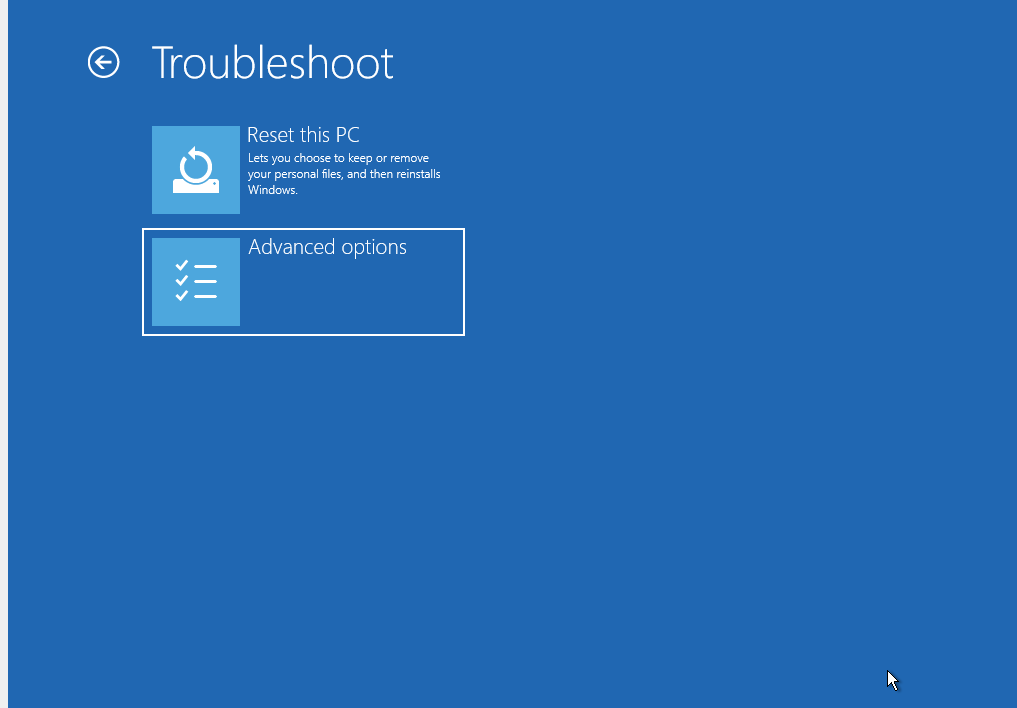
Click Startup Settings.
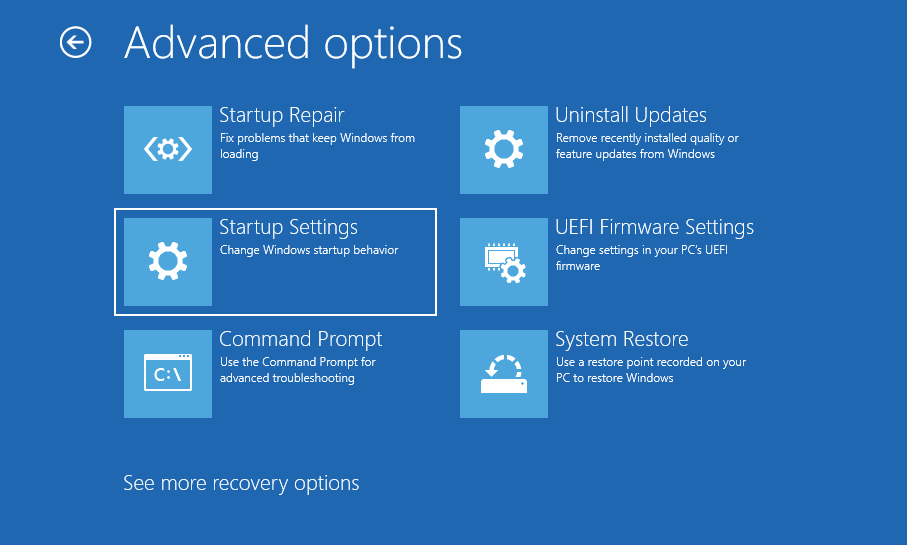
Click Restart to reboot the second time.
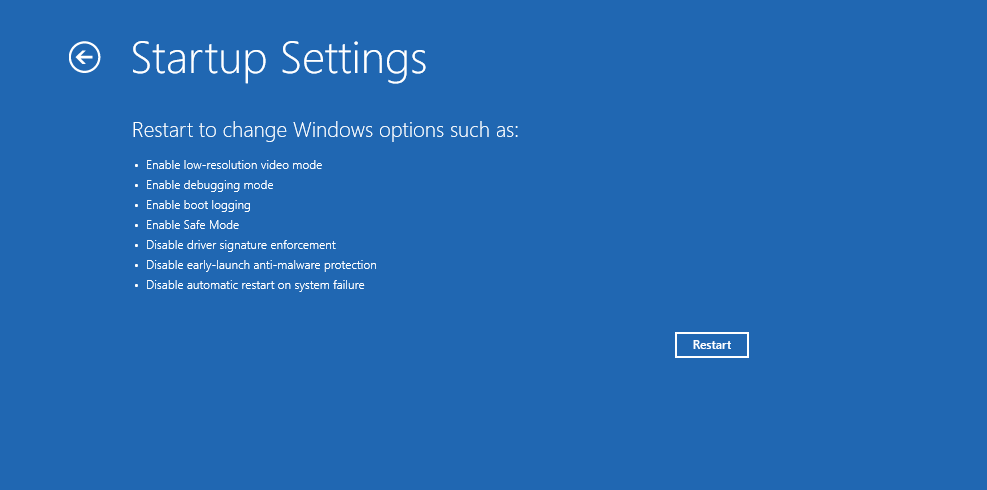
Finally, click the F7 key to select Disable Driver Signature Enforcement.
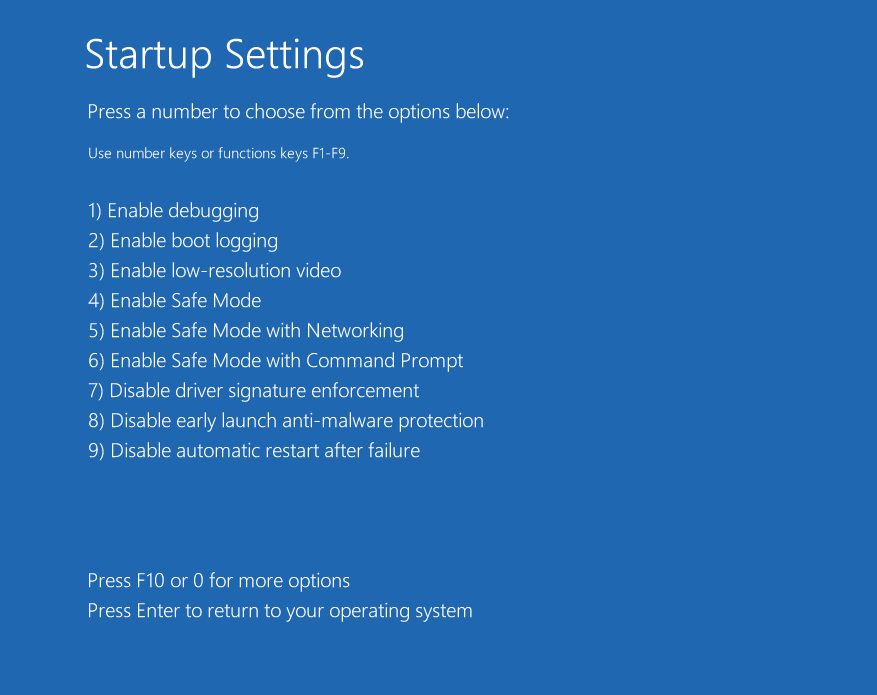
After this, you should be able to install kernel drivers without a certificate.
Deploy/Install Driver
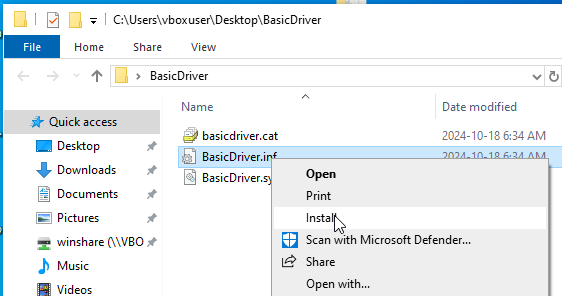
Transfer to, and install the driver onto your Target Device.
Right-click on the .inf file and select Install from the context menu.
Register/Start Driver
We use the sc.exe program to register and start the driver.
From the Administrator Command Line Shell, we will register the driver as driverName:
C:\Windows\System32> sc create driverName type= kernel binpath= %USERPROFILE%\Desktop\BasicDriver\BasicDriver.sys
[SC] CreateService SUCCESS
Note: The spaces after the = signs above are deliberate.
To start the driver:
C:\Windows\system32>sc start driverName

SERVICE_NAME: driverName
        TYPE               : 1  KERNEL_DRIVER
        STATE              : 4  RUNNING
                                (STOPPABLE, NOT_PAUSABLE, IGNORES_SHUTDOWN)
        WIN32_EXIT_CODE    : 0  (0x0)
        SERVICE_EXIT_CODE  : 0  (0x0)
        CHECKPOINT         : 0x0
        WAIT_HINT          : 0x0
        PID                : 0
        FLAGS              :

C:\Windows\system32>
Note: To confirm that coverage instrumentation is working, use the winobj tool to verify that there is an element with the name coco-<drivername> in the Device and the GLOBAL?? folder.
Build and install CocoDump on Target Device
Coco includes a separate tool that allows you to dump the coverage data from the instrumented kernel driver. This must be built on the Development Machine and then it must be copied over to and run on the Target Device.
Build the console application cocodump.exe (found in %SQUISHCOCO%\samples\windows-kernel-coverage) with Visual Studio in the Release configuration and transfer it to the target machine.
Run CocoDump to collect coverage report
cocodump.exe executable needs to be executed with administrator rights. The usage of the cocodump.exe tool is as following:
cocodump.exe <drivername> <outputfile>
You can run this application on the target machine once you installed the driver.
Use the cocodump.exe application with the name of your driver.
For example, to dump the execution data from your driver with the name mydriver into the file C:\mydriver.csexe you would need to call:
cocodump.exe mydriver "C:\mydriver.csexe"A relative path doesn't seem to work here, so you must specify an absolute path.
Check the command line output of the cocodump.exe tool for any error messages.
Confirm that the .csexe file has been created, copy it over to the Development Machine.
Examine Coverage Report
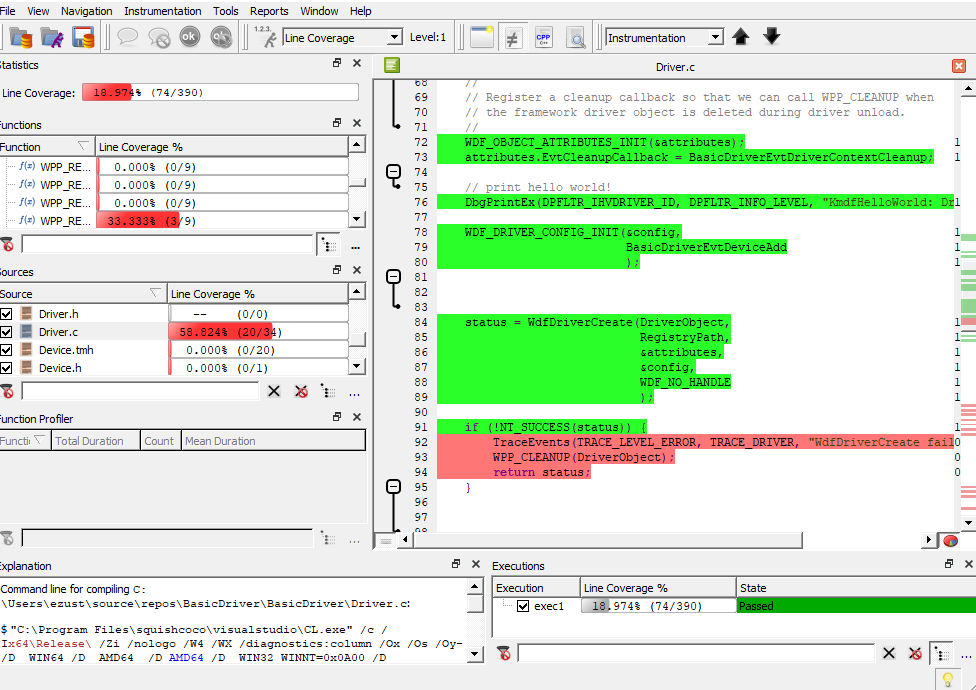
On the Development Machine, open the driver's .csmes file in CoverageBrowser.
coveragebrowser -m c:\builddir\path\BasicDriver.sys.csmesFile - Load Coverage Report and select the mydriver.csexe file you just copied from the Target Device.
Coco v7.6.0 ©2026 The Qt Company Ltd.
Qt and respective logos are trademarks of The Qt Company Ltd. in Finland and/or other countries worldwide. All other trademarks are property
of their respective owners.

