C
Setting up and using QBSP Test Bench
The Squish-based QBSP Test Bench helps you to verify that QBSPs work as expected and applications can be deployed to the target device from Qt Creator. Follow the instructions below to set up and use QBSP Test Bench.
Note: Before you start, make sure that the Squish license is available to you.
Setting up QBSP Test Bench
- Download the QBSP Test Bench package. Go to Qt Partner Portal and log in or register as a Qt user. The QBSP Test Bench package is titled
tqtc-qbsp-testbench-ddmmyy.7z. Unzip the package. - Run the
setup_install.pyscript from the unzipped package to install the required Qt and Qt Creator versions.Note: On Windows, you need to run the following script as an administrator. To do this, search for "cmd", select and hold (or right-click) the command prompt, and select Run as administrator.
On Windows, run the script as follows:
C:\Users\<username>\workdir\tqtc-qbsp-testbench>python3 setup_install.py ..\..\Downloads\meta-b2qt-embedded-qbsp-x86_64-mingw32-stm32mp15-disco-6.12.0.qbsp
On Linux, run the script as follows:
~/tqtc-qbsp-testbench $ ./setup_install.py /home/<username>/workdir/testbenchimages/meta-b2qt-embedded-qbsp-x86_64-stm32mp15-disco-6.12.0.qbsp
Output is the same in both Windows and Linux.
- Choose the device connection type when the query appears in the output:
- If you choose USB as the device connection type in Linux, make sure USB is configured as described in Setting Up USB Access to Embedded Devices.
- If you choose Ethernet, the installer asks for the IP address of the device that is being tested. If you don't know it yet, leave the field empty and add the address later on.
This is the output:
Configuration settings will be written into /home/<username>/testbench.config file where settings can be later edited.
Please input setting values matching your setup.
; Absolute path of directory, where Qt will be installed
qt installation_location: /home/<username>/workdir/testbench/qt
; Absolute path of Qt installer binary file (leave empty to attempt automatic Qt installer download)
qt installer_location:
; Qt credentials, which will be used with Qt installer
qt <username>: firstname.lastname@example.com
qt password:
; Qt version which QBSP file is based on
QBSP image_qt_version: \1
; The name of the hardware which is supported by the QBSP under test
device hardware_name: stm32mp15-disco
; connection_type can be ethernet or usb
device connection_type: ethernet
device ethernet_address: 192.168.1.113
User configuration read from /home/<username>/testbench.config
Attempting to download Qt installer
--2023-03-01 15:41:29--  https://download.qt.io/official_releases/online_installers/qt-unified-linux-x64-online.run
Resolving download.qt.io (download.qt.io)... 77.86.162.2
Connecting to download.qt.io (download.qt.io)|77.86.162.2|:443... connected.
HTTP request sent, awaiting response... 302 Found
Location: https://www.nic.funet.fi/pub/mirrors/download.qt-project.org/archive/online_installers/4.5/qt-unified-linux-x64-4.5.1-online.run [following]
--2023-03-01 15:41:29--  https://www.nic.funet.fi/pub/mirrors/download.qt-project.org/archive/online_installers/4.5/qt-unified-linux-x64-4.5.1-online.run
Resolving www.nic.funet.fi (www.nic.funet.fi)... 193.166.3.3, 2001:708:10:8::3
Connecting to www.nic.funet.fi (www.nic.funet.fi)|193.166.3.3|:443... connected.
HTTP request sent, awaiting response... 200 OK
.
.
.
[12618] Installation finished!
[12621] Headless installation: skip wizard page item addition:  "LaunchQtCreatorCheckBoxForm"
[12621] Components installed successfully.
Installation complete. Install dir: '/home/<username>/workdir/testbench/qt' found

Update image from /home/<username>/workdir/testbench/qt/\1/Boot2Qt/stm32mp15-disco/images
to your stm32mp15-disco hardware and run suite_qbsp_testbench with Squish.
/home/<username>/workdir/testbench/qt/Tools/b2qt/b2qt-flashing-wizard tool installed.
Use it to write the installed image to memory card.

Use a Squish version that is based on the same Qt version as the installed Qt Creator:
Qt Creator 12.0.2 based on Qt 6.6.0
- Once the installation is complete, the installer launches Qt Creator's Boot to Qt Flashing Wizard, with which you can write the device image to a memory card. If you already have the image on the device, skip this step.
An important detail in the installer output is "based on Qt 6.6.0". You need this piece of information later on when installing Squish.
Note: On Windows, the installer launches a pop-up window where you can see the Qt version. Installation continues when you close the window.
If the script doesn't print Qt Creator version, you can also check it manually:
$ <qt installation path>/Tools/QtCreator/bin/qtcreator -version 2> >(grep "based on")
Qt Creator 12.0.2 based on Qt 6.6.0
Alternatively, you can also launch Qt Creator and select Help > About Qt Creator to verify the version information.
If necessary, you can check and edit the created testbench.config from user's home folder before continuing. On Linux it's in ~/testbench.config and on Windows the location is C:\Users\[<username>]\testbench.config.
$ cat ~/testbench.config
[qt]
; Absolute path of directory, where Qt will be installed
installation_location = /home/<username>/workdir/testbench/qt
; Absolute path of Qt installer binary file (leave empty to attempt automatic Qt installer download)
installer_location =
; Qt credentials, which will be used with Qt installer
username = [your Qt account username]
password = [your Qt account password]

[QBSP]
; Qt version which QBSP file is based on
image_qt_version = 6.12.0

[device]
; The name of the hardware which is supported by the QBSP under test
hardware_name = stm32mp15-disco
; connection_type can be ethernet or usb
connection_type = ethernet
ethernet_address = [ip address of your device under testing]
Warning: Use absolute paths in testbench.config because paths such as ~/workdir/testbench/qt won't work in this case.
Installing Squish
To run the tests successfully, make sure that these two preconditions are met:
- The installed Squish version needs to be built for the Qt version used in the installed Qt Creator (in this example it is Qt 6.6).
- Qt Creator version (or more specifically, its GUI) needs to match the Qt Creator version that the Squish Test Suite was designed for:
setup_install.pytries to determine and install the correct Qt Creator version for you.
Note: For Windows, choose the Microsoft Visual C++ version of Squish, that is squish-8.0.0-qt66x-win64-msvc142.exe.
To install Squish:
- Go to Qt Customer Portal and download the Squish installation packages. In this example installation you need the latest version which is compatible with Qt 6.6, so download, give execute permissions, and install
squish-8.0.0-qt66x-linux64.run.~/Downloads$ chmod +x squish-8.0.0-qt66x-linux64.run ~/Downloads$ ./squish-8.0.0-qt66x-linux64.run
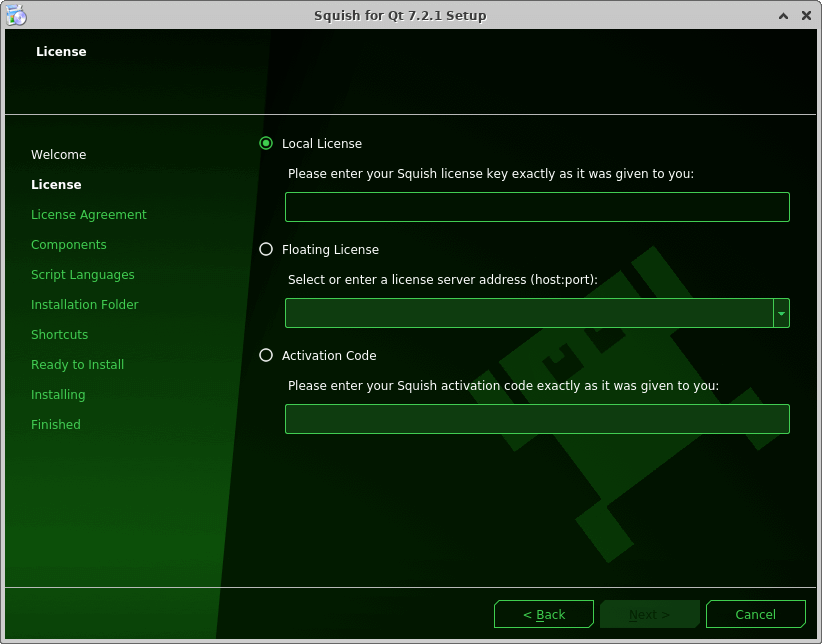
- In the License view, select the license type that is correct for you.
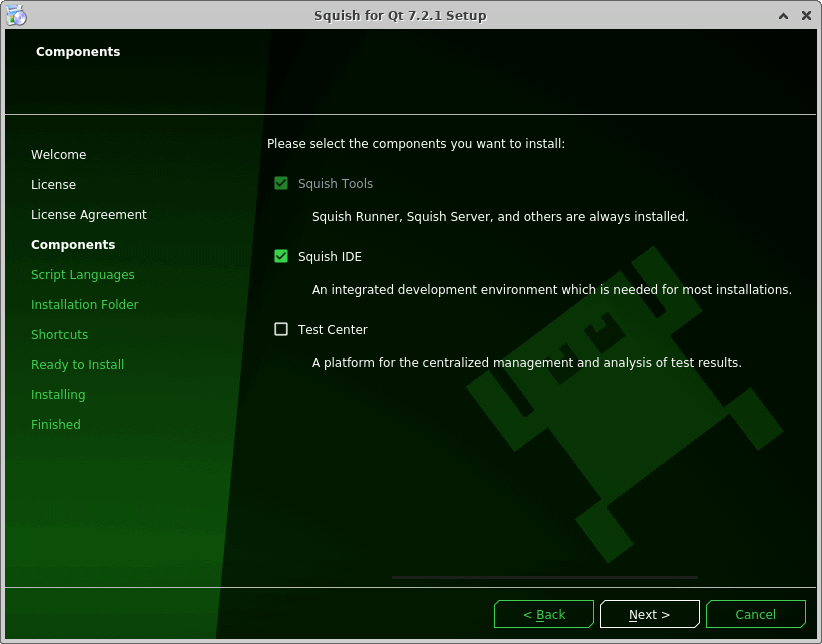
- Out of the available components, you only need Squish Tools to execute the Squish Test Suite from the command line. However, to investigate possible test failures, and store and view test results, we recommend installing also Squish IDE. Be prepared for over 1GB of hard disk usage when performing the full installation.
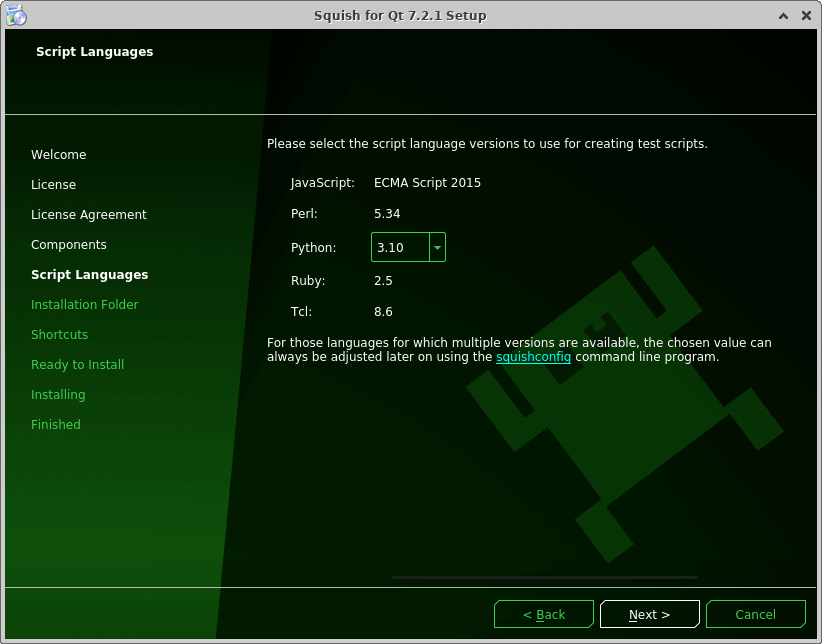
- In the Script Languages view, select Python version 3.10.
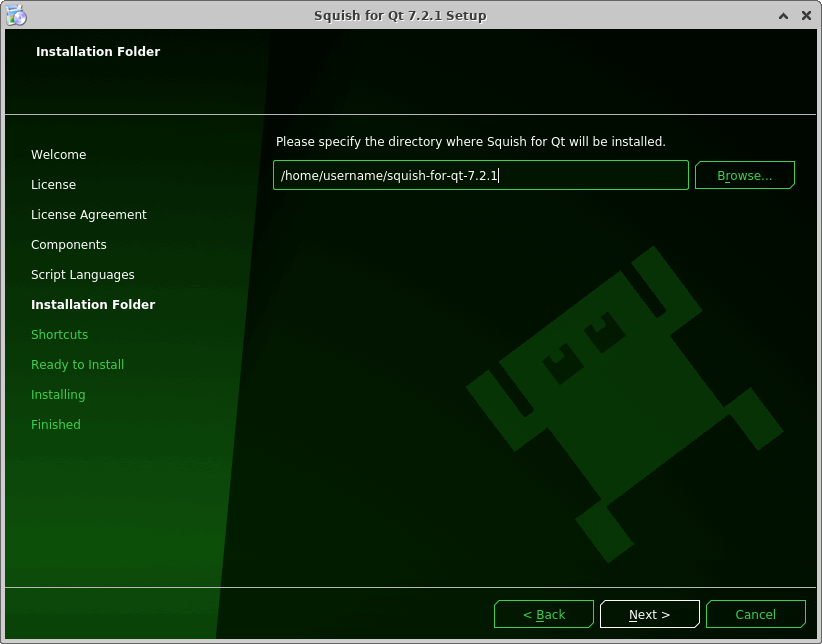
- In the Installation Folder view, select the installation directory and proceed with the installation.
Running the Squish Test Suite
On Linux:
- Run the Squish server:
~$ ./squish-for-qt-8.0.0/bin/squishserver &
- Run the Squish Test Suite:
~$ ./squish-for-qt-8.0.0/bin/squishrunner --testsuite tqtc-qbsp-testbench/suite_qbsp_testbench/
2022-10-04T15:54:11 START Start 'suite_testsuite' Test 'suite_testsuite' started
2022-10-04T15:54:11 START_TEST_CASE Start 'tst_install' Test 'tst_install' started (tst_install)
...
2022-10-04T15:05:17 END End 'suite_testsuite' End of test 'suite_testsuite'
*******************************************************
Summary:
Number of Test Cases: 15
Number of Tests: 30
Number of Errors: 0
Number of Fatals: 0
Number of Fails: 0
Number of Passes: 30
Number of Expected Fails: 0
Number of Unexpected Passes: 0
Number of Warnings: 0
*******************************************************
On Windows:
- Open a new command prompt window for the Squish server:
C:\Users\<username>\Squish for Qt 8.0.0\bin>squishserver.exe
15:29:19:834 Info: Starting server of Squish version 8.0.0.
15:29:19:849 Info: Listening on 0.0.0.0:4322
15:29:19:849 Info: Listening on ws://127.0.0.1:63535?pQoRUcLoosOUVMcCZR0c
15:29:19:849 Info: Announcing server presence via SSDP
- Run the Squish Test Suite:
C:\Users\<username>\Squish for Qt 8.0.0\bin>squishrunner.exe --testsuite ..\..\workdir\tqtc-qbsp-testbench\suite_qbsp_testbench
Note: Adding --reportgen html,[absolute_path_to_report_dir] to the command line generates an HTML report, which may give more helpful details in problem situations. Archiving the folder is a good way to share results to others.
You can also run the Squish Test Suite from Squish IDE.
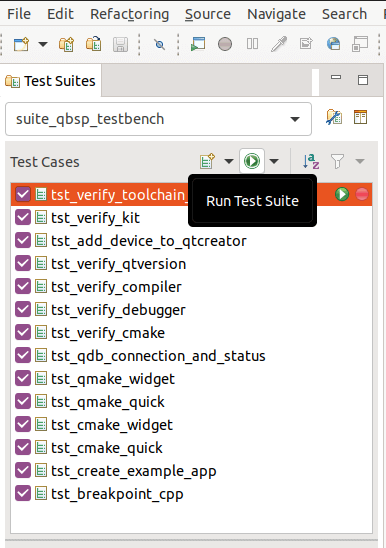
After the full Squish Test Suite has been executed, you can also run single test cases from the Squish IDE.
Available under certain Qt licenses.
Find out more.

