Qt Design Studio integration tutorial
Summary
This tutorial provides a step-by-step guide for exporting a Qt Design Studio project for Python development and deployment. You will learn how to:
Export a Qt Design Studio in order to get a project template for further Python development
Implement custom QML elements using Python
Successfully deploy the PySide6 application
Note
This tutorial is not focused on teaching how to use Qt Design Studio or QML, but rather how to integrate PySide6 with an existing Qt Design Studio project. If you want to learn how to use Qt Design Studio, check the available tutorials.
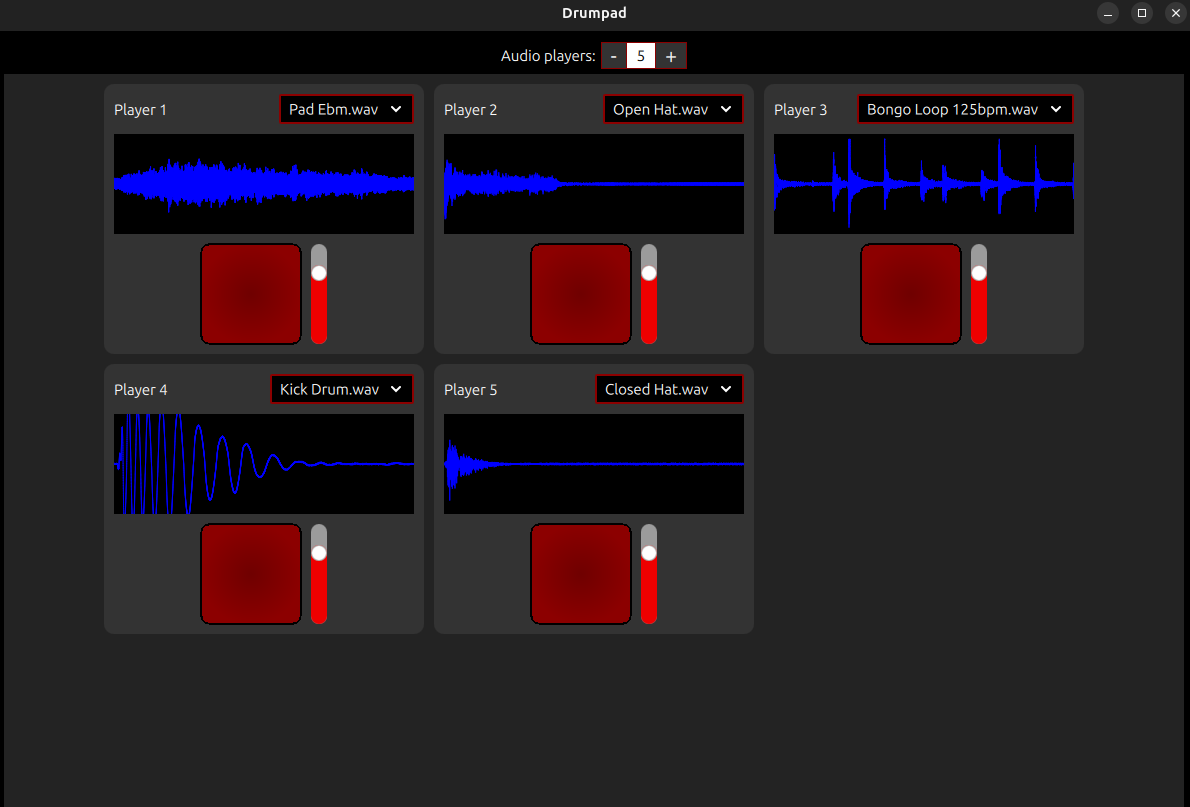
The project consists in a single “drumpad” screen that can be used to play different sound effects. The screen is composed of a responsive grid of buttons, each playing a different sound. In addition, a waveform display shows the audio amplitude over time using Qt Multimedia features.
Workflow overview
Before starting the tutorial, we need to understand the Qt Design Studio project workflow first.
Create a QML project using Qt Design Studio: Develop the application UI in a user friendly way. You can visually design components, screens and animations without writing QML code manually.
Export the project: Create a Python project using the Qt Design Studio generator.
Develop logic: Implement custom functionalities and application logic in Python, connecting it to the exported QML files. Define backend elements and signal communication with the UI.
Deploy: Package the application into a standalone executable using the pyside6-deploy tool. This bundles all required dependencies, resources, and modules into a distributable format.
Qt Design Studio project set up
The initial project source code is available for download at Drumpad example (Qt Design Studio) - Initial project. This provides the starting point for the tutorial and includes a set of QML files, Qt Resource files, and other project files.
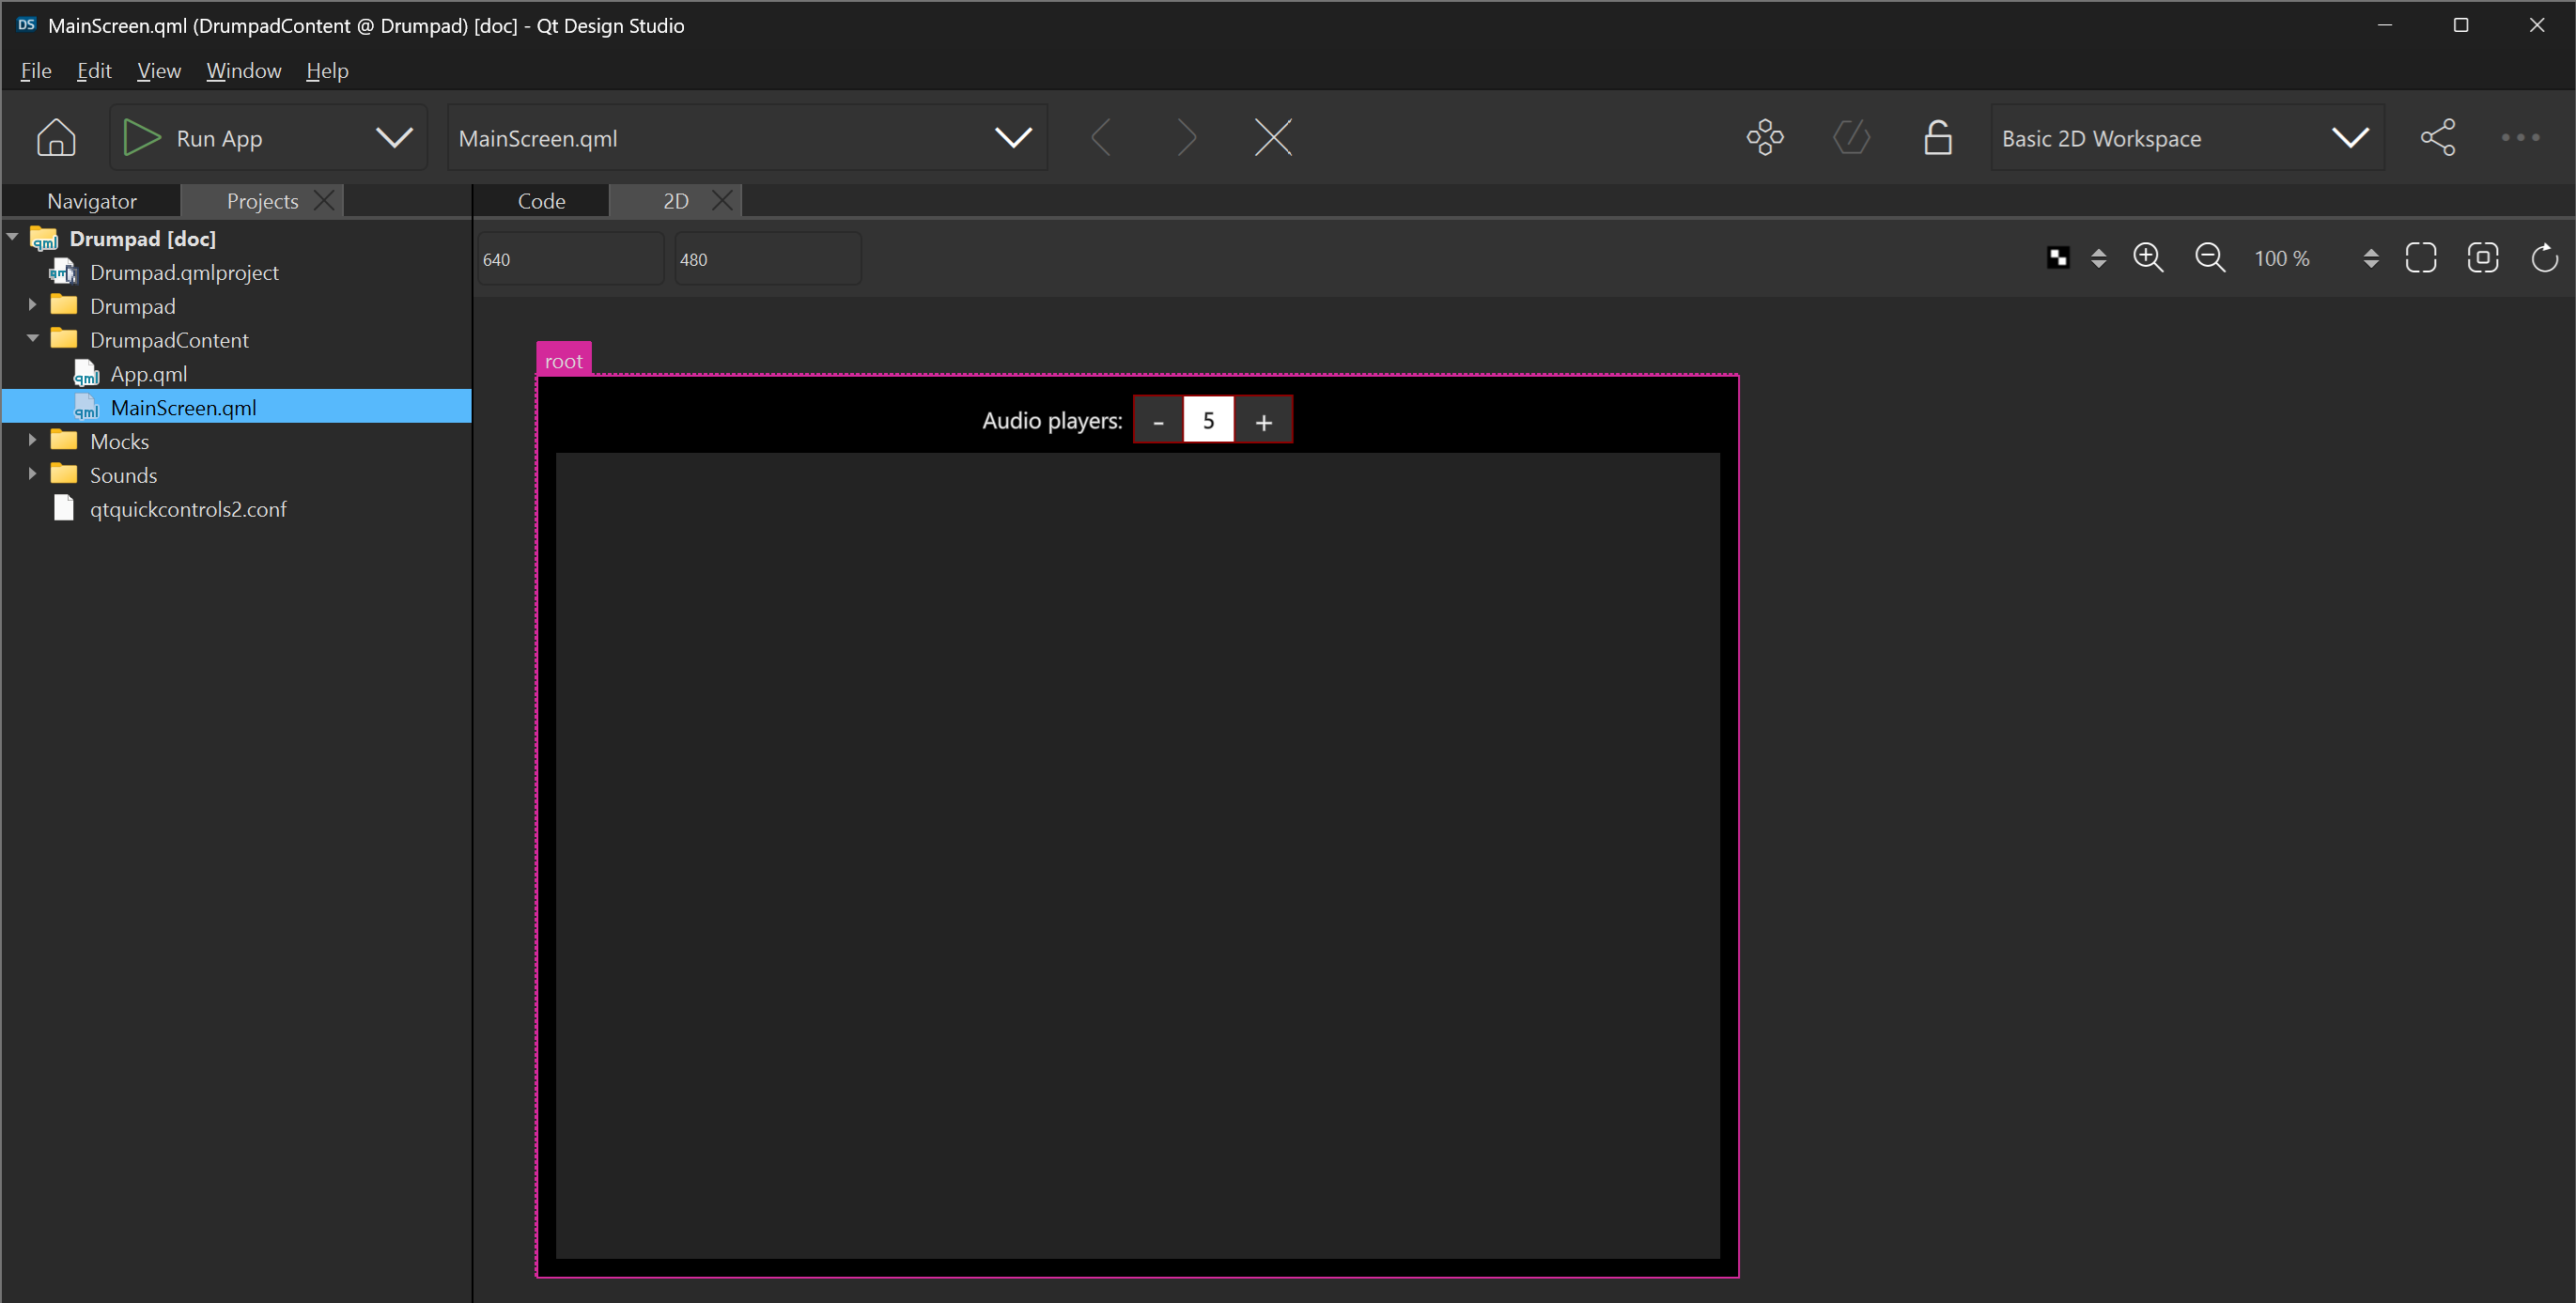
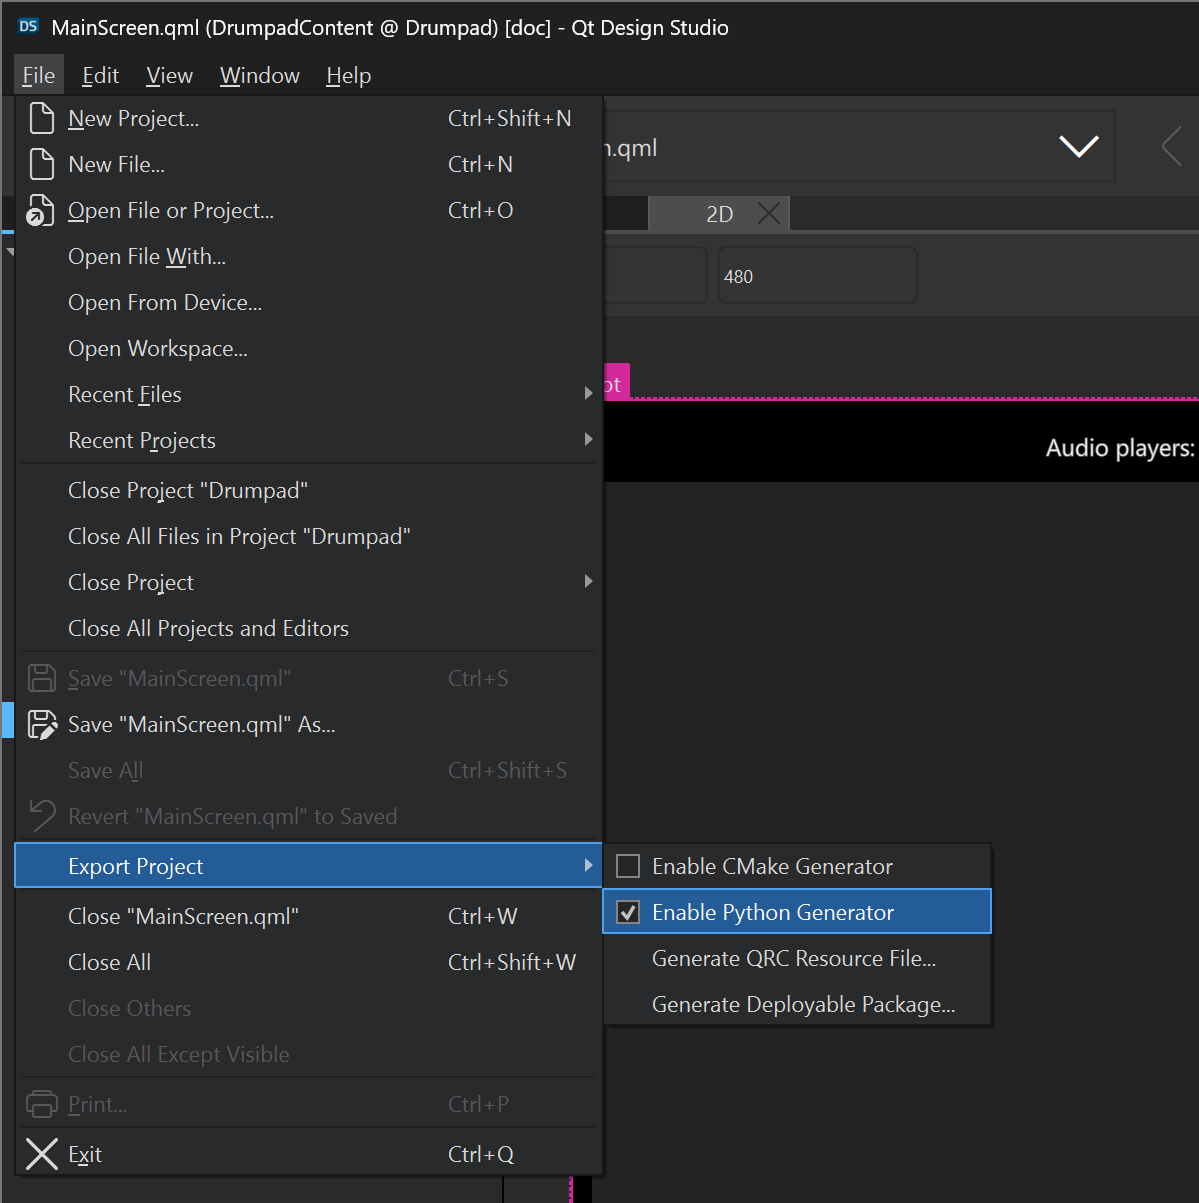
Qt Design Studio offers a Python project template generator. The option can be enabled in the
File > Export project > Enable Python Generator setting.
When the setting is enabled, Qt Design Studio will create a Python folder in the project directory,
containing the main.py and pyproject.toml files as well as the autogen folder. The autogen
folder contains the settings.py file, which is used to set up the project root path, the QML
import paths and other Qt specific settings.
Python development
The project contains three Python files that define QML elements located in the Python/audio
folder. They belong to the Audio QML module. The QML code expects that they exist. Otherwise, the
application can not be executed.
The AudioEngine QML element is responsible for playing audio files. It uses the QSoundEffect
class from the Qt Multimedia module to play the audio files. It also provides Qt Signals for
communicating with the QML layer.
audio_engine.py
 1# Copyright (C) 2025 The Qt Company Ltd.
 2# SPDX-License-Identifier: LicenseRef-Qt-Commercial OR BSD-3-Clause
 3
 4from PySide6.QtQml import QmlElement
 5from PySide6.QtCore import QObject, Slot, Property, Signal, QUrl
 6from PySide6.QtMultimedia import QSoundEffect
 7
 8from autogen.settings import project_root
 9
10QML_IMPORT_NAME = "Audio"
11QML_IMPORT_MAJOR_VERSION = 1
12
13
14@QmlElement
15class AudioEngine(QObject):
16    volumeChanged = Signal()
17    fileChanged = Signal()
18    isPlayingChanged = Signal()
19    decodingStatusChanged = Signal(QSoundEffect.Status, str)
20
21    def __init__(self, parent=None):
22        super().__init__(parent)
23        self._sound_effect = QSoundEffect()
24        self._sound_effect.playingChanged.connect(self.isPlayingChanged.emit)  #
25        self._sound_effect.statusChanged.connect(self.reportStatus)
26
27    def reportStatus(self):
28        if self._sound_effect.status() == QSoundEffect.Status.Error:
29            self.decodingStatusChanged.emit(
30                QSoundEffect.Status.Error,
31                f"Error decoding file: {self._sound_effect.source().path()}",
32            )
33        else:
34            self.decodingStatusChanged.emit(self._sound_effect.status(), "")
35
36    @Slot(result=None)
37    def play(self):
38        self._sound_effect.play()
39
40    def volume(self):
41        return self._sound_effect.volume()
42
43    def setVolume(self, value):
44        self._sound_effect.setVolume(value)
45        self.volumeChanged.emit()
46
47    def file(self):
48        return self._sound_effect.source()
49
50    def setFile(self, value: QUrl):
51        if self._sound_effect.source() == value or value.isEmpty():
52            return
53
54        if "__compiled__" in globals():
55            self._sound_effect.setSource(f"qrc:/{value.toString()}")
56        else:
57            self._sound_effect.setSource(f"file:{project_root / value.toString()}")
58        self.fileChanged.emit()
59
60    def isPlaying(self):
61        return self._sound_effect.isPlaying()
62
63    volume = Property(float, volume, setVolume, notify=volumeChanged)
64    file = Property(QUrl, file, setFile, notify=fileChanged)
65    isPlaying = Property(bool, isPlaying, notify=isPlayingChanged)
The AudioFilesModel QML element is responsible for managing the audio files. It fetches the
available audio files from the Sounds folder and provides a getModel() method to return a list
of files. It detects whether the application has been deployed because the compiled Qt resource
files are used in this case.
audio_files_model.py
 1# Copyright (C) 2025 The Qt Company Ltd.
 2# SPDX-License-Identifier: LicenseRef-Qt-Commercial OR BSD-3-Clause
 3
 4from pathlib import Path
 5
 6from PySide6.QtCore import QObject, Slot, QDirIterator
 7from PySide6.QtQml import QmlElement
 8
 9from autogen.settings import project_root
10
11
12QML_IMPORT_NAME = "Audio"
13QML_IMPORT_MAJOR_VERSION = 1
14
15
16@QmlElement
17class AudioFilesModel(QObject):
18    @Slot(result=list)
19    def getModel(self):
20        if "__compiled__" in globals():
21            resource_prefix = ":/Sounds/"
22            iterator = QDirIterator(resource_prefix, QDirIterator.Subdirectories)
23            audio_files = []
24            while iterator.hasNext():
25                resource = iterator.next()
26                audio_files.append(resource.split(resource_prefix)[-1])
27            return audio_files
28
29        return list(p.name for p in Path(project_root / "Sounds").glob("*.wav"))
The WaveformItem QML element is responsible for displaying the audio waveform. It uses the
QAudioDecoder and QAudioFormat classes from the Qt Multimedia module to decode the audio file
and display the waveform. The graph is drawn using QPainter.
waveform_item.py
  1# Copyright (C) 2025 The Qt Company Ltd.
  2# SPDX-License-Identifier: LicenseRef-Qt-Commercial OR BSD-3-Clause
  3
  4import struct
  5
  6from PySide6.QtCore import Qt, Property, QUrl, Signal, QFile, QPointF
  7from PySide6.QtGui import QPen, QPainter
  8from PySide6.QtMultimedia import QAudioFormat, QAudioDecoder
  9from PySide6.QtQml import QmlElement
 10from PySide6.QtQuick import QQuickPaintedItem
 11
 12QML_IMPORT_NAME = "Audio"
 13QML_IMPORT_MAJOR_VERSION = 1
 14
 15
 16@QmlElement
 17class WaveformItem(QQuickPaintedItem):
 18
 19    fileChanged = Signal()
 20
 21    def __init__(self, parent=None):
 22        super().__init__(parent)
 23        self._waveformData = []
 24        self._background_color = Qt.black
 25
 26        audio_format = QAudioFormat()
 27        audio_format.setChannelCount(1)
 28        audio_format.setSampleRate(44100)
 29        audio_format.setSampleFormat(QAudioFormat.Float)
 30
 31        self._file_url: QUrl | None = None
 32        self._audio_file: QFile | None = None
 33
 34        self._decoder = QAudioDecoder()
 35        self._decoder.setAudioFormat(audio_format)
 36
 37        self._decoder.bufferReady.connect(self.onBufferReady)
 38        self._decoder.finished.connect(self.decoderFinished)
 39
 40    def file(self) -> QUrl | None:
 41        return self._file_url
 42
 43    def setFile(self, value: QUrl):
 44        if self._decoder.source() == value:
 45            return
 46
 47        if self._audio_file and self._audio_file.isOpen():
 48            self._audio_file.close()
 49
 50        self._waveformData = []
 51        self._decoder.stop()
 52
 53        self._file_url = value
 54        if "__compiled__" in globals():
 55            path = self._file_url.toString().replace("qrc:/", ":/")
 56        else:
 57            path = self._file_url.path()
 58        self._audio_file = QFile(path)
 59        self._audio_file.open(QFile.ReadOnly)
 60        self._decoder.setSourceDevice(self._audio_file)
 61        self._decoder.start()
 62        self.fileChanged.emit()
 63
 64    def paint(self, painter):
 65        # Fill the bounding rectangle with the specified color
 66        painter.fillRect(self.boundingRect(), self._background_color)
 67
 68        # If no waveform data is available, draw the text
 69        if not self._waveformData:
 70            painter.setPen(Qt.white)
 71            painter.drawText(self.boundingRect(), Qt.AlignCenter, "Waveform not available")
 72            return
 73
 74        painter.setRenderHint(QPainter.Antialiasing)
 75
 76        # Set the pen for drawing the waveform
 77        pen = QPen(Qt.blue)
 78        pen.setWidth(1)
 79        painter.setPen(pen)
 80
 81        # Get container dimensions
 82        rect = self.boundingRect()
 83        data_size = len(self._waveformData)
 84
 85        # Calculate step size and center line
 86        x_step = rect.width() / data_size
 87        center_y = rect.height() / 2.0
 88
 89        # Draw the waveform as connected lines
 90        for i in range(1, data_size):
 91            x1 = (i - 1) * x_step
 92            y1 = center_y - self._waveformData[i - 1] * center_y
 93            x2 = i * x_step
 94            y2 = center_y - self._waveformData[i] * center_y
 95            painter.drawLine(QPointF(x1, y1), QPointF(x2, y2))
 96
 97    @staticmethod
 98    def float_buffer_to_list(data):
 99        # Calculate the number of 32-bit floats in the buffer
100        float_count = len(data) // 4  # Each float32 is 4 bytes
101        # Unpack the binary data into a list of floats
102        return list(struct.unpack(f"{float_count}f", data))
103
104    def onBufferReady(self):
105        buffer = self._decoder.read()
106        data = buffer.constData()
107        self._waveformData.extend(self.float_buffer_to_list(data))
108        self.update()
109
110    file: QUrl = Property(QUrl, file, setFile, notify=fileChanged)
111
112    def decoderFinished(self):
113        self._audio_file.close()
Running the application
Navigate to the Python/ directory of the project:
cd Python/
Then, build the project using:
pyside6-project build
This command will compile resources, UI files, QML files, and other necessary components.
Deployment
In order to create a standalone executable of the application, we can use the pyside6-deploy command line tool. It will analyze the project source code, determine the required Qt modules and dependencies and bundle the code into a native executable.
To deploy the application, execute the following command from the Python/ directory:
pyside6-deploy --name Drumpad
This will create a standalone executable for the application in the project directory.
Important
Make sure to fulfil the pyside6-deploy requirements for your platform. Otherwise, the tool will not detect that the example code uses Qt Multimedia module. In that case, the produced executable will not work properly.
Qt resource files
Note that since the main.py file is contained in the Python folder, its references to the project
QML files and other resources have to traverse one level up. When the project is deployed, this is
an issue because of the way Nuitka works. After the deployment, the main.py entry point file
is morphed into a native executable file, but its location in the project folder changes:
Project structure before deployment:
├── Drumpad
│   ├── AvailableSoundsComboBox.qml
│   ...
├── Python
│   ├── main.py
│   ├── pyproject.toml
│   └── autogen
└── Sounds
    ├── Clap.wav
    ├── Kick Drum.wav
    ...
Project structure after deployment:
├── main.exe  (OS dependent executable format)
├── Drumpad
│   ├── AvailableSoundsComboBox.qml
│   ...
└── Sounds
    ├── Clap.wav
    ├── Kick Drum.wav
    ...
The relative location of the resources changes after the deployment. For example, before deploying
the application, the path for accessing a sound from the main.py file would be:
../Sounds/Clap.wav. After the deployment, the relative path is now: Sounds/Clap.wav.
This issue is addressed by the pyside6-deploy tool thanks to the usage of
Qt resource files. All the files listed in the Drumpad.qrc file are embedded
in the executable and can be accessed by importing the Python/autogen/resources.py Python file.
This way, the paths can be easily resolved properly after the deployment of the application.
Qt Design Studio creates the Python/autogen/settings.py file which contains code that enables the
usage of the compiled Qt resources when the application is deployed. This code can be modified on
demand.
Conclusion
In this tutorial, you learned how to integrate a user interface developed in Qt Design Studio with a Python backend using PySide6. We walked through the complete workflow, from exporting a QML project and implementing custom Python logic to packaging the application into a standalone executable using pyside6-deploy.