C
Design UI using Qt Design Studio (RH850)
This topic offers step-by-step instructions to design a simple UI that indicates the status of the user button and the on-board LED. You need Qt Design Studio to get started. If you don't have it installed, install it using either Qt Online Installer or Qt Maintenance Tool.
The following instructions guide you through the complete design process:
- Create a new project:
- Open Qt Design Studio and select Create Project.
- Select the Qt for MCUs tab in the New Project wizard.
- Set Width to
800and Height to600for the screen resolution.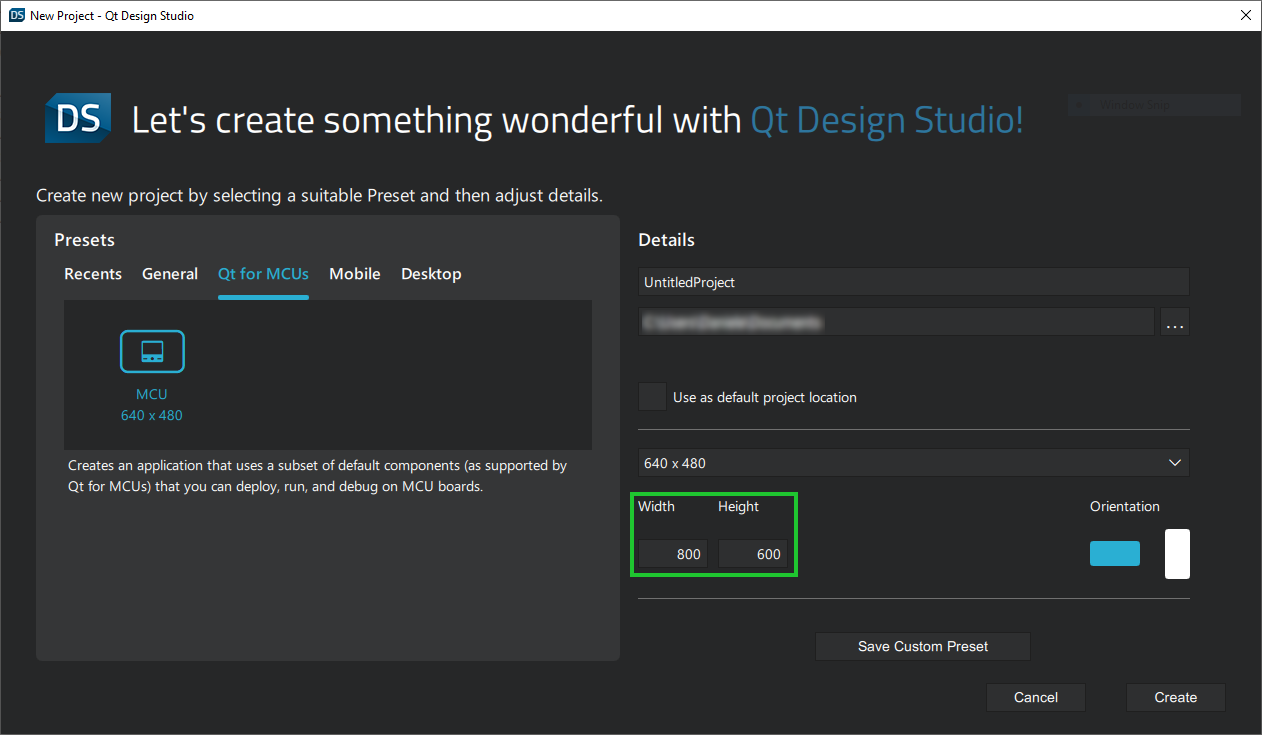
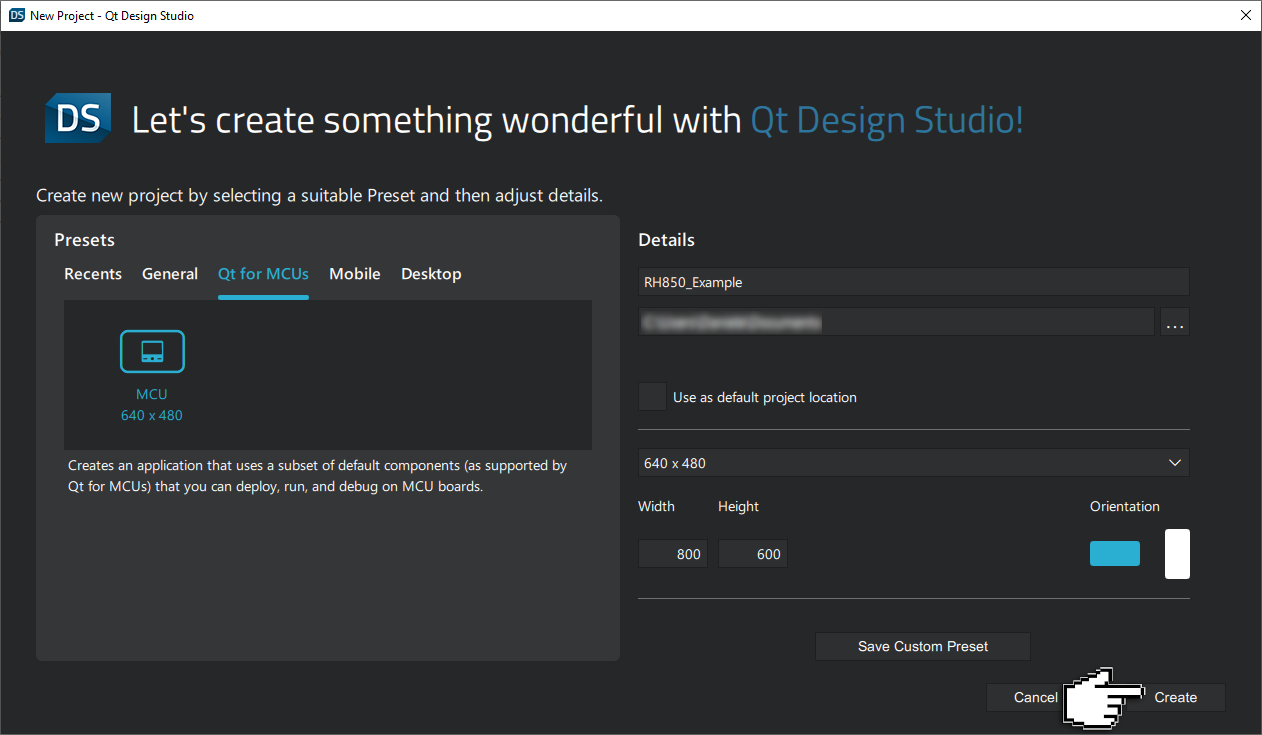
- Name your project and select Create.
You should now see the Design Mode UI and the boilerplate project with a
RectangleandTextitem.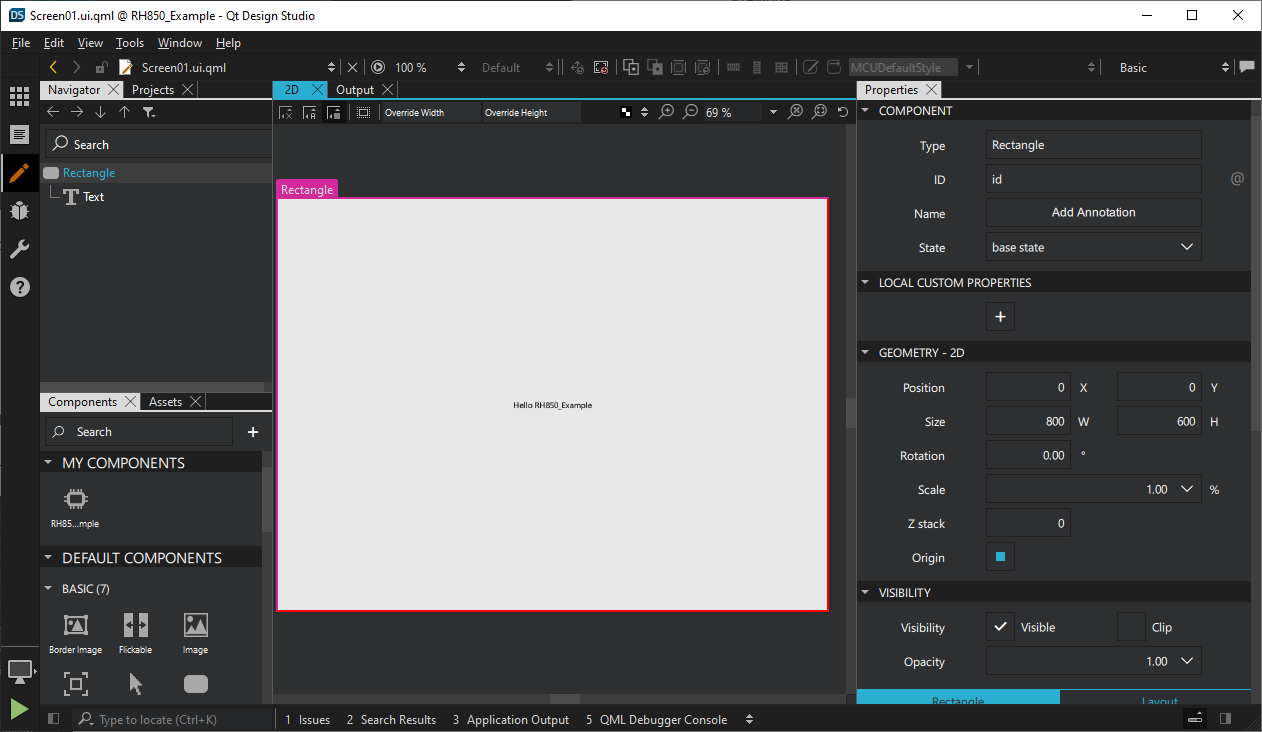
- Open Qt Design Studio and select Create Project.
- Select the
Rectangleeither in the Navigator pane or Form Editor
  to change its properties in the Properties
  pane:
pane:- Change the Fill color property to
blackeither by using the color picker or entering Hex code (#000000) manually.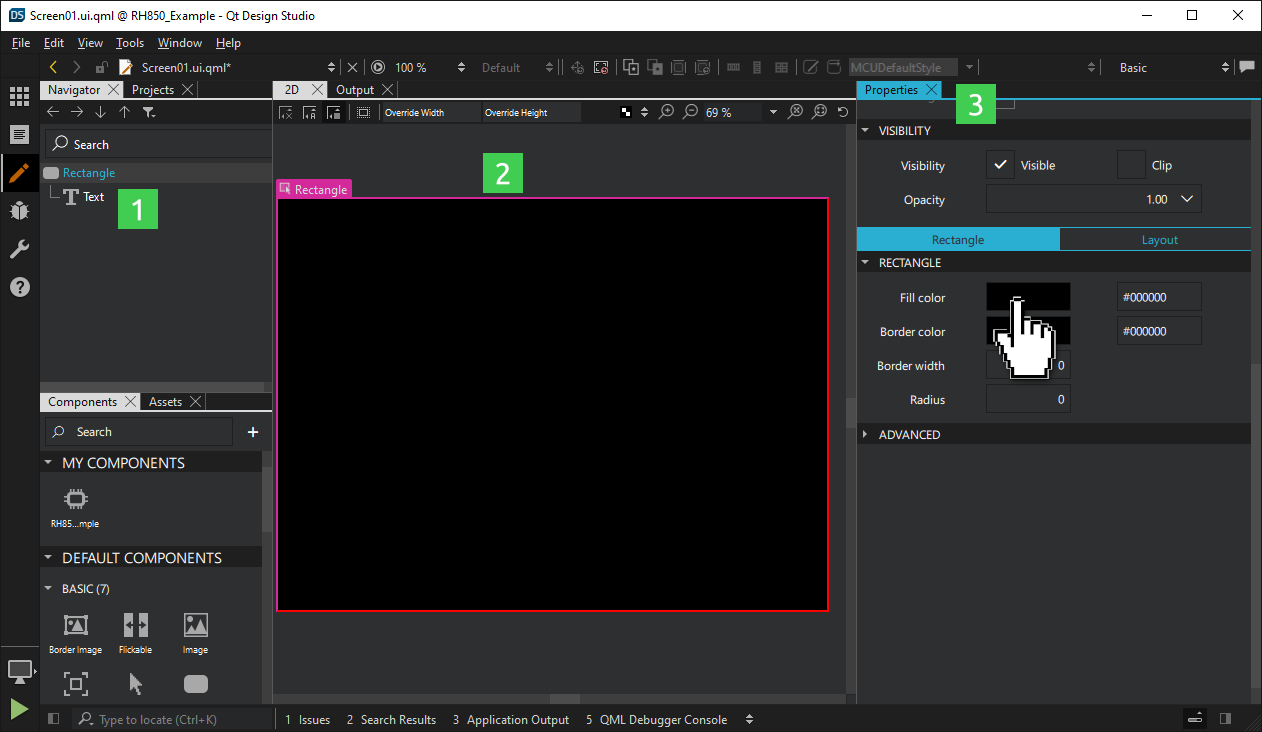
- Change the Fill color property to
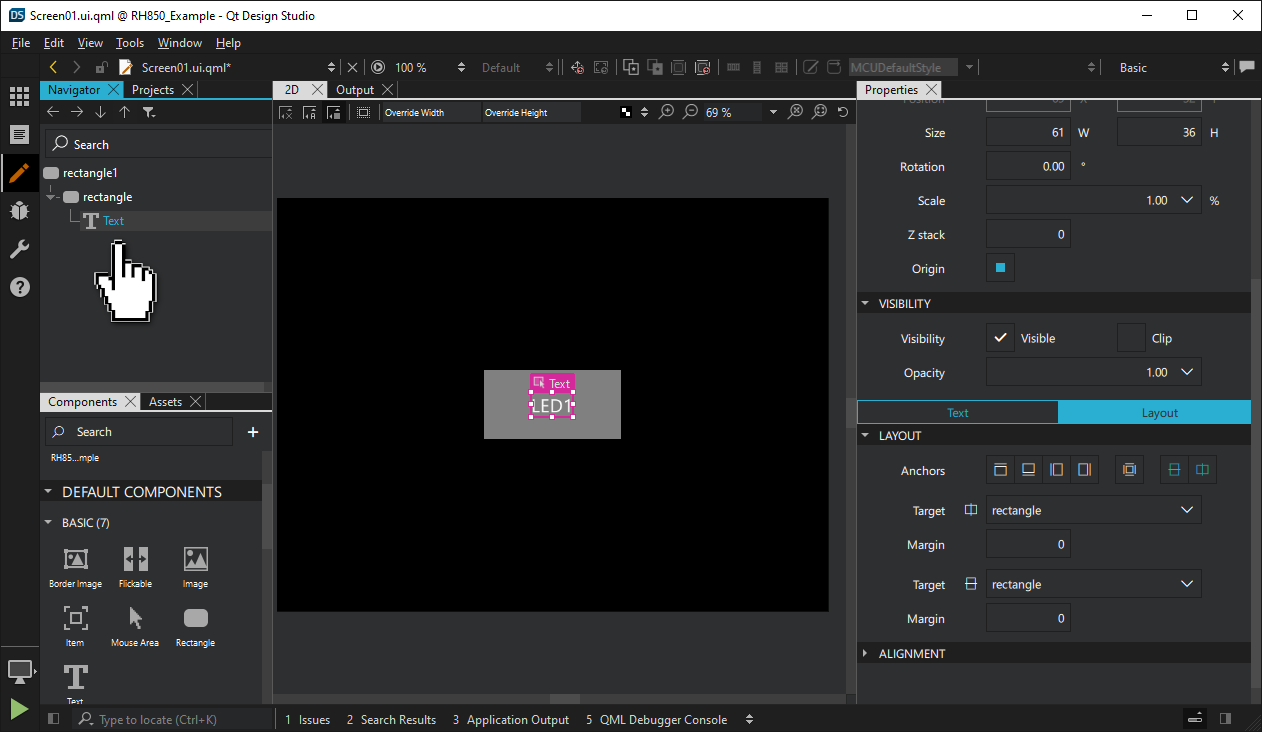
- Select the Text item either in the Navigator pane or Form Editor to change its properties:
- Change Text Color to
whiteeither using the color picker or entering Hex code (#ffffff) manually. - Change Units to
pxand Size to20. - Change Text to
LED1.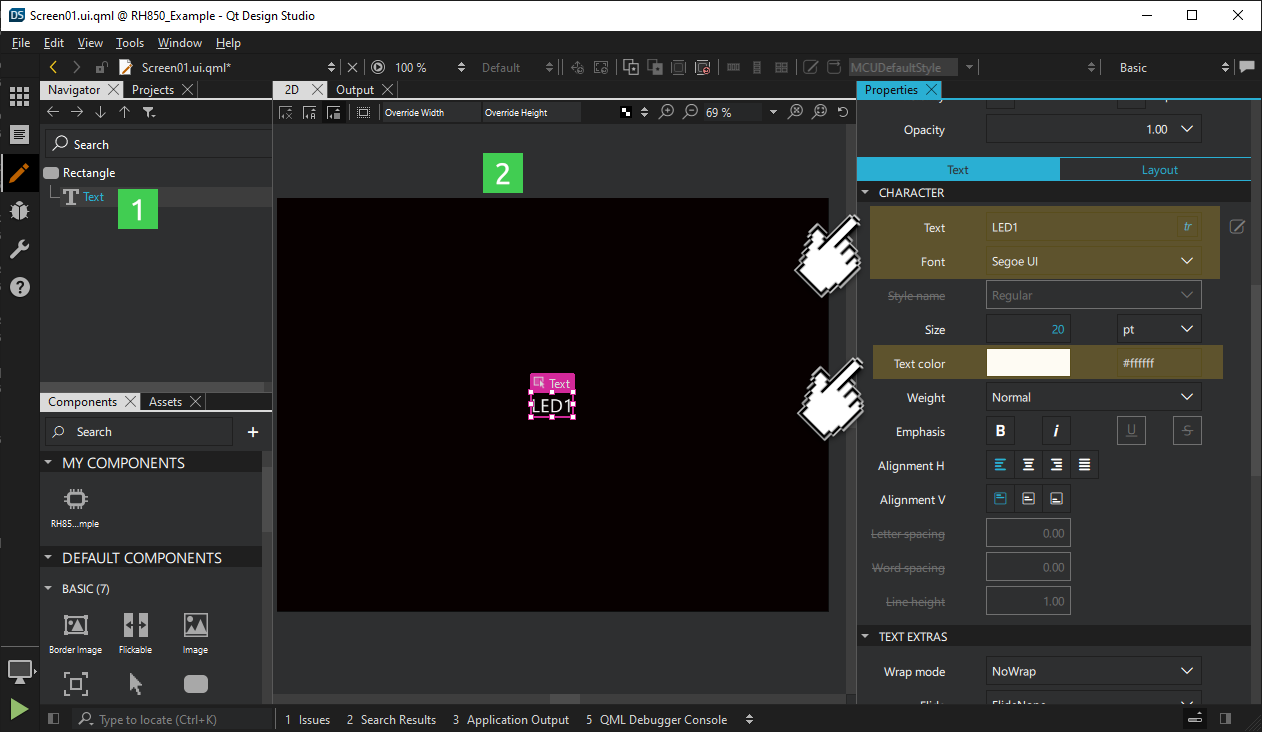
- Change Text Color to
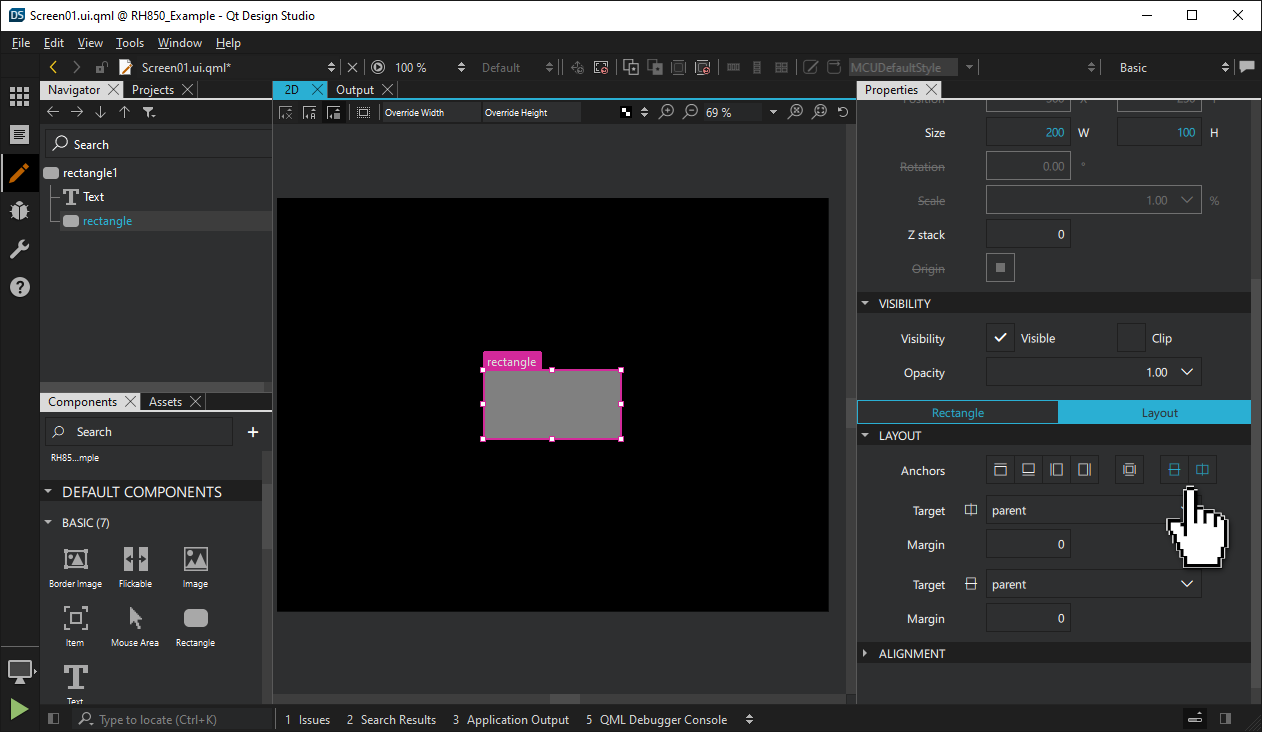
- Add the button rectangle:
- Find the Rectangle component in the Components pane under the Basic components. Drag it onto the Rectangle in the Navigator pane.
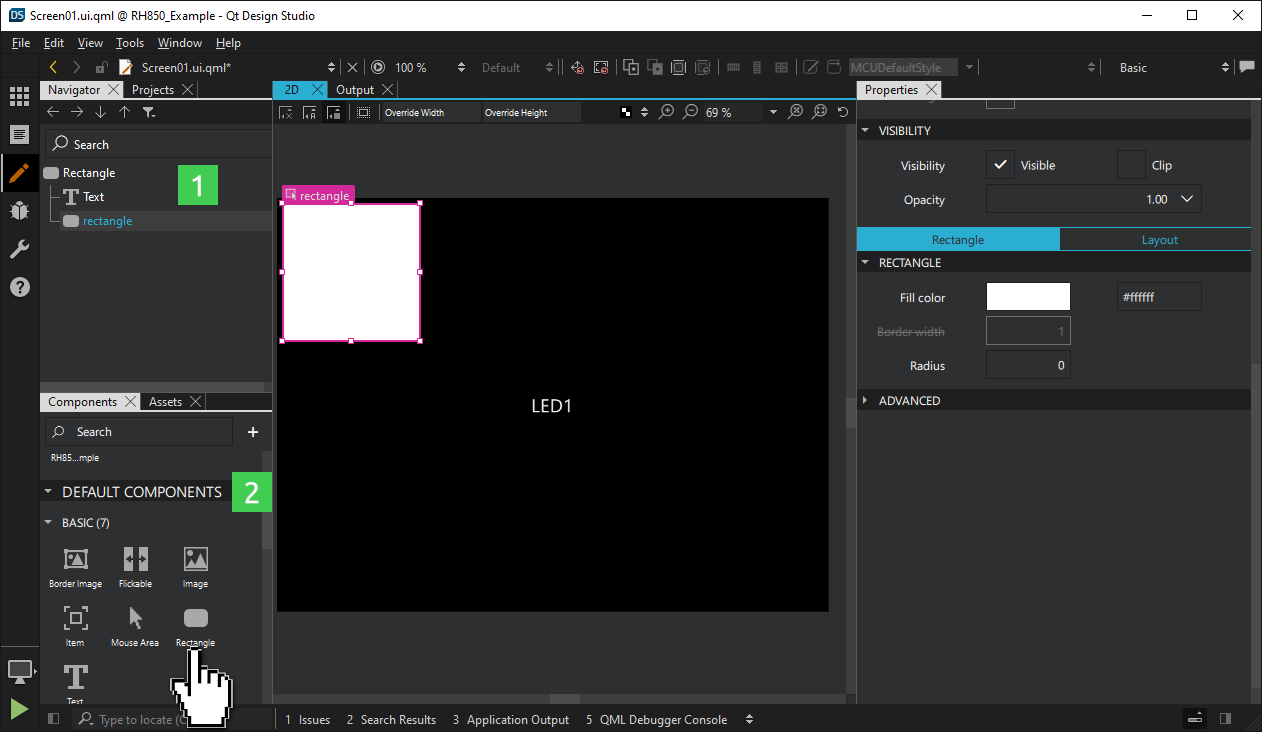
- Select the new rectangle in the Navigator pane to change some of its properties in the Properties pane:
- Change its Fill color property to
greyby either using the color picker or entering the Hex code (#808080) manually. - Set its size to
200 W x 100 H.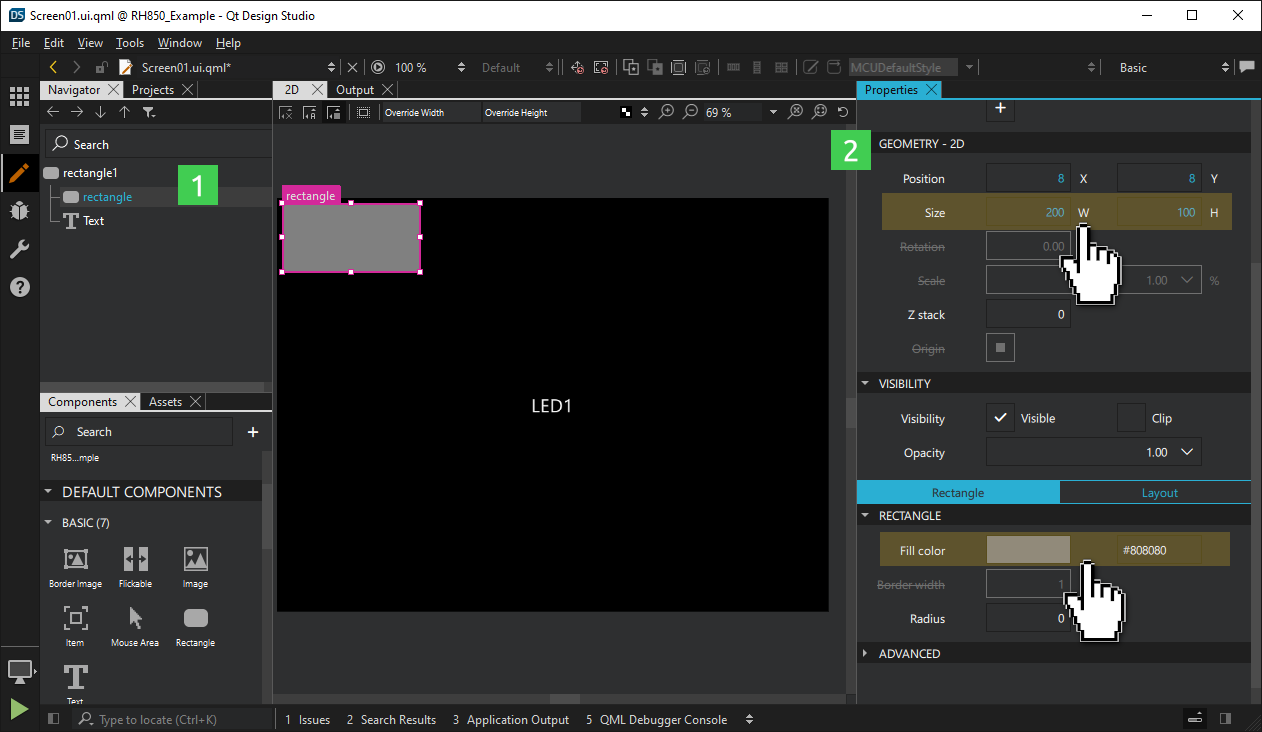
- Switch to the Layout section in the Properties pane. Anchor the rectangle to the center of its parent.
- Drag the existing Text component onto the new Rectangle.
- Change its Fill color property to
- Find the Rectangle component in the Components
- Assign a unique ID to each item:
- Name the Text item as
ledStateText.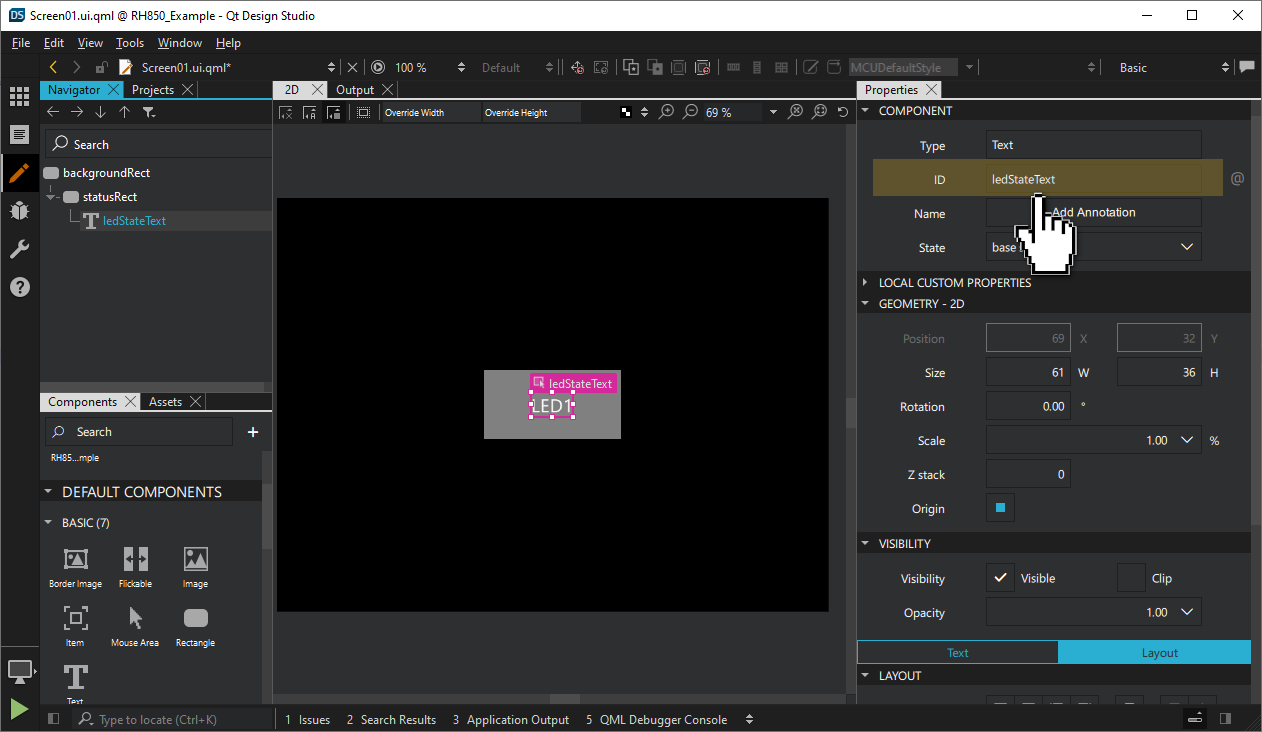
- Name the inner Rectangle item as
statusRect. - Name the parent Rectangle item as
backgroundRect.
- Name the Text item as
- Create a pressed property for
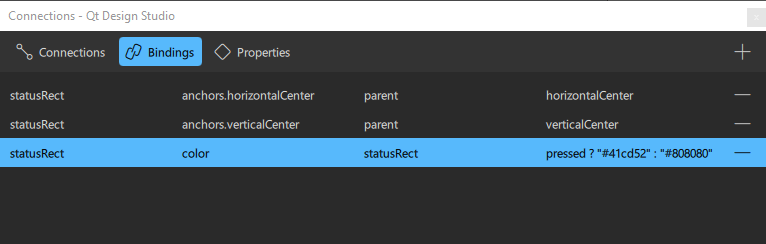
statusRect:- Select statusRect in the Navigator pane.
- Select Connections from the View > Views menu.

- Switch to the Properties tab in the Connections view.
- Select + to add a new property. Select
boolas Type, enterpressedunder Name andfalseunder Value.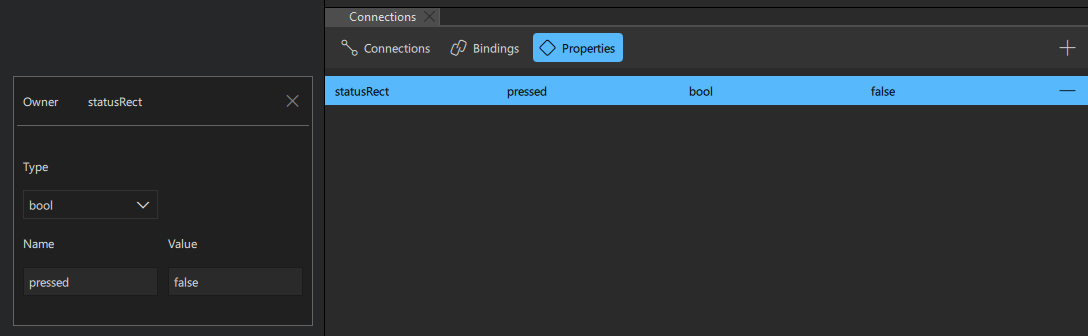
- Switch to the Rectangle tab in the Properties view.
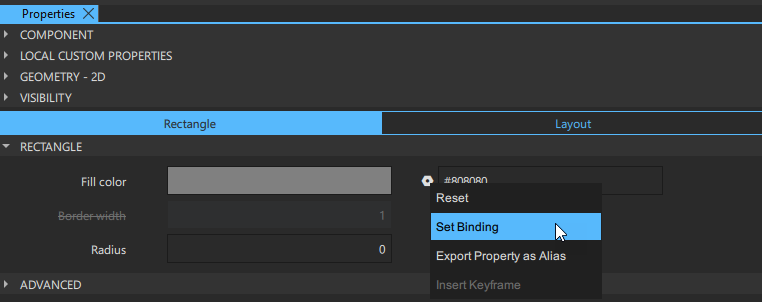
- Select the settings icon
 to add a new binding.
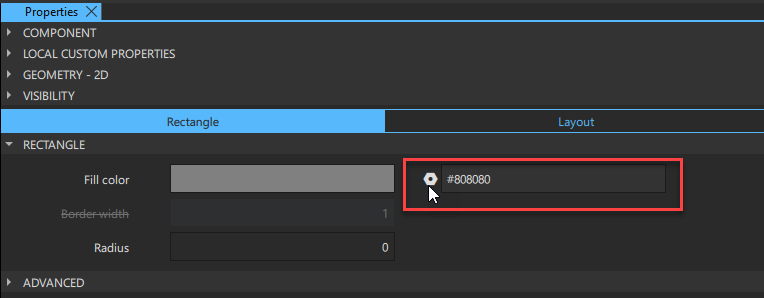
- Enter the following expression to the Binding Editor that opens up, and select OK.
statusRect.pressed ? "#41cd52" : "#808080"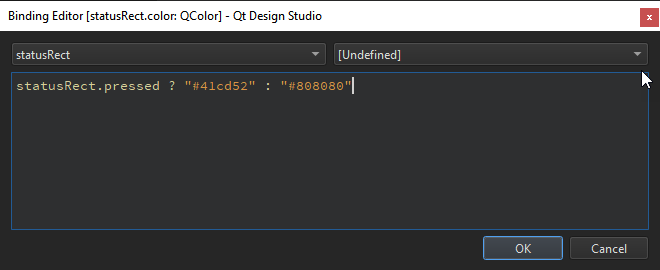
Note: The C++ backend, which you will add in the next chapter, modifies the
pressedboolean property. - Select statusRect in the Navigator
- Save and close.
- Select File > Save All to save your change.
- Select File > Close Project <YourProject> to close the project.
Available under certain Qt licenses.
Find out more.
