Automated Test Execution
You can now plan, execute and monitor automated tests in Test Center. In the Test Management View you can register tests, import automated test from your repository, or view already registered tests from uploaded results.
With the registered tests in Test Center you can create Test Plan Templates in the Test Plan Templates View, and add Test Runs to the template.
The Test Plan Template can now be scheduled to create a Test Plan Execution, where Test Center will go through the Test Runs and, at the scheduled time, will execute them on the appropriate servers.
Note: Executing tests with Test Center only works for Squish tests, that are setup to work with a remote squishserver.
Navigate to the Test Executions View to monitor the state and results of the executions.
This is a step-by-step guide on how to configure Test Center to execute automated tests.
Register Tests
Before registering tests, select or create a project where you want to manage the Tests.
There are three ways to make tests known to Test Center:
Note: Be aware that deleting or renaming an Automated Test can only be done when the test has no results uploaded to Test Center.
Import Tests
You can import test suites and cases from the repository to a connected project. In Test Management View, click the  Repository Information button to view the connected repositories to the project. A list of connected repositories will be shown. If the repository is a Git repository, then the respective default branch will be shown. This can be changed to select from which branch the import will take place. Clicking the Import Tests button will start the import process. This might take some seconds, depending on the amount of tests found.
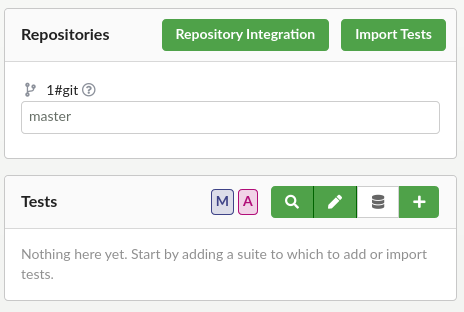
Test Management View - Repositories panel
Note: Currently only Squish tests created through squishide are imported to Test Center.
Register Tests Manually
Add a new Test Suite
Click  button to to add a new test suite.

Tests view - Test Management
And in the New Suite dialog, specify a name for the suite, and select Automated test suite
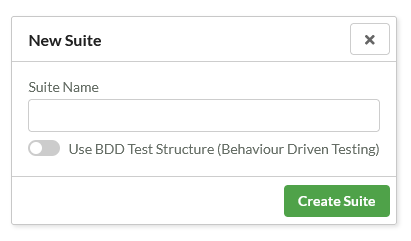
New Suite dialog
Click Create Suite to create the test suite and make it appear in the Tests pane.
Create Test Cases or scenarios
To create tests within a test suite, click  next to the test suite entry in the Tests pane, or select a test suite then click + Test Case in the details pane on the right.

Creation of test cases
Note: You still have the option to rename the after creating it, you just need to select it and click its name to edit it.
Create Test Plan Template
After registering automated tests you can now create Test Plan Templates that can be later executed.
After switching to the plan templates tab, you need to click + Test Plan.

Test Plan Templates view
Then you can configure the test plan in the Test Plan Template Details view

Test Plan Template details view.
After creating the test plan you can change its default name by clicking the  button, enter the new title, and click Ok.
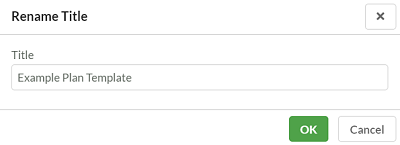
Rename test plan dialog
You can set or update the description of your test plan by editing the contents of the Description field. Simply click on the description field and enter the new description.
And to assign tags to your test plan, you can edit the  textbox
Add a test run to your Test Plan
Click + Test Run button in the Test Plan Details view. and you will go to the Add Test Run view.

Add Test Run view
Select the configuration for the automated test run from the Labels dropdown menu, where you can choose existing label value combinations or create new ones. Typically, you would specify the operating system, browser, or device that a automated test should be executed on. It is important to assign meaningful labels so that Test Center can select an appropriate server based on the configuration, as well to be able to later analyze the results in the Explore and History view.
You then need to select the test suites, or test cases for the test plan execution. The test details pane on the right-hand side displays more information about the selected test.
Clicking the Create Execution button will create the test execution, but stay in the current view. This is so that more Test Runs, or configurations through different labels can be created.
By navigate back to the Test Plan Details view.
Note: Each test run can only contain a single suite. If you select multiple suites, the Create Execution button automatically creates one test run per selected suite
Schedule Test Plan Execution
When you have a Test Template, you can schedule its execution and create Test Executions in two ways:
- Clicking on the + Schedule button in the Test Plan Details view
- Clicking on the
 button next to the test plan template name in the Test Plans view
In the Execute Test Plan dialog you need to fill in the mandatory fields: a unique test plan instance name and batch name. For Test Center to execute the automated tests, first you must enable the Schedule Automated Tests toggle, and then select at what time the tests should be executed, by setting the Scheduled Date, and finally you need to specify which repository branch or revision should the tests be executed from.
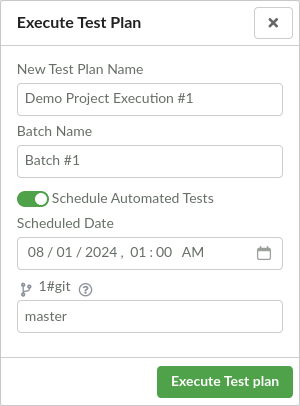
Execute Test Plan Dialog with enabled Schedule Automated Tests
Monitor Execution Progress
With the Test Plan Execution created, you can navigate to the Test Plan Executions View. In this page you will see the completion percentage of the Test Plan Executions, as well as the results of their respective completed tests.
Entering the Test Plan Details view, by clicking one of the Test Plan Executions, you can view the Completion, Result, and Status of each Test Run.
For even more details, clicking a Test Run will display its Tests, along with their execution Status and Result. If an error occurred during a Test Execution an error will be displayed on the Test Details, along with hints for possible solutions.
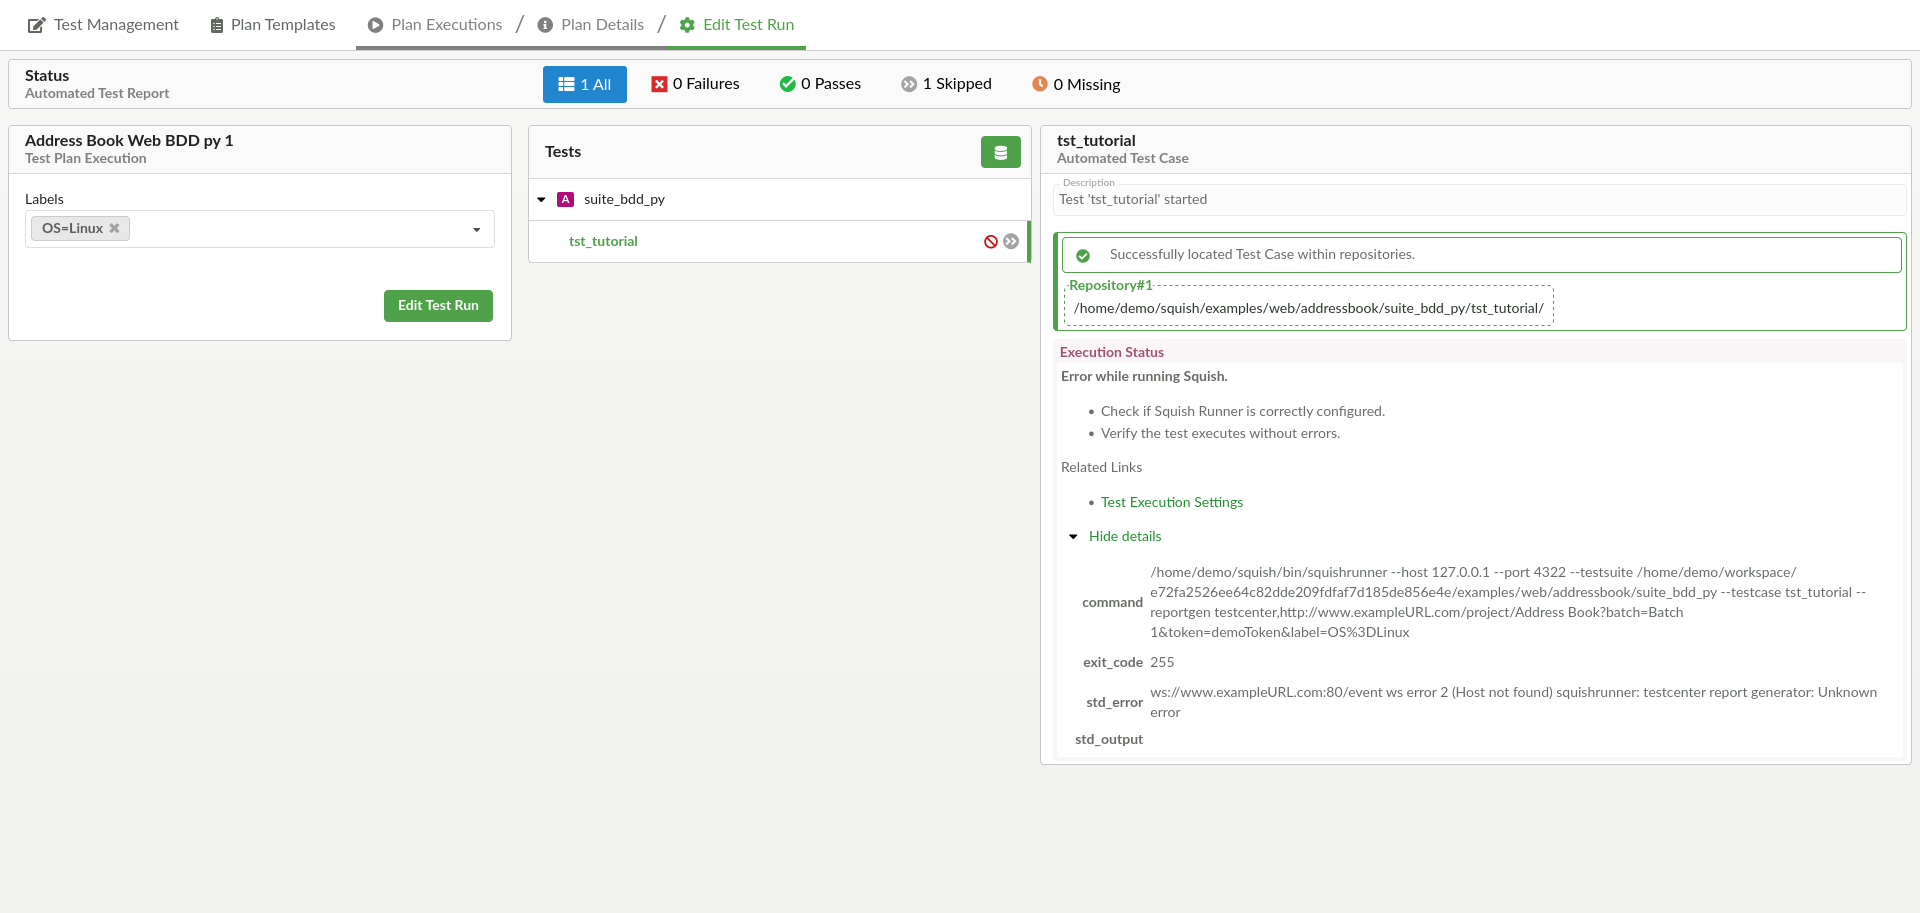
Edit Test Run Execution with error.
Reset Test Runs
When a test run fails, a Reset button  appears next to the failed test run in the tree. Clicking this button will move the test back into an unexecuted state and allows it to be picked up for execution again.
Execution errors
| Errors | Possible solutions |
|---|---|
|
|
|
|
|
|
|
|
|
|
|
|
|
|
|
|
Test Execution Settings
To enable Test Center to execute Squish tests the following settings need to be configured.
Note: Executing tests with Test Center only works for Squish tests, that are setup to work with a remote squishserver.
Squish Settings
For Test Center to be able to execute Squish tests, Squish needs to be installed on the same machine Test Center is running on, and the installation directory needs to be setup within the Test Execution tab of the Global Settings
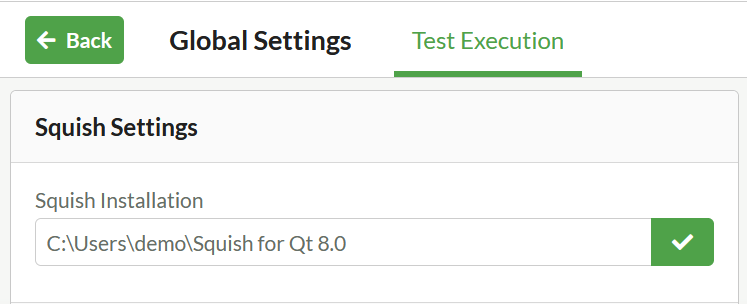
Squish Installation Settings
Squish Server Management
While the test scripts are executed locally on the Test Center instance, the test automation is expected to happen on separate machines, making use of the client server architecture of Squish. That also means the test scripts should be setup to work with a remote squishserver.
The squishserver instances that will be used for the test execution can be managed within the Squish Servers section of the Test Execution tab of the Global Settings.
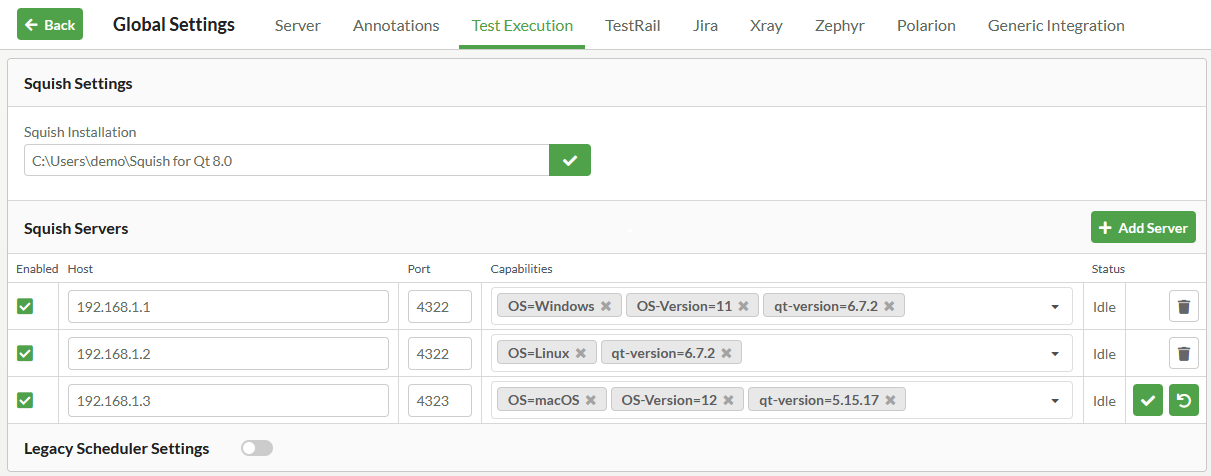
Squish Server Configuration
Adding a Squish server
To add a new server, you can use the + Add Server button in the top right corner of the Squish Servers panel. This will add a new line at the bottom of the server list, where you can fill in the server details. To finalize adding the server, you need to press the confirm button on the right-hand side of the line that was added. If you want to abort adding the server, you can click on the trashcan icon.

Added server entry with confirm and removal button at the right-hand side.
Configuring Squish server
Any change you make to a server from the server list is only saved when you press the confirm button on the right-hand side of the row, that shows up whenever there are unsaved changes to a server entry.
In the Host and Port columns you can configure the server address. With the Enabled column you can temporarily disable a server, which means it will not be selected by Test Center when scheduling test cases for execution.
In the Capabilities column you configure the capabilities of the server, e.g. the operating system or GUI toolkit version that can be tested with the Squish installation of the server.
Capabilities & Server Assignment
When Test Center schedules tests for execution it selects servers based on their capabilities. The labels used for your planned test runs are the same labels used to denote server capabilities. All labels that share a label key, that is assigned to a server as a capability, are considered capabilities.
When Test Center tries to find a free server to execute a planned test run on, it checks all labels that are assigned to the test run and tries to find a server that matches all of the labels that are capabilities. While all capabilities of a test run need to be satisfied for it to be assigned to a specific server, the server could have additional capabilities that are not required by the test run.
As an example, a server might have the capabilities OS=Windows, qt-version=6.7.2 and OS-Version=11 while a matching test run might have the labels OS=Windows, qt-version=6.7.2 and branch=master. As long as branch is never used as a label key for any server capability it will be ignored when trying to find a suitable server. Furthermore, if the OS-Version is not relevant for the selected test run, then it will also be ignored.
Server Status
The Status column either displays Idle when the server is currently not executing any tests, or it displays Executing when there is a test assigned to the server for execution.
© 2024 The Qt Company Ltd.
Documentation contributions included herein are the copyrights of
their respective owners.
The documentation provided herein is licensed under the terms of the GNU Free Documentation License version 1.3 as published by the Free Software Foundation.
Qt and respective logos are trademarks of The Qt Company Ltd. in Finland and/or other countries worldwide. All other trademarks are property
of their respective owners.

