Integration for Xray Cloud Test Management for Jira
This integration connects Test Center with Xray Cloud, a test management application for Jira Cloud that supports both manual and automated testing workflows. The primary purpose of this integration is to establish traceability between your Test Center tests and Xray Cloud test cases, enabling you to associate tests across both systems in a flexible many-to-many relationship. Once tests are linked, you can synchronize test execution results from Test Center to Xray Cloud, providing unified reporting and traceability across your testing ecosystem. To learn more about general traceability features please also have a look at the documentation for the Traceability View
Before configuring this integration, ensure you have an active Xray Cloud instance set up in your Jira Cloud environment. For general information about traceability features and managing test associations, refer to the Traceability View documentation.
Note: This integration is only compatible with Xray Cloud. If you are using Xray Server+DC, please consult the Xray Server Integration documentation instead.
Configuration
Administrators can enable and configure the Xray Cloud Integration through the Global Settings in Test Center. This configuration establishes the necessary connections to both Jira Cloud and Xray Cloud, and defines which Test Center projects correspond to which Xray projects.
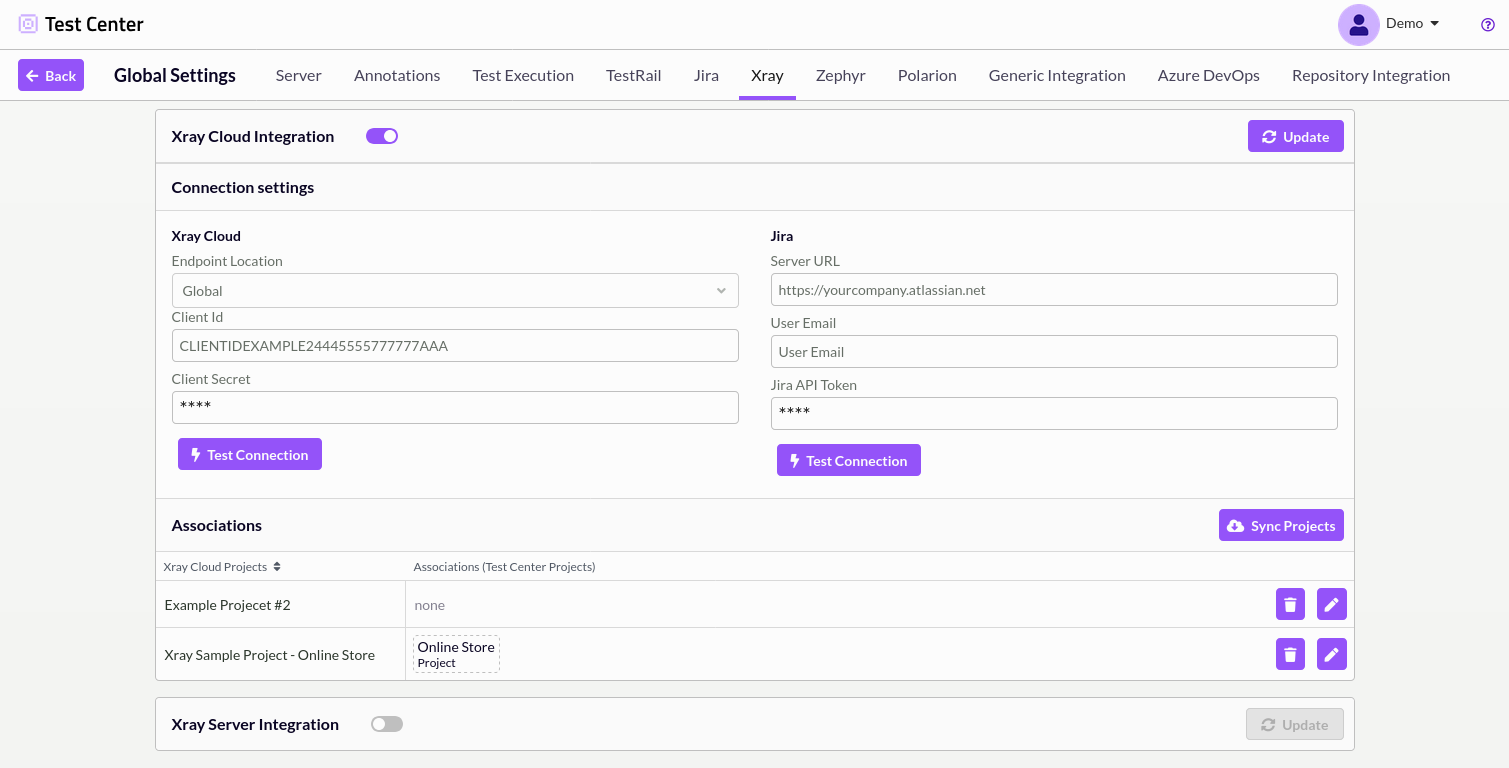
Global settings interface showing Xray and Jira connection parameters and project mapping options
Authentication Setup
The integration requires separate authentication for both Xray Cloud and Jira Cloud. These connections can be configured in any order.
Xray Cloud Authentication
Xray Cloud authentication uses API credentials consisting of a Client ID and Client Secret. To obtain these credentials:
- In Jira, open the Settings menu and select Marketplace Apps.
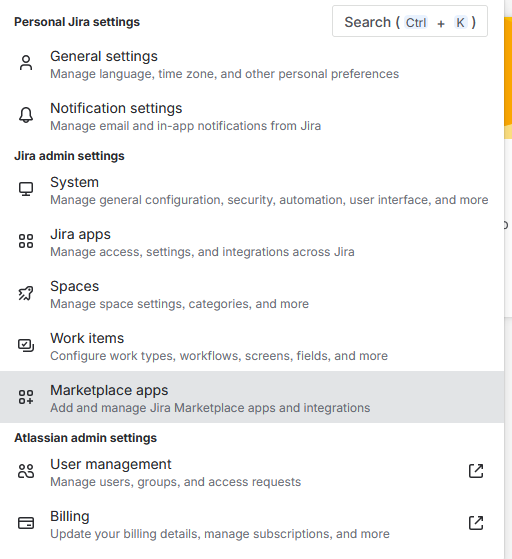
- Navigate to the Xray section and select API Keys.
- Click Create API Key to generate new credentials.
- Copy the generated Client ID and Client Secret values into the corresponding fields in the Test Center Integration Settings.
- Click Update to save the configuration.
Jira Cloud Authentication
Jira Cloud authentication requires three parameters: the Server URL, User Email, and User API Token.
The Server URL should be your Jira Cloud instance URL (e.g., https://yourcompany.atlassian.com).
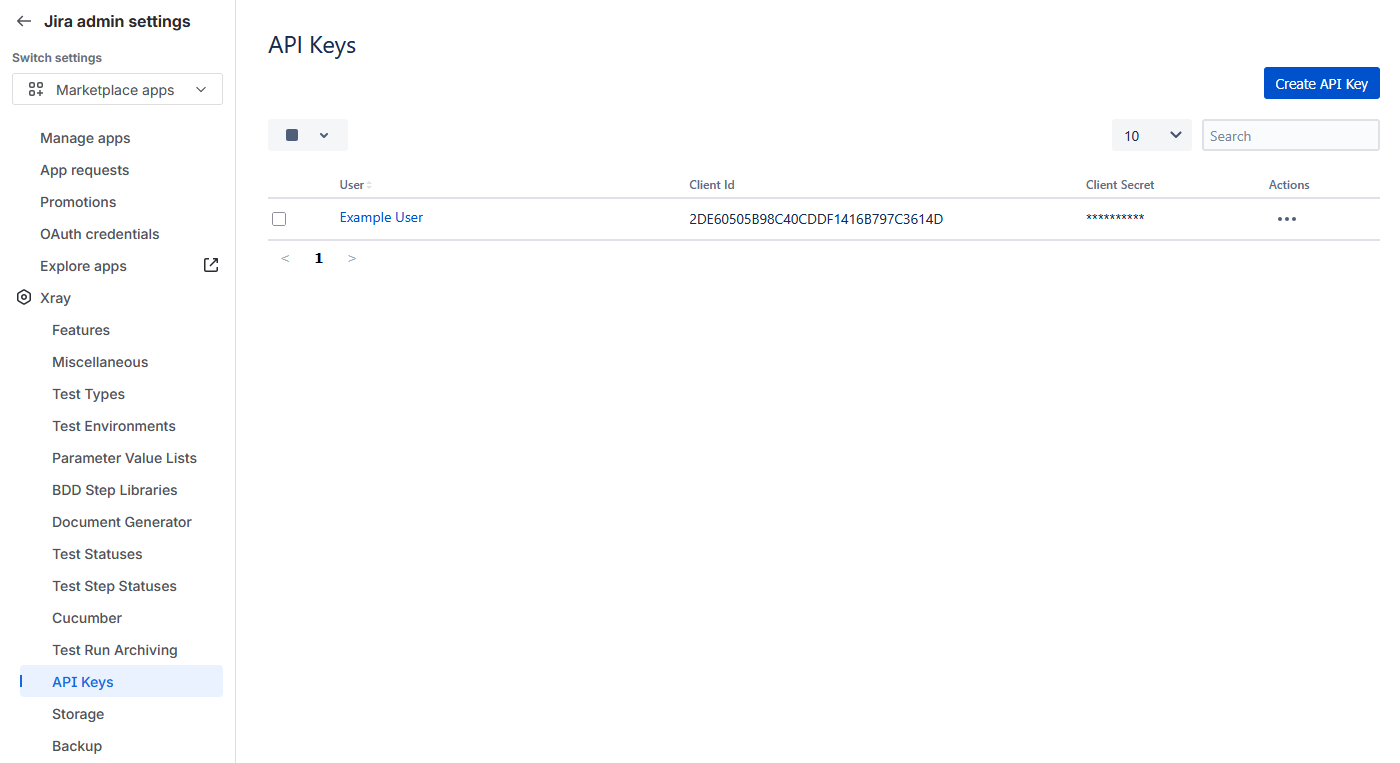
To generate a Jira API token:
- Navigate to your Jira account settings.
- Select the Security tab, then click Create and manage API tokens.
- Click Create API token.
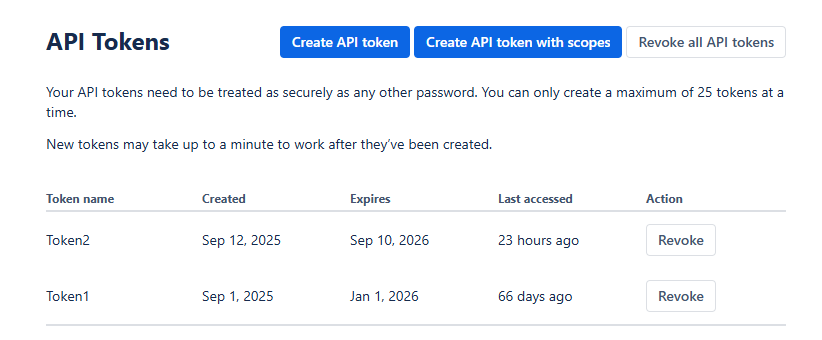
- Provide a label for the token and click Create.
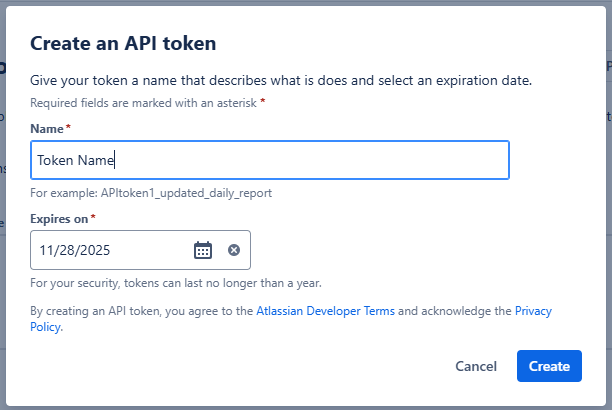
- Copy the generated token and paste it into the JIRA API Token field in Test Center.
- Enter your Jira user email in the User Email field.
- Click Update to save the configuration.
You can verify each connection using the respective Test Connection button. While testing connections is optional, it is useful for troubleshooting configuration issues.
Project Mapping
After establishing connections to both systems, you need to map Xray projects to their corresponding Test Center projects. This mapping enables many-to-many associations, allowing one Test Center project to link with multiple Xray projects and vice versa.
To configure project mappings:
- Click the Sync Projects button to retrieve all available Xray projects from your Jira instance.
- In the Associations list, use the edit button to open the mapping dialog for each project relationship you want to establish.
- Select the appropriate Test Center and Xray project pairs to create the associations.
Once project mappings are configured, users can begin linking individual tests between the systems.
Linking and Synchronizing Tests
Once project mappings are configured, you can establish traceability between individual Xray test cases and Test Center tests. This involves pulling Xray tests into Test Center, creating associations between them, and then pushing test execution results back to Xray Cloud for unified reporting and traceability.
The primary interface for these operations is the Traceability View, accessible from the top navigation bar at any time.
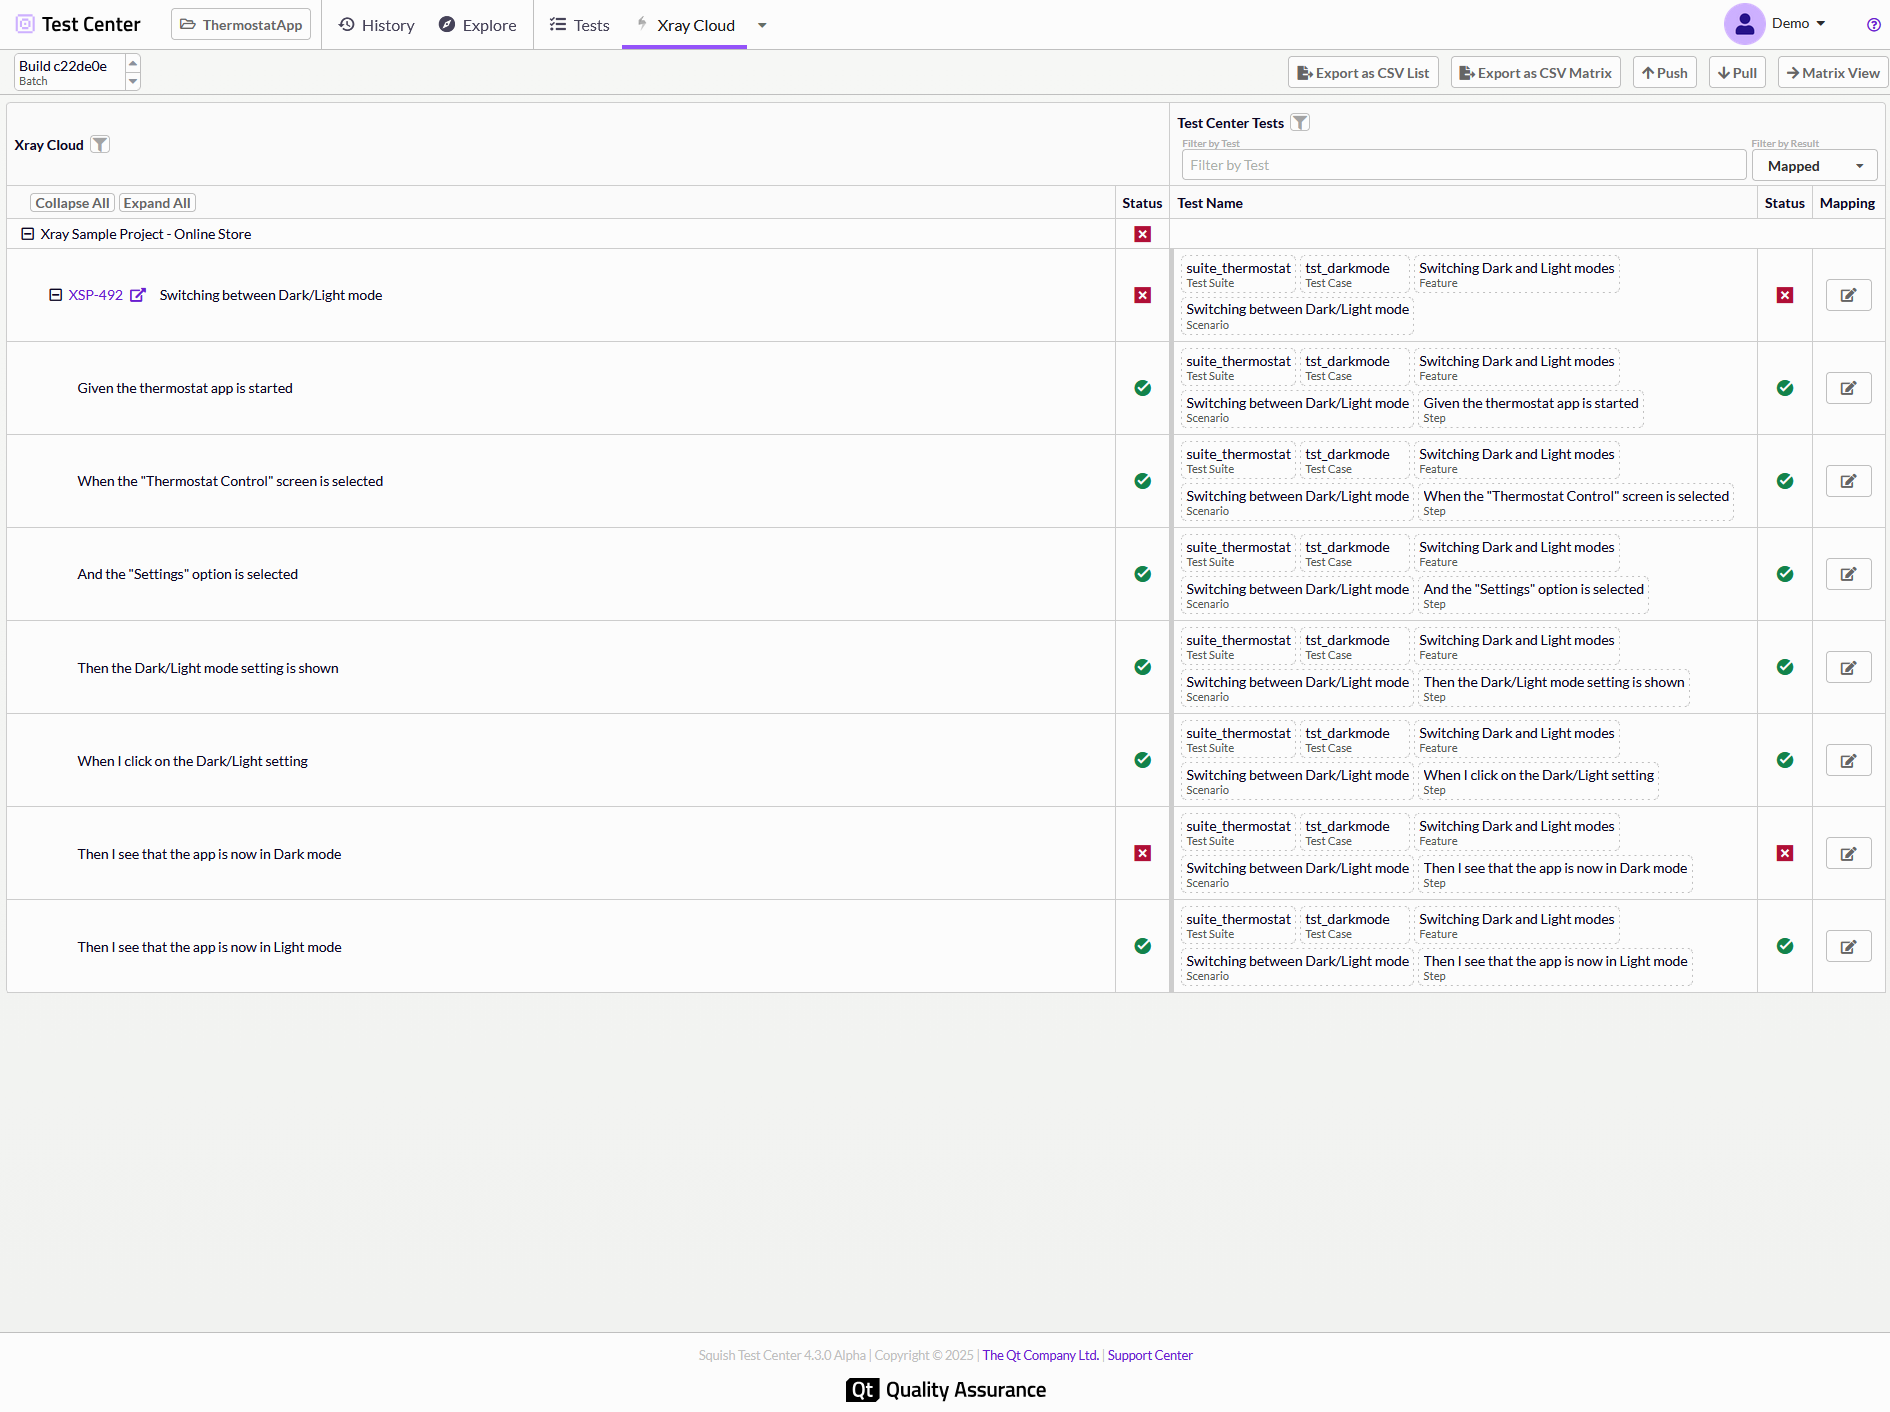
Traceability view displaying Xray tests (left) mapped to Test Center tests (right)
For detailed information about creating and managing test associations, refer to the Traceability View documentation. A Requirements Traceability Matrix is also available to visualize coverage across your test landscape.
Pulling Xray Tests
Pulling retrieves test cases from your mapped Xray projects and stores references to them in Test Center, making them available for association with your Test Center tests. This operation should be performed regularly whenever tests are added to or removed from Xray Cloud.
To pull tests, use the pull function in the Traceability View. You can also automate this process - see Automate Traceability Actions for configuration details.
Pushing Test Results
After executing tests in Test Center and establishing associations with Xray test cases, you can push test execution results back to Xray Cloud. This makes your Test Center results visible in Xray alongside clickable links that allow Xray users to navigate directly to the detailed results in Test Center, including screenshots and verification points.
Results are pushed per batch, where a batch represents all tests executed for a specific revision of your application under test. Select the desired batch using the report label selection at the top of the Traceability View (see Report Label Selection for details).
Push operations are typically performed after all test results have been uploaded to Test Center. This process can also be automated - refer to Automate Traceability Actions for setup instructions.
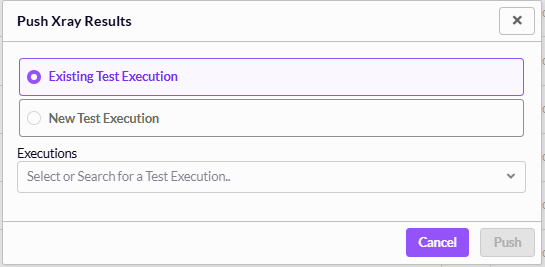
Pushing to Existing or New Test Executions
When pushing results, you can target either an existing Xray Test Execution or create a new one:
Option 1: Push to an existing Test Execution
Create the Test Execution directly in Xray Cloud, then select it from the push dialog in Test Center.
Push dialog configured to update an existing Xray Test Execution
Option 2: Create a new Test Execution
Specify a Test Plan and execution title in the push dialog. Test Center will create a new Test Execution in Xray Cloud and push the results to it.
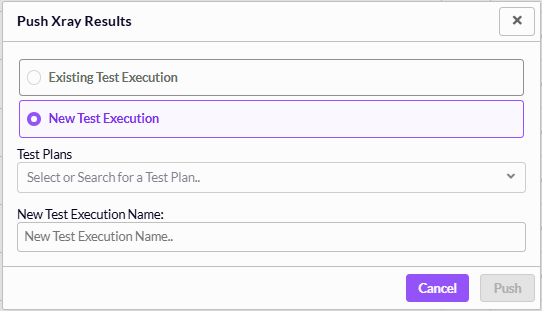
Push dialog configured to create a new Test Execution under a selected Test Plan
Handling Test Iterations
Xray supports data-driven testing through parameterized test steps. When test steps contain parameters, Xray organizes execution results into iterations - one iteration per unique parameter combination.
Test Center automatically handles this by matching report labels to Xray parameter keys. When you upload test results to Test Center with labels applied (see Report Label Selection), each unique combination of label values generates a separate iteration in Xray. Reports with labels that don't match any Xray parameters are aggregated under an "undefined" iteration, while extra labels that don't correspond to parameters are ignored.
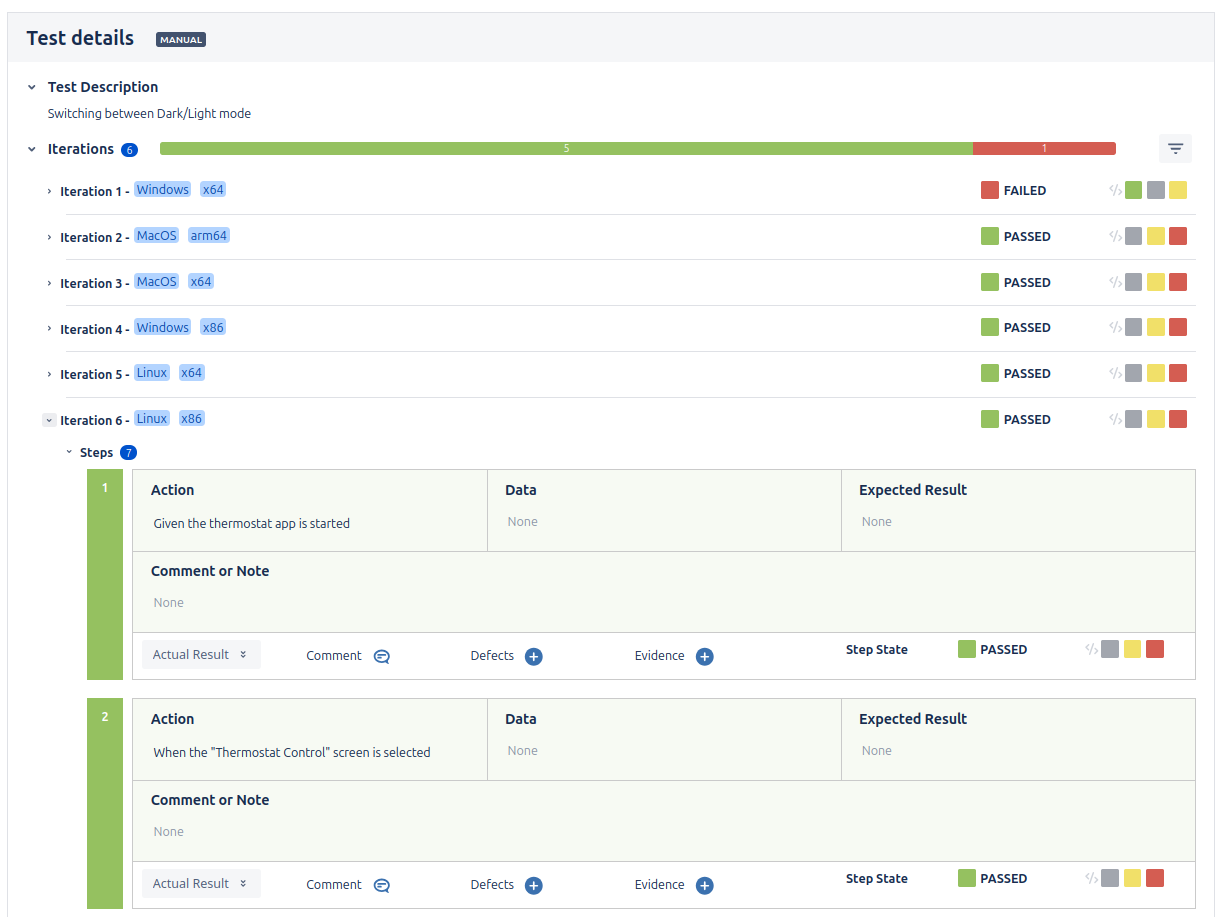
Xray Test Execution showing multiple iterations created from Test Center results

Test Center reports with label combinations that generated the iterations above
Creating Xray Tests from Test Center
In addition to linking existing tests, the integration allows you to create new Xray test cases directly from Test Center. The key advantage of this approach is that tests created this way are automatically mapped in the Traceability View, eliminating the need for manual association and streamlining your workflow.
You can create Xray tests from the Explore view by selecting Create Xray Cloud Test Item from the Actions dropdown.
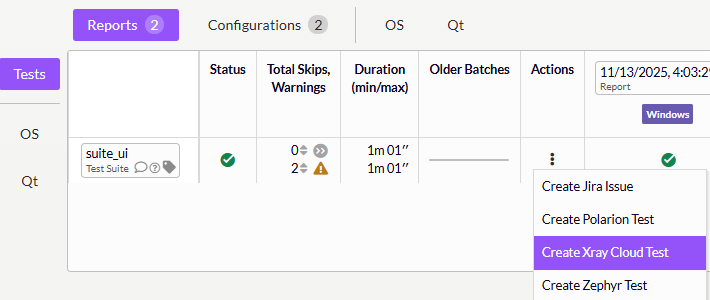
Actions dropdown showing the Create Xray Cloud Test Item option
Test Creation Dialog
The test creation dialog provides several configuration options:
- Project: Select the Xray project where the test should be created (only projects configured in your project mappings are available)
- Title: Specify a name for the new Xray test case
- Description: Provide additional context or details for the test
- Create test steps automatically: When enabled, this option converts the structure of your Test Center test into manual test steps in Xray
The automatic test step creation is particularly useful for Scenarios and Test Cases that contain structured steps or sections. For example, when creating an Xray test from a Scenario result, the Scenario itself becomes the test case in Xray, and each of its steps is automatically created as a manual test step.
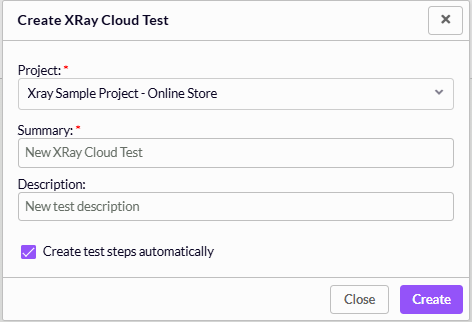
Test creation dialog with project selection and automatic step creation option
Accessing the Created Test
After successful creation, a notification appears with a direct link to the newly created test item in Xray Cloud, allowing you to immediately navigate to it and verify the results.

Success notification with link to the created Xray test
The created test is also immediately available in the Traceability View with its mapping already established, ready for result synchronization.
© 2024 The Qt Company Ltd.
Documentation contributions included herein are the copyrights of
their respective owners.
The documentation provided herein is licensed under the terms of the GNU Free Documentation License version 1.3 as published by the Free Software Foundation.
Qt and respective logos are trademarks of The Qt Company Ltd. in Finland and/or other countries worldwide. All other trademarks are property
of their respective owners.
