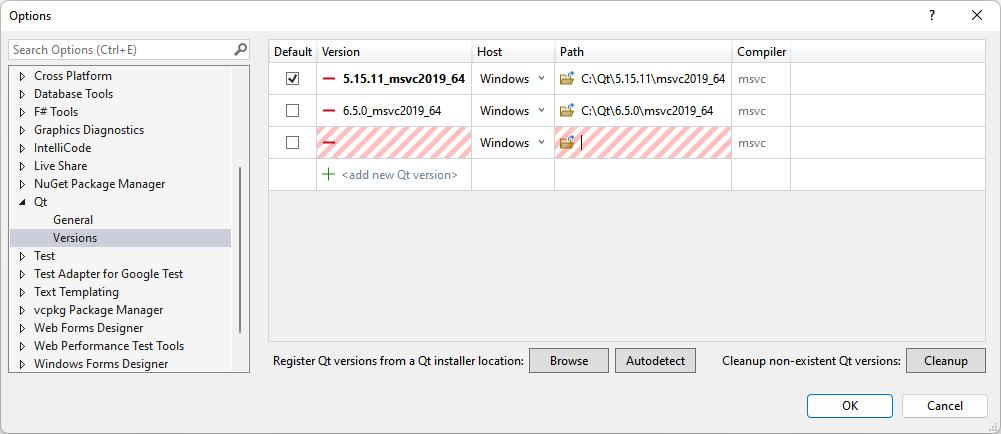
Add Qt versions
You can develop with multiple Qt versions in parallel, such as Qt 5.15.11 and Qt 6.8.0. You have to add at least one Qt version that was built for MSVC to be able to create Qt projects.
Detect installed Qt versions
Qt VS Tools can automatically detect Qt versions that you install with Qt Online Installer. To automatically detect installed Qt versions, select Autodetect.
To detect installed Qt versions from a folder, select Import and locate the Qt installation folder.
Remove Qt versions
To remove entries for Qt versions that you have uninstalled, select Cleanup.
To remove a particular Qt version, select it in the list and then select Remove.
You can remove the default Qt version only if you make another version the default or if it is the only Qt version in the list.
Set default Qt version
To set the Qt version to use by default when creating new projects or importing a project from a .pro file, select it in the list and then select Default.
Turn off notifications about new Qt versions
To turn off notifications about new Qt versions being available:
- Go to Extensions > Qt VS Tools > Options > Qt > General > Notifications.
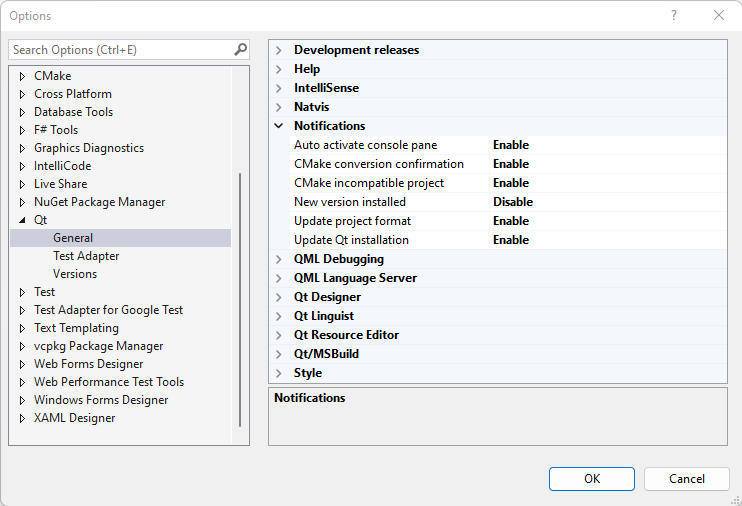
- In Update Qt installation, select Disable.
Add other Qt versions
To add Qt versions that you installed from other sources than Qt Online Installer or built yourself:
- Go to Extensions > Qt VS Tools > Qt Versions.
- Select Add.
- In Name, enter a name for the Qt version. If you add the location of Qt first, this field is filled automatically.
- In Location, enter the path to the qmake.exe for the Qt version. For example:
C:\Qt\6.8.0\msvc2022_64\bin\qmake.exe. - In Host, select Windows, unless you want to cross-compile the application for an embedded Linux device. Compiler shows the compiler type.
- Select OK.
See also Select Qt versions for a project, Cross-compile, and Load Qt projects.
© 2026 The Qt Company Ltd. Documentation contributions included herein are the copyrights of their respective owners. The documentation provided herein is licensed under the terms of the GNU Free Documentation License version 1.3 as published by the Free Software Foundation. Qt and respective logos are trademarks of The Qt Company Ltd in Finland and/or other countries worldwide. All other trademarks are property of their respective owners.
