Creating the glow and the bloom effects
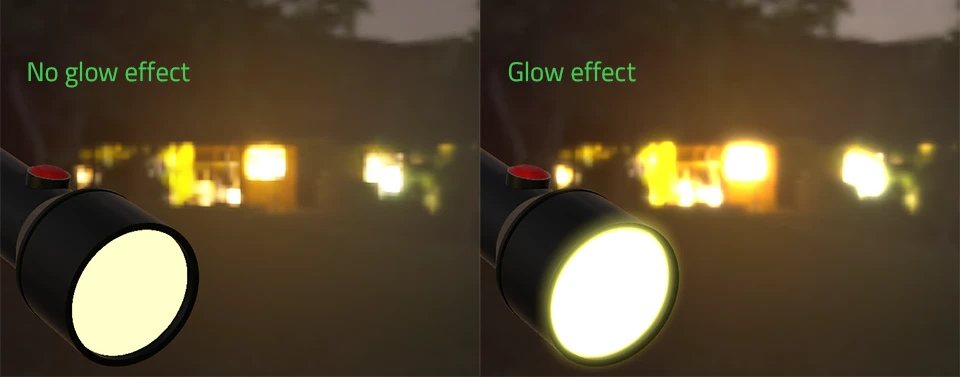
In Qt Design Studio, you can add a glow and a bloom effect to your 3D scene using the ExtendedSceneEnvironment component (available in Qt 6.5 and later). With this effect, you can, for example, create glow around illuminated areas (such as material or skyboxes when using image-based lighting) or add ambient light. Using the glow effect is one way to make your scene more realistic.
Creating a project with ExtendedSceneEnvironment
To create a project with ExtendedSceneEnvironment as the default scene environment, use the 3D Extended project preset.
For more information about creating projects, see Creating projects.
Adding ExtendedSceneEnvironment to an Existing Project
To add ExtendedSceneEnvironment to an existing project, drag the ExtendedSceneEnvironment component from Components to the 2D or Navigator view.

Enabling the Glow effect
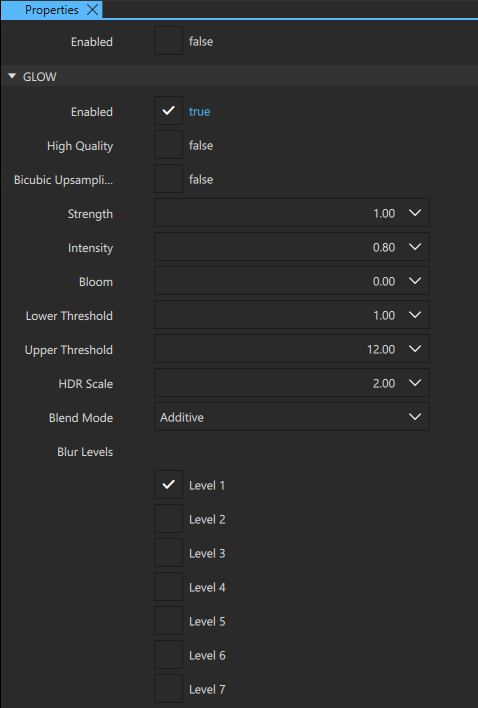
To enable the glow effect, select SceneEnvironment in the Navigator view and then, in the Properties view, select Enabled in the Glow section.
Note: When setting up or experimenting with the glow effect, use the Replace blend mode to see the effect more clearly.
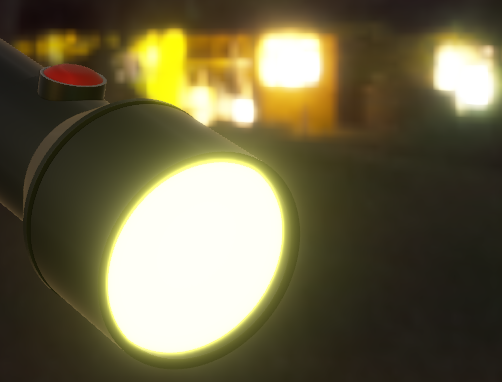
Flashlight Example project
The flashlight example used in this documentation is available from the Examples section of the Qt Design Studio Welcome page.
Use the project to experiment with the Glow properties. When you run the project, you can control most properties with UI controls. Another way to experiment with properties is to change them directly in the Properties view in Qt Design Studio and see the changes live in the 2D view.

Controls
| Description | Control |
|---|---|
| Rotate the camera | Left mouse button |
| Move the camera | Ctrl + left mouse button |
| Rotate the flashlight | Right mouse button |
Light sources
In the scene, there are the following light sources (affected by the glow and bloom effects):
- A flashlight.
- A computer screen.
- Two candle lights.
- A scene environment (HDR image).
Basic properties
Usually, the best way to achieve a realistic glow effect in your 3D scene is to adjust the Strength, Intensity, and Bloom properties together.
Strength
Sets the strength of the glow. If this property has a 0 value, the glow effect is disabled. The strength is a scale factor (multiplier) applied per level. This means that with more levels enabled in Blur Levels, a larger strength value has a more pronounced effect.
Intensity
Sets the intensity of the glow. The intensity is effectively a scale factor (multiplier) for the accumulated glow color (including all levels).
Bloom
Sets the overall illumination of the whole scene.
Lower Threshold
Sets the minimum level of brightness for the glow.
Upper Threshold
Sets the maximum level of brightness for the glow.
HDR Scale
Sets how much the glow bleeds (or extends) beyond the borders of bright areas in the scene. The range for this property is 0-8. As seen in the example images below, a high value gives a very modest bleed, while a low number results in a much more visible bleed.
| HDR Scale | Example |
|---|---|
| Bloom disabled |
|
| 8 |
|
| 1 |
|


Blur Levels
Sets which of the blur passes to apply to the glow effect.
The higher the level is, the more the glow effect spreads around the light source, and the softer the glow is.
As seen in the example image below, lower blur levels produce an intense glow within a limited area, while higher blur levels produce a softer glow in a more extensive area. Combine blur levels to get the desired result.
| Blur level | Example |
|---|---|
| 1, 2, 3 |
|
| 5, 6, 7 |
|
| 1, 2, 3, 4, 5, 6, 7 |
|


Blend modes
The following blend modes are available:
| Blend mode | Description | Example |
|---|---|---|
| Additive | Often recommended for outdoor scenes with a visible sky or sun. |
|
| Screen | Similar to Additive, but the result is less bright. |
|
| SoftLight | Often recommended for in-door environments. |
|
| Replace | Does not perform any blending, but displays only the contribution the glow effect would blend with the actual content. In practice, this is useful for experimenting and troubleshooting when setting up the glow effect. |
|


Improvement properties
The High Quality and Bicubical Upsampling properties improve the quality of the glow blur by upsampling. Using these properties may slow down the performance of the application. You can also try using the Dithering property in the sceneEnvironment instead. In some cases, Dithering renders a similar result but at a lower cost.
High Quality
Increases the samples used for the glow when downsampling to improve the quality of the glow effect.
Bicubical Upsampling
Reduces the aliasing artifacts and boxing in the glow effect.
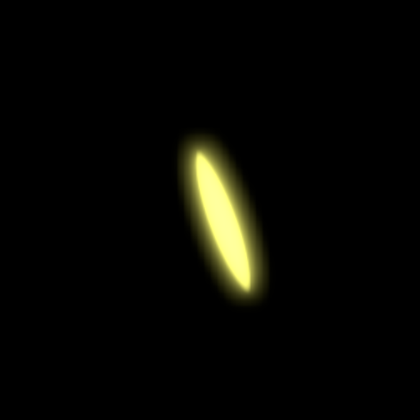
Examples
These examples show a zoomed-in image of each effect:
| Effect | Example |
|---|---|
| No effect |
|
| High Quality |
|
| Bicubic Upsampling |
|


Available under certain Qt licenses.
Find out more.
