Installing from Binary Packages
Getting Packages
If you do not yet have a license, you can start an evaluation of Squish.
Binary Packages are available for download from the QA Software Portal.
In most cases, you can install Squish from a binary package, and then configure to make Squish ready for use. Binary packages are available for Linux, macOS, and Microsoft Windows. Different versions of each Squish edition are provided to ensure the tightest possible integration between Squish, the operating system, and the applications or web sites you want to test.
Minimum System Requirements for Binary Packages
Binary packages contain the Squish IDE and the Squish Tools (squishrunner, squishserver, and others). They have varying minimum system requirements.
In the case of Squish for Qt, the Squish Tools have the same requirements as their corresponding Qt versions. For example, the latest release of Qt has these requirements.
Minimum System Requirements for Squish IDE
The Squish IDE can be installed on the following platforms:
- Microsoft Windows 7 SP1 or newer 64-bit versions
- GNU/Linux
- 64-bit CentOS 7.5 or newer 64-bit versions
- 64-bit Red Hat Enterprise 7.5 or newer 64-bit versions
- 64-bit SUSE Linux Enterprise Server 15 or newer 64-bit versions
- other 64-bit distributions which provide GTK 3.22 or newer
- Apple macOS 12 Monterey or newer
Note: Squish binary packages can be still installed on older platforms, but the Squish IDE will not be available. For those requirements, see the section below.
Minimum System Requirements for Squish Tools
The Squish command-line Tools (squishrunner, squishserver, and others) can be installed on the following platforms:
- Microsoft Windows 7 SP1 or newer
- GNU/Linux
- CentOS 7 or newer (x86, x86_64)
- Debian 9 or newer (x86, x86_64)
- Ubuntu 18.04 or newer (x86_64)
- Debian 11 or newer (aarch64)
- other distributions which provide glibc 2.17 and libstdc++ 4.8 or newer
- Package dependencies:
- CentOS:
- fontconfig freetype libICE libSM libX11 libXdamage libXext libXfixes libXft libXrandr libXtst libstdc++ libxcb libxkbcommon libxkbcommon-x11 xcb-util-image xcb-util-keysyms xcb-util-renderutil xcb-util-wm zlib
- libwayland-client (for AUTs on Wayland)
- Debian:
- libfontconfig1 libfreetype6 libice6 libsm6 libstdc++6 libx11-6 libx11-xcb1 libxcb-icccm4 libxcb-image0 libxcb-keysyms1 libxcb-randr0 libxcb-render-util0 libxcb-render0 libxcb-shape0 libxcb-shm0 libxcb-sync1 libxcb-xfixes0 libxcb-xinerama0 libxcb-xkb1 libxcb1 libxdamage1 libxext6 libxfixes3 libxft2 libxkbcommon-x11-0 libxkbcommon0 libxrandr2 libxtst6 zlib1g
- libwayland-client0 (for AUTs on Wayland)
- CentOS:
- Apple macOS 12 Monterey or newer
Note: Squish Tools (squishrunner, squishserver, and others) can also run on other platforms (like embedded Linux, or older versions of the platforms above), but they have to be built from sources, and remote testing has to be used.
Note: When using a Linux distribution that relies on glibc 2.38 or newer, it is necessary to install the libxcrypt-compat package.
Built-in scripting languages versions in a Squish Package
Squish comes packaged with multiple available scripting languages:
- JavaScript: ECMAScript 2015
- Perl: 5.22
- Python: 3.10.6 (may be switched to different external Python using squishconfig tool)
- Ruby: 2.2
- Tcl: 8.6
Choosing the Correct Squish Package
The binary Squish packages are available in the QA Software Portal after choosing Squish as a product.
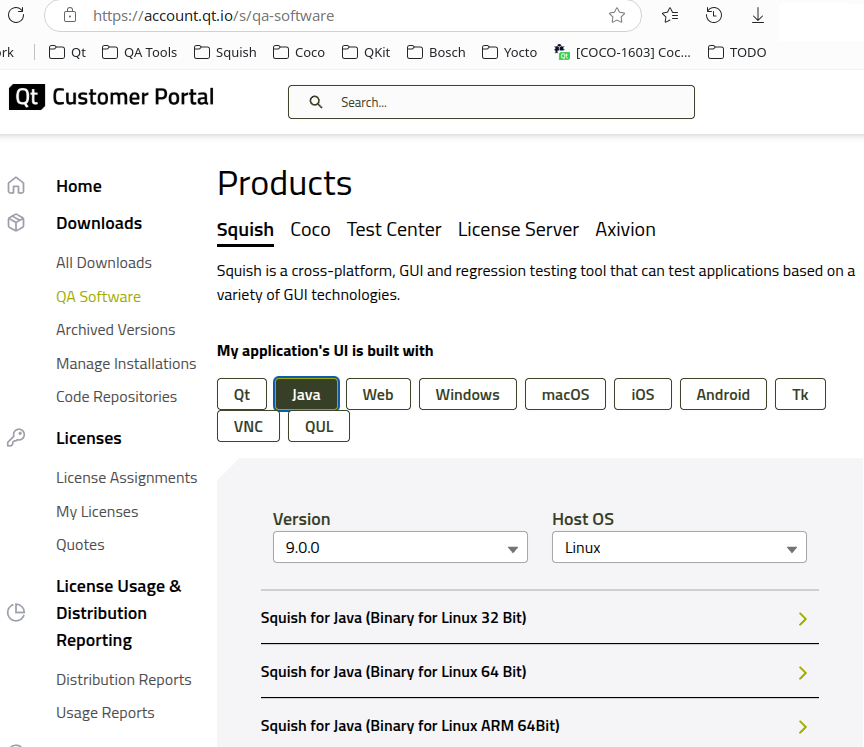
To find out which package to download, you need to know which toolkit is used to build the applications you are going to test. The toolkit could be: Qt, Java, native Windows (e.g. MFC, WinForms or WPF), macOS (Cocoa or SwiftUI), Web, and so on. You also need to know which operating system you are going to use to test the applications: Linux, macOS, or Microsoft Windows. For easier search for a suitable binary package, Qt Customer Portal has a set of helpful filters that can be used to display only packages that match the given host operating system or the given Squish edition (toolkit).
If you will be testing Qt applications, you need to collect some additional technical information in order to choose the correct package:
- Which version of Qt is used by the application you want to test?
- Which compiler (and which version of the compiler) was used to compile the Qt library and the application you want to test?
If you don't have this information, you'll need to ask one of the application's developers. Once you know the operating system, Squish edition, toolkit version, and the compiler name and version, you can identify the correct Squish package as follows: Every Squish package name is of the form squish-<squishVersion>-toolkit<toolkitVersion>-<platform>-<compiler> and ending with .exe (on Windows), .run (on Linux) or .dmg (on macOS). Some package names don't specify the <toolkitVersion>, in which case the package can be used with any version of the toolkit; others have an x in the toolkit version, in which case they can be used with a version of the toolkit that has any digit in that position—so qt62x means any Qt 6.2 version, Qt 6.2.0, Qt 6.2.1, and so on. Some packages don't specify the <compiler>, in which case they can be used with any compiler that runs on the platform. Some examples are shown in the table below.
Squish packages for macOS machines—and that are processor-dependent—embed a processor identifier in their name, e.g., x86_64 for 64-bit Intel processors. Similarly, some Java packages specify whether they are for 32-bit or 64-bit Intel Windows machines (e.g., using java-win32 or java-win64 in their names). Yet in some cases the architecture of the machine doesn't matter. For example, Squish for Windows (i.e., for applications using the native MFC or .NET toolkit) is designed to work with all Windows compilers and with both Intel 32-bit and 64-bit versions of Windows—so in this case the package names just have the Squish version, e.g., squish-8.0.0-windows.exe.
| Example Package Name | Description |
|---|---|
squish-8.0.0-qt65x-linux64.run | Squish 8.0.0 for 64-bit AUTs running on Linux and built with Qt 6.5.x and using any compiler. |
squish-8.0.0-qt59x-win32-msvc14.exe | Squish 8.0.0 for 32-bit AUTs running on Windows and built with Qt 5.9.x using the MSVC 14 (VS 2015) compiler. |
squish-8.0.0-qt515x-win64-msvc141.exe | Squish 8.0.0 for 64-bit AUTs running on Windows and built with Qt 5.15.x using the MSVC 14.1 (VS 2017) compiler. |
squish-8.0.0-qt515x-macx86_64.dmg | Squish 8.0.0 for AUTs running on 64-bit Intel macOS machines and built with Qt 5.15.x using the standard compiler. |
squish-8.0.0-web-windows.exe | Squish 8.0.0 for Web using any browser on Windows. |
squish-8.0.0-web-linux64.run | Squish 8.0.0 for Web using a 64-bit browser on Linux. |
squish-8.0.0-web-mac.dmg | Squish 8.0.0 for Web using any browser on macOS. |
squish-8.0.0-java-win32.exe | Squish 8.0.0 for Java—all 32-bit versions from 1.4 using AWT/Swing or SWT—running on Windows. |
squish-8.0.0-java-win64.exe | Squish 8.0.0 for Java—all 64-bit versions from 1.4 using AWT/Swing or SWT—running on Windows. |
If you cannot find a Squish binary package in Qt Customer Portal that matches your platform, it is best that you build Squish from source. This will ensure that Squish integrates correctly with your local software configuration. Building Squish from source is described in Installing Squish for Qt from Desktop Source Packages.
Configuring the Package
After you have decided which Squish binary package you need, download it from Qt Customer Portal onto your computer, and execute it.
Configuring on Linux
On Linux, you need to make the .run file which you downloaded executable first. Popular desktop environments allow this by right-clicking the file and enabling the Execute permission. You can however also make the installer executable on the command line by executing:
$ chmod a+x packagename
Configuring on Windows, Linux and macOS
The installation program will guide you through the configuration process by presenting multiple pages.
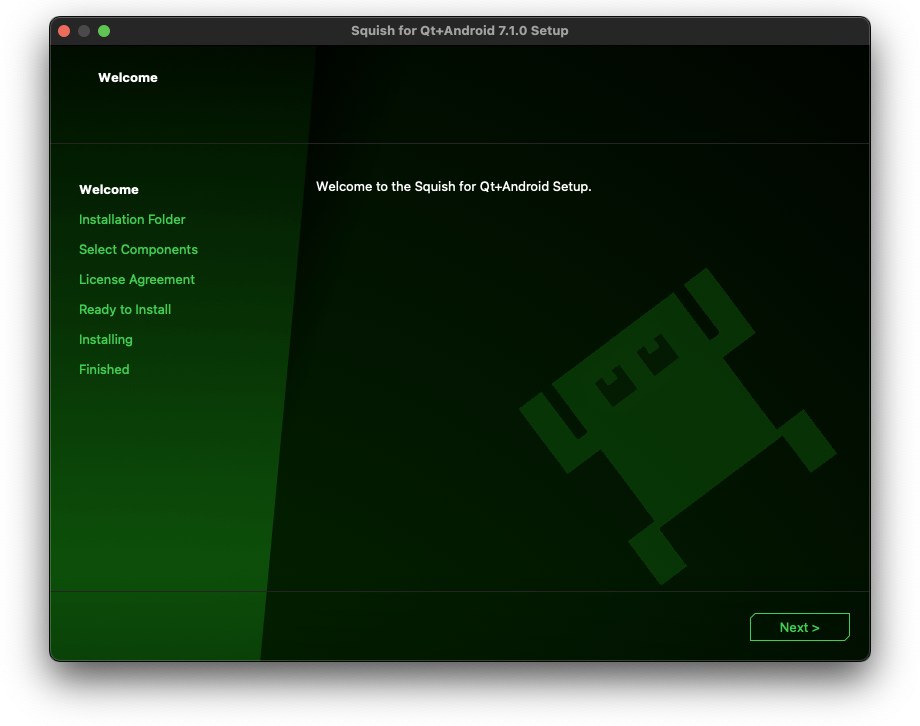
The installation program is shown running in the screenshot above (and in several screenshots that follow). However, the list of configuration steps varies depending on which edition of Squish you are installing, so don't be concerned if one or more of the configuration pages mentioned below is not presented to you, or if additional pages are shown.
To change a setting you made during the configuration, use the Back button to go back to the relevant page, change the configuration setting, and then move forward again using the Next button.
Entering a License Key
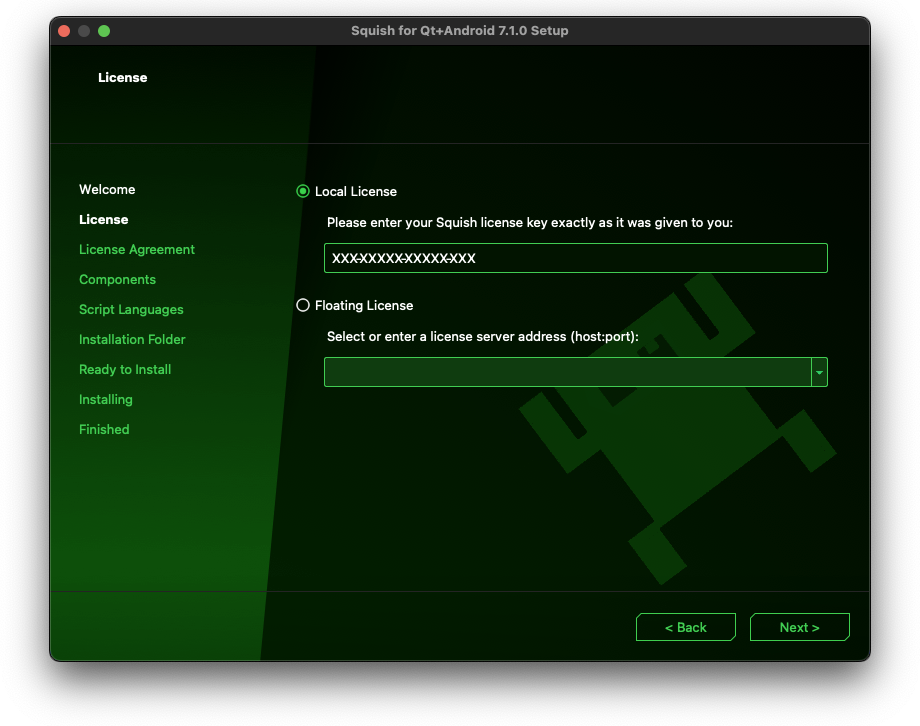
After acknowledging the welcome page by pressing the Next button at the bottom of the setup program's window, the next page will request you to enter either:
- Squish license key
- Squish Floating License Server (FLS) host:port
- Qt License Server (QLS) URL
If you have a 19-character license key to enter, this section is for you. If you want to enter a hostname:port of a Floating License Server, see Entering a Floating License Server Address.
If you already have a previous Squish installation on your computer—perhaps an evaluation version—or if you have already copied the license file to your HOME directory, and renamed it to start with a period, the license key will be shown in the input field. If there is no license shown, or if you want to use a different one, enter your license here exactly as it appears in the License Details section of your Qt Customer Portal, including any dashes.
License File Location
| Windows | %HOMEDRIVE%%HOMEPATH%\.squish-license |
| Linux/Unix/macOS | $HOME/.squish-license |
To use a license key file stored somewhere else, set the SQUISH_LICENSEKEY_DIR environment variable to the desired location. See Environment Variables.
Click the Next button to advance to the next step in the configuration process. If there are any problems with the license (for example, if it has expired or you mistyped it) then a message box will be shown, explaining the problem. You can then have another try.
Entering a Floating License Server (FLS) Address
Select the corresponding section to use a floating license with Squish. The installer will try to discover license servers on the network and populate the drop down menu with them. If the license server you plan to use is not listed, you may enter a server address manually in the form of (hostname_or_IP_address:port). When a valid server address is selected the Next button will be enabled.
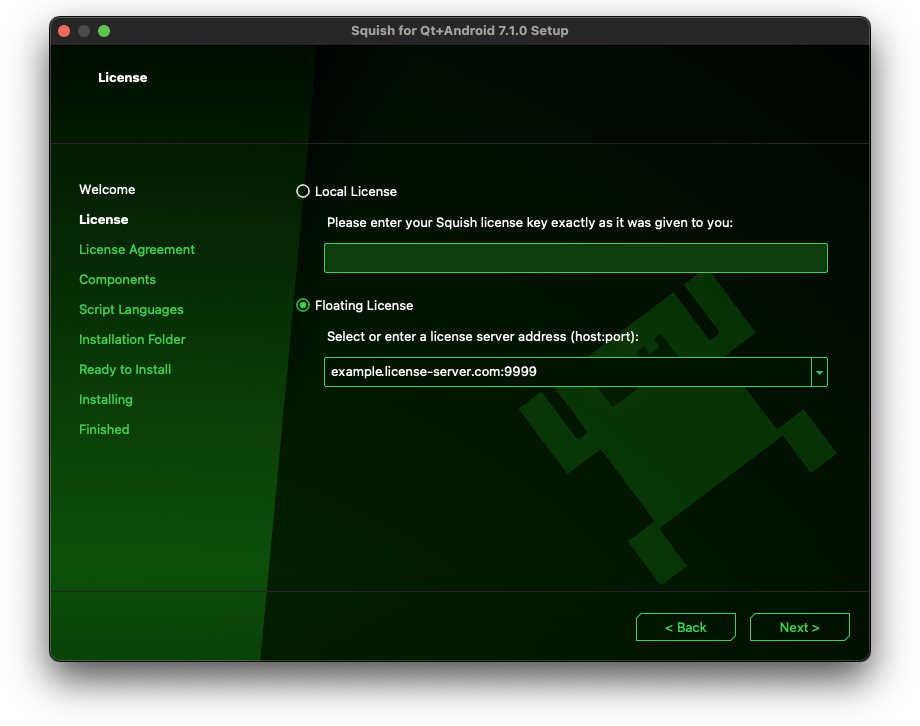
Click Next to advance to the next step in the configuration process. If there are any problems with the license server or its license (for example, the server is not reachable or its license doesn't include the required Squish editions) then a message box will be shown, explaining the problem; you can then have another try.
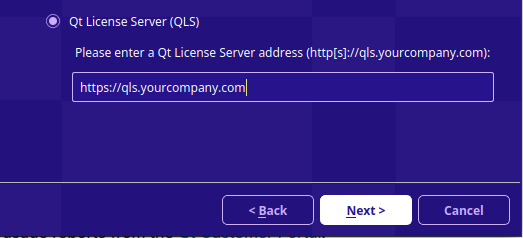
Entering a Qt License Service (QLS) URL
If you have a QLS setup, you can enter the URL of the server here.
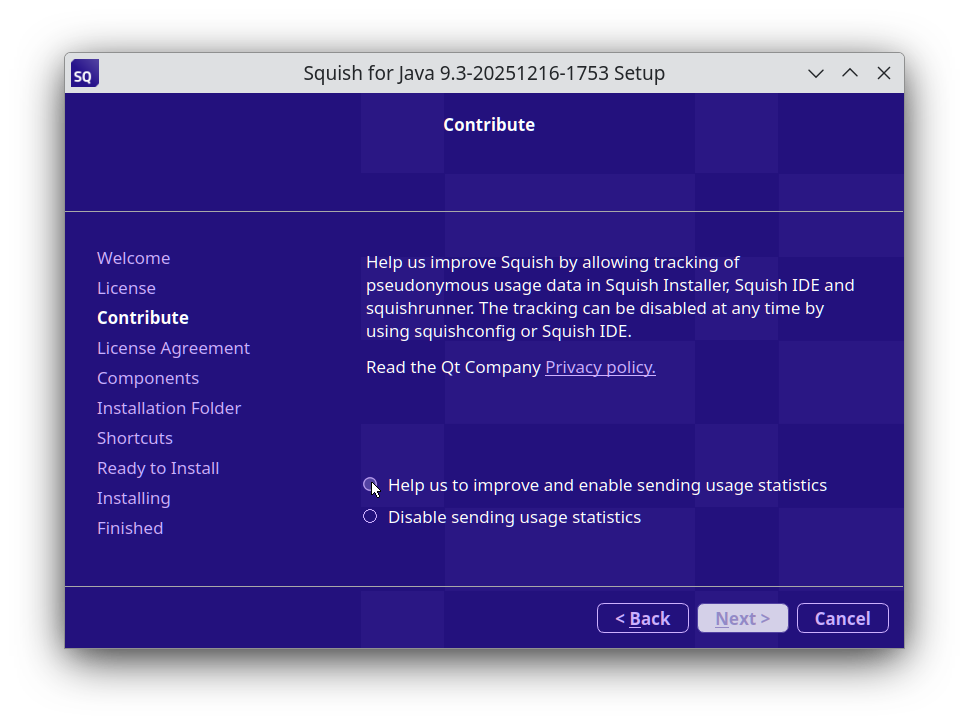
After that, you will see another dialog asking you whether you want pseudonymous usage statistics (telemetry data) to be sent to the license server. To find out more about telemetry, what usage data we collect and why, read Usage Statistics Collection chapter.
Acknowledging the Terms of Use
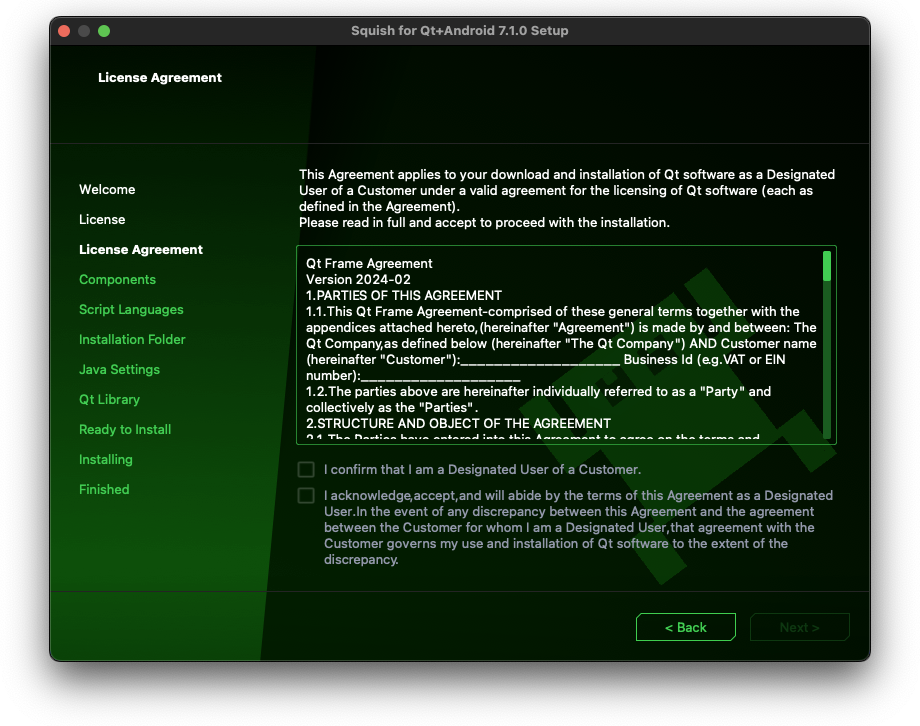
After entering your license key or server address, you will be presented with the license under which you are permitted to use your copy of Squish. Read the entire license text carefully before proceeding. Doing so will enable the two checkboxes located below the license text agreement. Selecting the checkboxes indicates your agreement or disagreement with the terms of the license agreement. When all terms are checked, you are allowed to proceed with the installation process by clicking the {Next} button. If you disagree, then you cannot install or use Squish so you should click the Cancel button (or close the window) to terminate the installation.
Component Selection
In this step, the installation of Squish can be customized by selecting optional components.
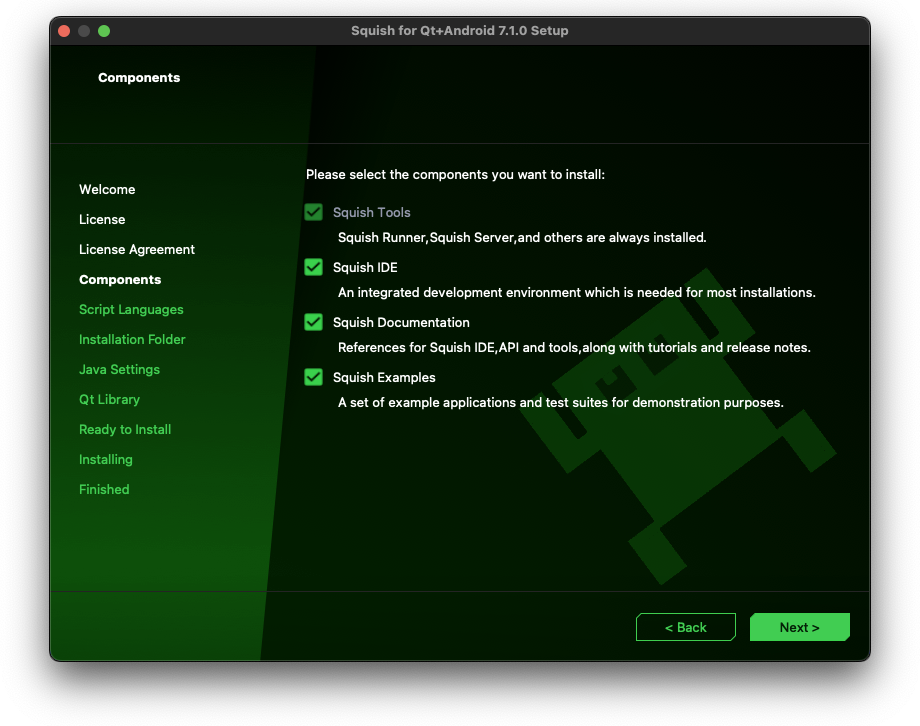
The basic Squish Tools (such as squishrunner or squishserver) are mandatory and thus are always selected. However, other components are optional:
- Squish IDE: You can choose to not install the Squish IDE in order to save disk space. This can be useful in case the Squish installation is only meant to be used for automatic (e.g. nightly or CI-driven) test execution but not for test development.
- Squish Documentation: This component contains the offline documentation for Squish IDE, API reference, tutorials and release notes.
- Squish Examples: This component includes sample applications and test suites. By deselecting it, some disk space will be saved. Nevertheless, it is advisable for standard installations.
Script Languages
In this step, the script languages to use for test scripts can be configured. Furthermore, in case the Squish package contains multiple versions of any given language, this page permits selecting the version to use for executing tests. Note that these settings can also be reconfigured later on by running the squishconfig program.
This page is not displayed if a Squish package contains only a single version of each script language.
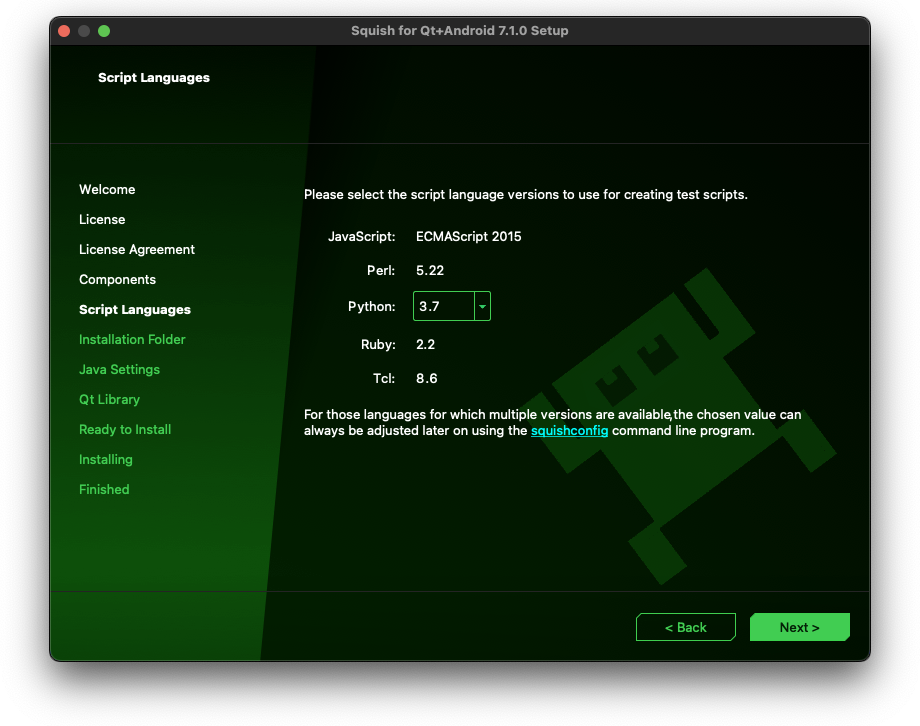
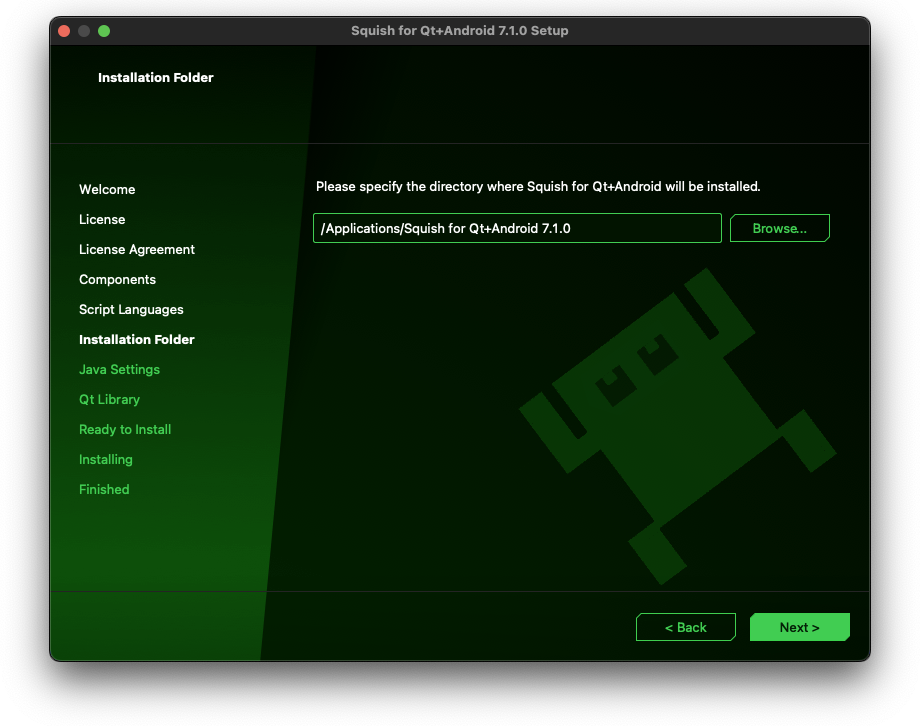
Installation Folder
This step decides into which location on your system the Squish package will be uncompressed.
Path to the Qt Library
This step is only necessary if you are configuring a Squish package set up for testing Qt applications on macOS, and if your license key entitles you to test Qt applications. If either of these conditions doesn't apply, this configuration page will not appear, in which case you can safely skip to the next section and continue from there.
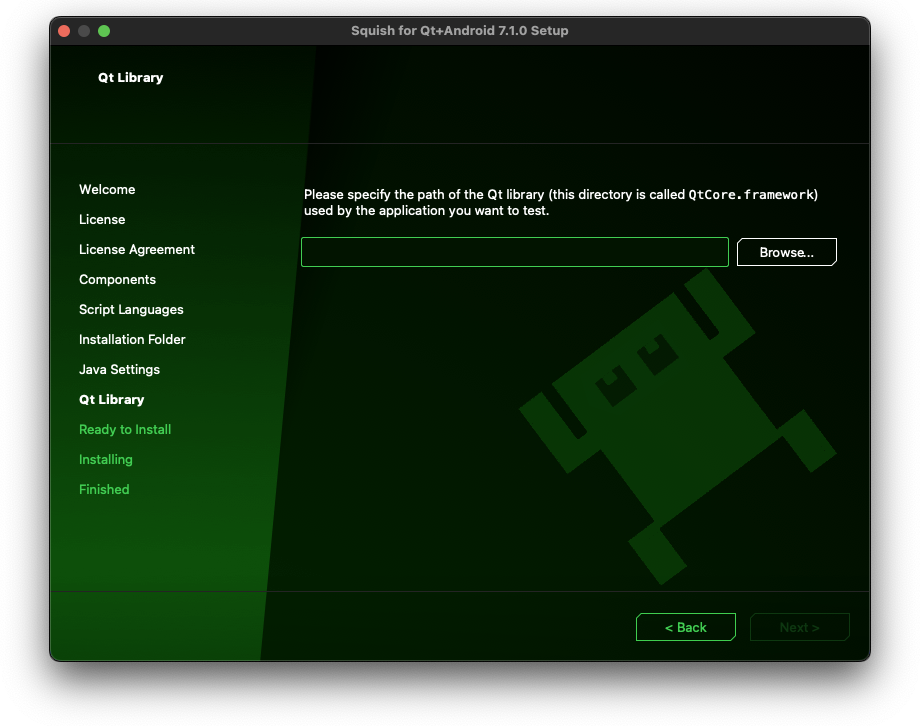
Most Qt applications on the macOS contain Qt libraries in the application bundle. If this is the case for your AUT, then use the Finder to navigate to the AUT, right click on it and say Show Package Contents, then drill down to Contents/Frameworks to find QtCore.framework. To copy that path to the clipboard, View > Show Path Bar, right click on the Frameworks button in the bottom path bar, Copy "Frameworks" as Pathname, then paste it into the line edit in the installer dialog.
After specifying the path to the requested Qt library, use the Next button to advance to the next step of the setup.
To change the location of the Qt library without reinstalling Squish, issue the command:
$ SQUISHDIR/bin/squishconfig --qt=/path/to/QtCore.framework
Paths for Java Settings
This step is only necessary if you are configuring a Squish package set up for testing Java applications or if you are configuring a Squish package for testing Web applications and if your license key entitles you to test Java or Web applications. If either of these conditions doesn't apply, this configuration page will not appear, in which case you can safely skip to the next section and continue from there.
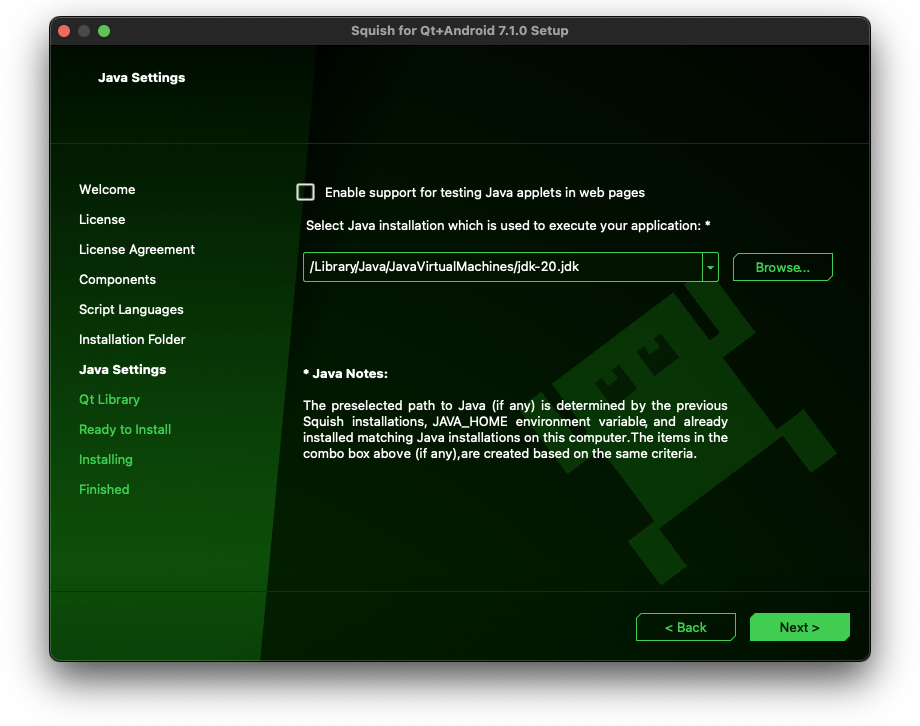
To test Java applications, you need to tell Squish where your Java runtime libraries are installed. If you are using the Java SDK (Software Development Kit), you must specify the runtime library directory—called jre, which is located inside the SDK's directory. If you only have the JRE (Java Runtime Environment) installed, specify the JRE's directory, not a directory inside the JRE.
After specifying the path to the Java runtime library, use the Next button to advance to the next step of the setup.
MCU Settings
Before installing Squish for MCU, you should first install Qt for MCUs version 2.8.1 or later. Install the Common Files as well as the package which is specific to your Microcontroller Unit (MCU).
When you reach this screen, you can download and configure the location of MCU tools and drivers. The tools currently supported are for NXP and STM32 devices.
Check the device that you wish to use. If you have not downloaded the MCU tools installer yet, click the corresponding Download link to get it.
STM32
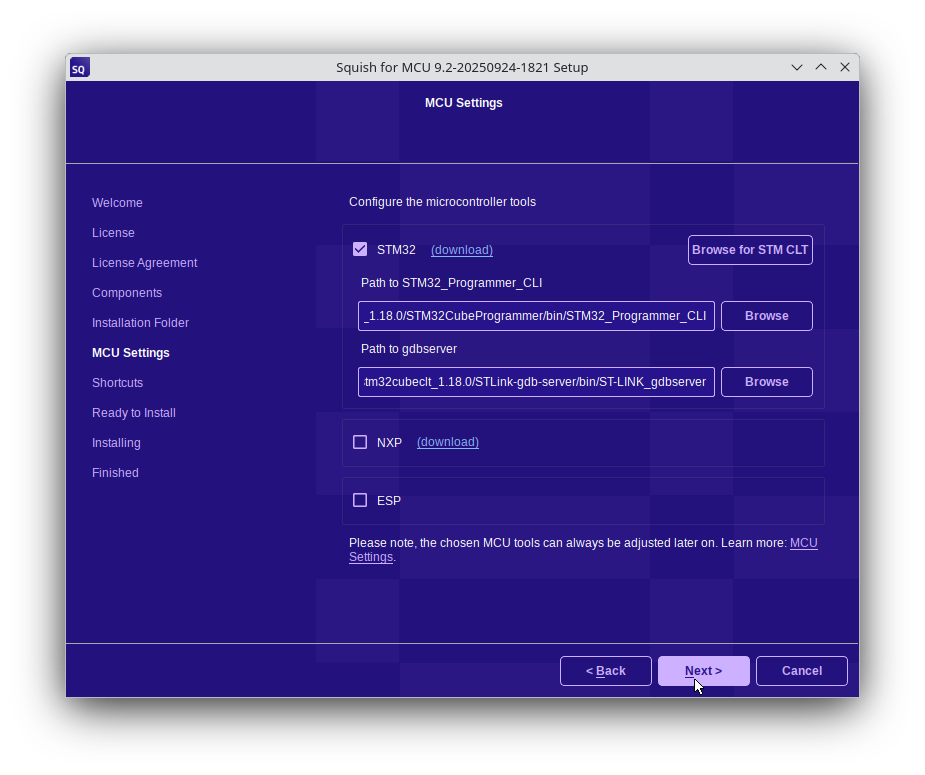
After you have downloaded and installed the STM32 tools, you can click Browse for STM CLT, navigate to the folder where STM32 CLT is installed and enter the location. This will pre-fill the two fields below, Path to STM32Programmer_CLI and Path to gdbserver, since these paths are relative to the STM CLT path.
NXP
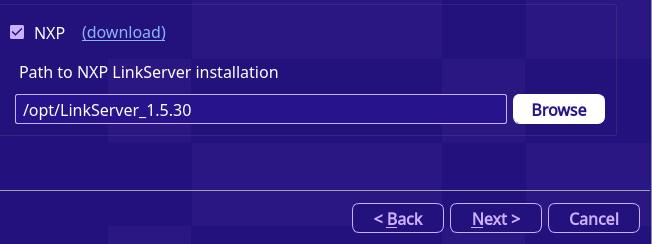
After you have downloaded and installed MCU LinkServer, you can then Browse to the Path to the NXP Linkserver installation from this installer page.
Note: MCU-Link Installer is a different thing from MCU LinkServer. On Windows, you may need to click Show More to see the correct download from the web page.
ESP

After installing the ESP-IDF toolchain, you should have a batch file or shell script which sets up the development environment. You can provide Squish for MCU the path to that script here.
If, after installing, you need to adjust the paths, see this HowTo page.
Ready to Install
At this point all the configuration options have been set and the installation is ready to launch. A page is shown which displays the disk space (usually less than 1GB) required for the selected Squish install.
Note: In addition to this, the Squish installer may also need up to 250MB of free space for temporary files during installation.
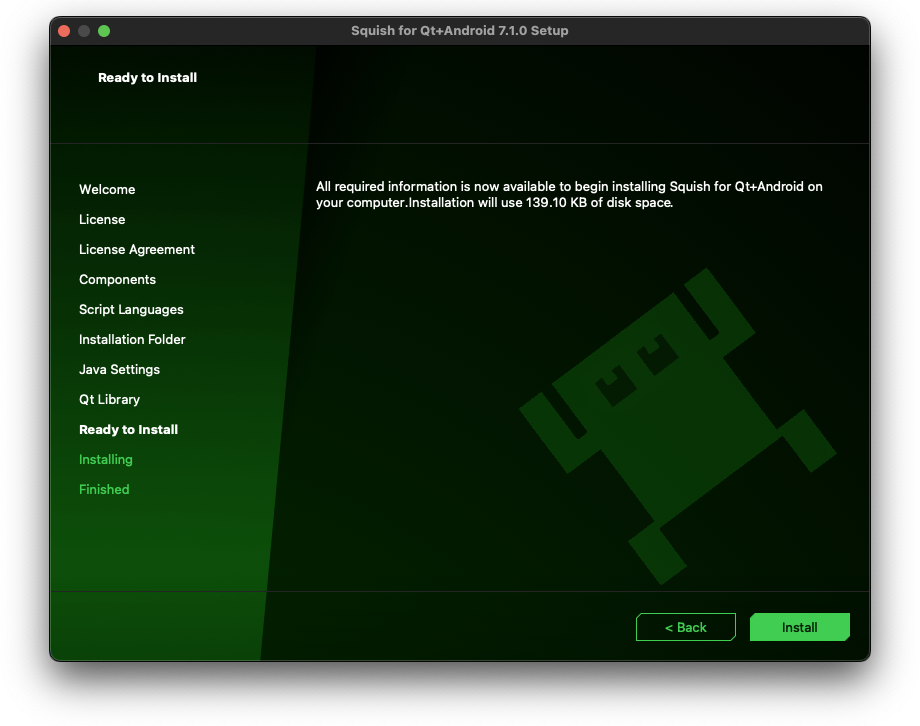
When you press the Next button on this page, the configuration shown is saved to disk and Squish will use these settings from now on.
Executing the Installation
The installation program now commences installing Squish on your system. You can click the Show Details button to get a detailed list of actions performed as part of the installation.
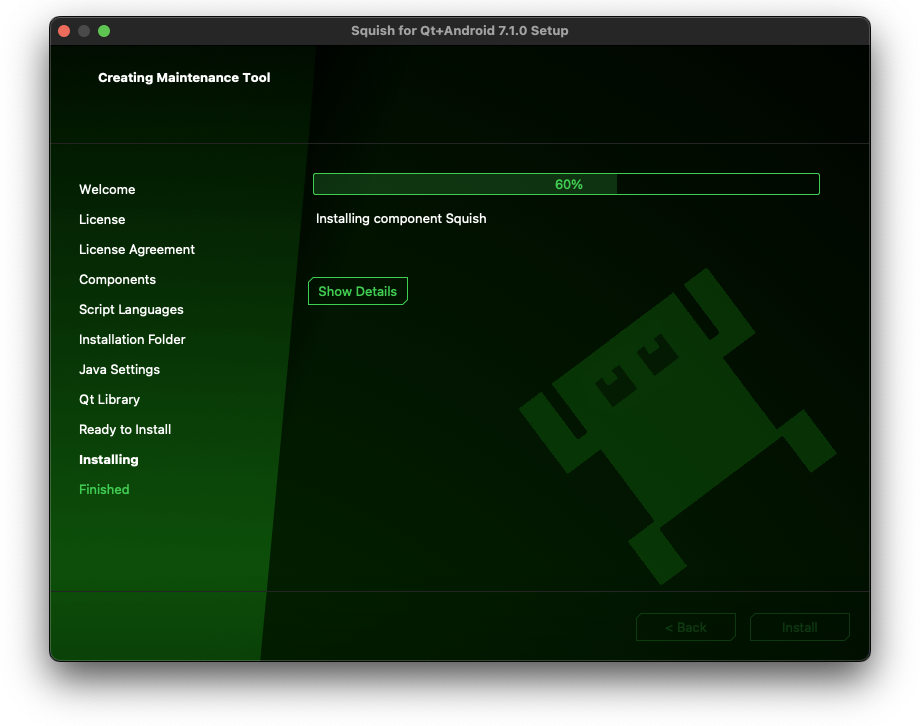
You can close the installer at any time, e.g. by closing the window or by pressing the Cancel button (only visible on platforms other than macOS). All changes done so far will be rolled back.
Concluding the Configuration
Congratulations! You have finished configuring Squish, and all the settings have been saved successfully. This page concludes the setup of your Squish binary package.
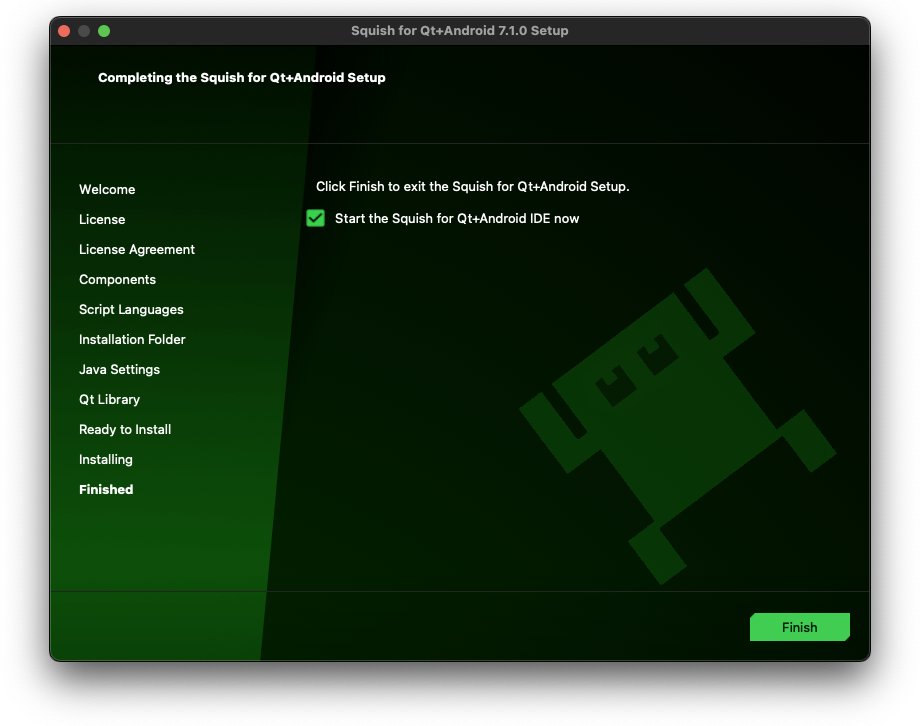
Click the Finish button to close the installation program. An option is presented which can be used to define whether the Squish IDE should be launched after the installation finished.
Note: A restart is required when installing Squish on Windows if reconfiguration is required which only takes effect when starting the operating system. Restart your computer before using Squish to ensure that it operates properly.
Note: On macOS, Squish requires enabling Accessibility access for the Squish IDE or the Terminal to be able to replay interactions in menus and use the nativeType(keys) or the nativeMouseClick(x, y, button) function. Upon starting the Squish IDE or launching squishserver from the Terminal, a dialog opens that leads you through the process. For more information, see macOS Universal Access.
Performing Unattended Installations
It is possible to perform the installation of Squish completely unattended, passing any required values up front. Unattended installation requires no graphical display, and works on headless systems.
To perform an unattended installation, invoke the Squish installation program from the command line passing at least the argument unattended=1:
$ ./squish-9.1.0-windows unattended=1 more options...
That argument will launch the installation without any graphical user interface. Instead, progress information and potential error messages are written to the console.
In addition to the unattended=1 argument, you may want to specify further arguments to specify the target directory, the license key and further settings. See the installer reference documentation for a full list of recognised arguments.
In case any required values are missing, the installation will print a message and stop, e.g.:
$ ./squish-9.1.0-vnc-linux64.run unattended=1
IFW Version: 4.8.1, built with Qt 5.15.17.
Build date: Mar  6 2025
Installer Framework SHA1: 42c1997
[0] Arguments: ./squish-9.1.0-vnc-linux64.run, unattended=1
[7] Operations sanity check succeeded.
...
[218] Cannot perform unattended installation; license key not specified.
[218] Please pass 'licensekey=<TEXT>' on the command line.
Omitting optional arguments will make the installer pick a sensible default value. A message will be printed indicating this condition, and how to override it. For instance, here's the output generated while installing a Squish package without providing a target directory:
...
[271] No target directory specified, installing to auto-detected target directory '/home/user/squish-for-vnc-9.1.0'
[271] Specify 'targetdir=<PATH>' on the command line to override this.
...
© 2025 The Qt Company Ltd.
Documentation contributions included herein are the copyrights of
their respective owners.
The documentation provided herein is licensed under the terms of the GNU Free Documentation License version 1.3 as published by the Free Software Foundation.
Qt and respective logos are trademarks of The Qt Company Ltd. in Finland and/or other countries worldwide. All other trademarks are property
of their respective owners.

