How to Test Qt Applications
In Squish for Qt, it is possible to find and query objects, call methods, and access properties and even enums. Squish automatically recognizes QObject properties and slots. To expose properties in your custom derived QObjects to Squish, use the Q_PROPERTY macro. For methods, make them slots or mark them as Q_INVOKABLE.
- How to Access Qt Objects
- How to Call Functions on Qt Objects
- How to Access Qt Enums
- How to Use the Qt Convenience API
- How to Use Qt Signal Handlers
- How to Test Qt Widgets
- How to Test non-Qt Widgets in Qt Applications
- How to Do Automatic Stress Testing on Qt
- How to Test Internationalized Qt AUTs
In addition, the Qt Convenience API provides functions for executing common GUI actions, such as clicking a button or selecting a menu item.
How to Test Qt Widgets contains examples on using the scripting Qt API to access and test complex Qt applications.
How to Access Qt Objects
As described in How to Identify and Access Objects, can call Object waitForObject(objectOrName) (or Object findObject(objectName) for hidden objects), to get a reference to an object with a specific real or symbolic name. Once have such a reference can use it to interact with the object, access the object's properties, or call the object's methods.
Here are some examples where we access a QRadioButton. If it isn't checked, we click it to check it, so that in the end it should be checked regardless of its initial state.
    cashRadioButton = waitForObject(names.make_Payment_Cash_QRadioButton)
    if not cashRadioButton.checked:
        clickButton(cashRadioButton)
    test.verify(cashRadioButton.checked)
var cashRadioButton = waitForObject(names.makePaymentCashQRadioButton);
if (!cashRadioButton.checked) {
clickButton(cashRadioButton);
}
test.verify(cashRadioButton.checked); my $cashRadioButton = waitForObject($cashRadioButtonName);
if (!$cashRadioButton->checked) {
clickButton($cashRadioButton);
}
test::compare($cashRadioButton->checked, 1); cashRadioButton = waitForObject(Names::Make_Payment_Cash_QRadioButton)
if not cashRadioButton.checked
clickButton(cashRadioButton)
end
Test.verify(cashRadioButton.checked) set cashRadioButton [waitForObject $names::Make_Payment_Cash_QRadioButton]
if {![property get $cashRadioButton checked]} {
invoke clickButton $cashRadioButton
}
test verify [property get $cashRadioButton checked]In this example we get the value of a property, set the property (indirectly by clicking the widget), and then get the value of the property again so that we can test that it has the correct value.
Here is another example, this time one that sets and gets a QLineEdit's, text property, and prints the property's value to Squish's test log (i.e., to the Test Results view). In contrast to the previous example, it uses Text-Based Object Map.
lineedit = waitForObject(":Forename:_LineEdit") lineedit.text = "A new text" text = lineedit.text test.log(str(text))
var lineedit = waitForObject(":Forename:_LineEdit"); lineedit.text = "A new text"; var text = lineedit.text; test.log(String(text));
my $lineedit = waitForObject(":Forename:_LineEdit"); $lineedit->text = "A new text"; my $text = $lineedit->text; test::log("$text");
lineedit = waitForObject(":Forename:_LineEdit") lineedit.text = "A new text" text = lineedit.text Test.log(String(text))
set lineedit [waitForObject ":Forename:_LineEdit"] property set $lineedit text "A new text" set text [property get $lineedit.text] test log [toString $text]
Converting QStrings to Native Strings
In the examples above, the queried text from QLineEdit::text is not directly passed to the test.log(message) function (or to native print functions such as print or puts). The property is of type QString and the script functions to print a string expect a native (to the script language) string, such as a str in Python, or a String in JavaScript or Ruby. A conversion is done explicitly in the examples, although in the Perl case we did it indirectly using string interpolation, and in the Tcl case we used a Squish-internal helper function, toString().
The conversion in the other direction (that is, passing a native string to a Qt API function that expects a QString) is done automatically by Squish, so no explicit conversion is necessary in such cases.
How to Call Functions on Qt Objects
With Squish it is possible to call every public function on any Qt object. In addition it is possible to call static functions provided by Qt.
In the example below we change the button text of the button we queried in the previous section using the setText function.
button = waitForObject(":Address Book - Add.OK_QPushButton") button.setText("Changed Button Text")
var button = waitForObject(":Address Book - Add.OK_QPushButton"); button.setText("Changed Button Text");
my $button = waitForObject(":Address Book - Add.OK_QPushButton"); $button->setText("Changed Button Text");
button = waitForObject(":Address Book - Add.OK_QPushButton") button.setText("Changed Button Text")
set button [waitForObject ":Address Book - Add.OK_QPushButton"] invoke $button setText "Changed Button Text"
Similarly, static Qt functions can be called. As an example, we will query the currently active modal widget (e.g. a dialog box) using the static QApplication::activeModalWidget function. If this returns a valid object, we will print the object's object name (or "unnamed" if no name has been set) to the test log (i.e., the Test Results view). To check if the object is valid (i.e., not null), we can use Squish's Boolean isNull(object) function. To find the object's name, we access its objectName property.
widget = QApplication.activeModalWidget() if not isNull(widget): test.log(widget.objectName or "unnamed")
var widget = QApplication.activeModalWidget(); if (!isNull(widget)) { var name = widget.objectName; test.log(name.isEmpty() ? "unnamed" : name); }
my $widget = QApplication::activeModalWidget(); if (!isNull($widget)) { test::log($widget->objectName() || "unnamed"); }
widget = QApplication.activeModalWidget() if !isNull(widget) name = widget.objectName Test.log(name != "" ? name : "unnamed") end
set widget [invoke QApplication activeModalWidget] if {![isNull $widget]} { set name [property get $widget objectName] if {[invoke $name isEmpty]} { set name "unnamed" } test log stdout "$name\n" }
How to Access Qt Enums
In C++ it is possible to declare enumerations, which are names that stand for numbers to make the meaning and purpose of the numbers clear. For example, instead of writing label->setAlignment(1);, the programmer can write label->setAlignment(Qt::AlignLeft); which is much easier to understand. The term enumeration is often abbreviated to enum. We use both forms in this manual.
Qt defines a lot of enumerations, and many of Qt's functions and methods take enumerations as arguments. Just as using enumerations makes code clearer for C++ programmers, it can also make test code clearer, so Squish makes it possible to use enums in test scripts. Here's how we would set the alignment of a label in a test script:
label = waitForObject(":Address Book - Add.Forename:_QLabel") label.setAlignment(Qt.AlignLeft)
var label = waitForObject(":Address Book - Add.Forename:_QLabel"); label.setAlignment(Qt.AlignLeft);
my $label = waitForObject(":Address Book - Add.Forename:_QLabel"); $label->setAlignment(Qt::AlignLeft);
label = waitForObject(":Address Book - Add.Forename:_QLabel") label.setAlignment(Qt::ALIGN_LEFT)
set label [waitForObject ":Address Book - Add.Forename:_QLabel"] invoke $label setAlignment [enum Qt AlignLeft]
How to Use the Qt Convenience API
This section describes the script API Squish offers on top of the standard Qt API to make it easy to perform common user actions such as clicking a button or activating a menu option. A complete list of this API is available in the Qt Convenience API section in the Tools Reference.
Here are some examples to give a flavor of how the API is used. The first line shows how to click a button, the second line shows how to double-click an item (for example, an item in a list, table, or tree—although here we click an item in a table), and the last example shows how to activate a menu option (in this case, File > Open).
clickButton(":Address Book - Add.OK_QPushButton") doubleClickItem(":CSV Table - before.csv.File_QTableWidget", "10/0", 22, 20, 0, Qt.LeftButton) activateItem(waitForObjectItem(":Address Book_QMenuBar", "File")) activateItem(waitForObjectItem(":Address Book.File_QMenu", "Open..."))
clickButton(":Address Book - Add.OK_QPushButton"); doubleClickItem(":CSV Table - before.csv.File_QTableWidget", "10/0", 22, 20, 0, Qt.LeftButton); activateItem(waitForObjectItem(":Address Book_QMenuBar", "File")); activateItem(waitForObjectItem(":Address Book.File_QMenu", "Open..."));
clickButton(":Address Book - Add.OK_QPushButton"); doubleClickItem(":CSV Table - before.csv.File_QTableWidget", "10/0", 22, 20, 0, Qt.LeftButton); activateItem(waitForObjectItem(":Address Book_QMenuBar", "File")); activateItem(waitForObjectItem(":Address Book.File_QMenu", "Open..."));
clickButton(":Address Book - Add.OK_QPushButton") doubleClickItem(":CSV Table - before.csv.File_QTableWidget", "10/0", 22, 20, 0, Qt::LEFT_BUTTON) activateItem(waitForObjectItem(":Address Book_QMenuBar", "File")) activateItem(waitForObjectItem(":Address Book.File_QMenu", "Open..."))
invoke clickButton ":Address Book - Add.OK_QPushButton" invoke doubleClickItem ":CSV Table - before.csv.File_QTableWidget" \ "10/0" 22 20 0 [enum Qt LeftButton] invoke activateItem [waitForObjectItem ":Address Book_QMenuBar" "File"] invoke activateItem [waitForObjectItem ":Address Book.File_QMenu" "Open..."]
See the How to Test Qt Widgets section for a wide range of examples of how to test various Qt widgets.
How to Use Qt Signal Handlers
To trace Qt signals emitted by widgets in the user interface (or by any AUT QObject), use the installSignalHandler(objectOrName, signalSignature, handlerFunctionName) function.
The installSignalHandler(objectOrName, signalSignature, handlerFunctionName) function should be called after the AUT has been started and passed the name of (or a reference to) an already existing AUT object, a signal signature, and the name of a handler function (as a string). The function can be called multiple times if necessary to register multiple object/signal/handler combinations. Here is a very simple example to show how it is done:
def tableItemChangedHandler(obj, item): test.log('itemChanged emitted by object "%s" on item "%s"' % ( objectMap.symbolicName(obj), item.text())) def main(): startApplication("addressbook") # ... various actions ... now the table widget exists installSignalHandler(table, "itemChanged(QTableWidgetItem*)", "tableItemChangedHandler") # ... the rest of the test ...
function tableItemChangedHandler(obj, item) { test.log('itemChanged emitted by object "' + objectMap.symbolicName(obj) + '" on item "' + item.text() + '"'); } function main() { startApplication("addressbook"); // ... various actions ... now the table widget exists installSignalHandler(table, "itemChanged(QTableWidgetItem*)", "tableItemChangedHandler"); // ... the rest of the test ... }
sub tableItemChangedHandler {
my($obj, $item) = @_;
test::log("itemChanged emitted by object \"" . objectMap::symbolicName($obj) .
"\" on item \"" . $item->text() . "\"");
}
sub main {
startApplication("addressbook");
# ... various actions ... now the table widget exists
installSignalHandler($table,
"itemChanged(QTableWidgetItem*)", "main::tableItemChangedHandler");
# ... the rest of the test ...
}def tableItemChangedHandler(obj, item) name = objectMap.symbolicName(obj) text = item.text() Test.log("itemChanged emitted by object '#{name}' on item '#{text}'") end def main startApplication("addressbook") # ... various actions ... now the table widget exists installSignalHandler(table, "itemChanged(QTableWidgetItem*)", "tableItemChangedHandler") # ... the rest of the test ... end
proc tableItemChangedHandler {obj item} {
set name [objectMap symbolicName $obj]
set text [toString [invoke $item text]]
test log "itemChanged was emitted by object \"$name\" on item \"$text\""
}
proc main {} {
startApplication "addressbook"
# ... various actions ... now the table widget exists
invoke installSignalHandler $table \
"itemChanged(QTableWidgetItem*)" "tableItemChangedHandler"
# ... the rest of the test ...
}Whenever any item in the QTableWidget is changed the tableItemChangedHandler function will be called with a reference to the table widget that emitted the signal. Here we simply log the symbolic name of the object that emitted the signal using the String objectMap.symbolicName(object) function, and the text of the QTableWidgetItem that was changed. So each time the signal is emitted (i.e., whenever a table item is changed), we will get a log output something like this:
itemChanged emitted by object ":Address Book - MyAddresses.adr.File_QTableWidget" on item "Doe"
We've line-wrapped the output to make it easier to read.
The first argument passed to the handler function is always a reference to the object that emitted the signal. If the signal has any arguments, these are also passed to the handler, following the object reference. So in the example above the itemChanged(QTableWidgetItem*) signal has one argument so the handler gets two arguments—the emitting object and the signal's table widget item.
We can, of course, register as many handlers as we like. Here are some examples of some additional handlers:
def fileMenuHandler(obj, action):
test.log('triggered emitted by object "%s" for action "%s"' % (
objectMap.symbolicName(obj), action.text))
def modelIndexClickedHandler(obj, index):
test.log('clicked emitted by object "%s" on index "%s"' % (
objectMap.symbolicName(obj), index.text))
def cellClickedHandler(obj, row, column):
test.log('clicked emitted by object "%s" on cell (%d, %d)' % (
objectMap.symbolicName(obj), row, column))function fileMenuHandler(obj, action) {
test.log('triggered emitted by object "' + objectMap.symbolicName(obj) +
'" for action "' + action.text + '"');
}
function modelIndexClickedHandler(obj, index) {
test.log('clicked emitted by object "' + objectMap.symbolicName(obj) +
'" on index "' + index.text + '"');
}
function cellClickedHandler(obj, row, column) {
test.log('clicked emitted by object "' + objectMap.symbolicName(obj) +
'" on cell (' + row + ', ' + column + ')');
}sub fileMenuHandler {
my($obj, $action) = @_;
test::log("triggered emitted by object \"" . objectMap::symbolicName($obj) .
"\" for action \"" . ($action ? $action->text : "Unknown action") . "\"");
}
sub modelIndexClickedHandler {
my($obj, $index) = @_;
test::log("clicked emitted by object \"" . objectMap::symbolicName($obj) .
"\" on index \"" . $index->text . "\"");
}
sub cellClickedHandler {
my($obj, $row, $column) = @_;
test::log("clicked emitted by object \"" . objectMap::symbolicName($obj) .
"\" on cell ($row, $column)");
}def fileMenuHandler(obj, action)
Test.log('triggered emitted by object "%s" for action "%s"' % [
ObjectMap.symbolicName(obj), action.text])
end
def modelIndexClickedHandler(obj, index)
Test.log('clicked emitted by object "%s" on index "%s"' % [
ObjectMap.symbolicName(obj), index.text])
end
def cellClickedHandler(obj, row, column)
Test.log('clicked emitted by object "%s" on cell (%d, %d)' % [
ObjectMap.symbolicName(obj), row, column])
endproc fileMenuHandler {obj action} {
set name [objectMap symbolicName $obj]
set text [toString [property get $action text]]
test log "triggered emitted by object \"$name\" for action \"$text\""
}
proc modelIndexClickedHandler {obj index} {
set name [objectMap symbolicName $obj]
set text [toString [property get $index text]]
test log "triggered emitted by object \"$name\" on index \"$text\""
}
proc cellClickedHandler {obj row column} {
set name [objectMap symbolicName $obj]
set row [toString $row]
set column [toString $column]
test log "clicked emitted by object \"$name\" on cell ($row, $column)"
}And here is the code needed to install the handlers:
installSignalHandler(fileMenu, "triggered(QAction*)", "fileMenuHandler")
activateItem(waitForObjectItem(names.address_Book_File_QMenu, "Open..."))
clickButton(waitForObject(names.qFileDialog_detailModeButton_QToolButton))
waitForObjectItem(names.stackedWidget_treeView_QTreeView, "MyAddresses\\.adr")
clickItem(names.stackedWidget_treeView_QTreeView, "MyAddresses\\.adr", 81, 4, 0, Qt.LeftButton)
clickButton(waitForObject(names.qFileDialog_Open_QPushButton))
table = waitForObject(names.address_Book_MyAddresses_adr_File_QTableWidget)
installSignalHandler(table, "itemChanged(QTableWidgetItem*)", "tableItemChangedHandler")
installSignalHandler(table, "clicked(QModelIndex)", "modelIndexClickedHandler")
installSignalHandler(table, "cellClicked(int, int)", "cellClickedHandler") installSignalHandler(fileMenu, "triggered(QAction*)", "fileMenuHandler");
activateItem(waitForObjectItem(names.addressBookFileQMenu, "Open..."));
clickButton(waitForObject(names.addressBookChooseFileDetailModeButtonQToolButton));
waitForObjectItem(names.stackedWidgetTreeViewQTreeView, "MyAddresses\\.adr");
clickItem(names.stackedWidgetTreeViewQTreeView, "MyAddresses\\.adr", 81, 4, 0, Qt.LeftButton);
clickButton(waitForObject(names.addressBookChooseFileOpenQPushButton));
var table = waitForObject(names.addressBookMyAddressesAdrFileQTableWidget);
installSignalHandler(table, "itemChanged(QTableWidgetItem*)",
"tableItemChangedHandler");
installSignalHandler(table, "clicked(QModelIndex)",
"modelIndexClickedHandler");
installSignalHandler(table, "cellClicked(int, int)",
"cellClickedHandler"); installSignalHandler($fileMenu, "triggered(QAction*)", "main::fileMenuHandler");
activateItem(waitForObjectItem($Names::address_book_file_qmenu, "Open..."));
clickButton(waitForObject($Names::qfiledialog_detailmodebutton_qtoolbutton));
waitForObjectItem($Names::stackedwidget_treeview_qtreeview, "MyAddresses\\.adr");
clickItem($Names::stackedwidget_treeview_qtreeview, "MyAddresses\\.adr", 81, 4, 0, Qt::LeftButton);
clickButton(waitForObject($Names::address_book_choose_file_open_qpushbutton));
my $table = waitForObject($Names::address_book_myaddresses_adr_file_qtablewidget);
installSignalHandler($table, "itemChanged(QTableWidgetItem*)", "main::tableItemChangedHandler");
installSignalHandler($table, "clicked(QModelIndex)", "main::modelIndexClickedHandler");
installSignalHandler($table, "cellClicked(int, int)", "main::cellClickedHandler"); installSignalHandler(fileMenu, "triggered(QAction*)", "fileMenuHandler")
activateItem(waitForObjectItem(Names::Address_Book_File_QMenu, "Open..."))
clickButton(waitForObject(Names::QFileDialog_detailModeButton_QToolButton))
waitForObjectItem(Names::StackedWidget_treeView_QTreeView, "MyAddresses\\.adr")
clickItem(Names::StackedWidget_treeView_QTreeView, "MyAddresses\\.adr", 81, 4, 0, Qt::LEFT_BUTTON)
clickButton(waitForObject(Names::Address_Book_Choose_File_Open_QPushButton))
table = waitForObject(Names::Address_Book_MyAddresses_adr_File_QTableWidget)
installSignalHandler(table, "itemChanged(QTableWidgetItem*)", "tableItemChangedHandler")
installSignalHandler(table, "clicked(QModelIndex)", "modelIndexClickedHandler")
installSignalHandler(table, "cellClicked(int, int)", "cellClickedHandler") invoke installSignalHandler $fileMenu "triggered(QAction*)" \
"fileMenuHandler"
invoke activateItem [waitForObjectItem $names::Address_Book_File_QMenu "Open..."]
invoke clickButton [waitForObject $names::QFileDialog_detailModeButton_QToolButton]
waitForObjectItem $names::stackedWidget_treeView_QTreeView "MyAddresses\\.adr"
invoke clickItem $names::stackedWidget_treeView_QTreeView "MyAddresses\\.adr" 81 4 0 [enum Qt LeftButton]
invoke clickButton [waitForObject $names::QFileDialog_Open_QPushButton]
set table [waitForObject $names::Address_Book_MyAddresses_adr_File_QTableWidget]
invoke installSignalHandler $table "itemChanged(QTableWidgetItem*)" \
"tableItemChangedHandler"
invoke installSignalHandler $table "clicked(QModelIndex)" \
"modelIndexClickedHandler"
invoke installSignalHandler $table "cellClicked(int, int)" \
"cellClickedHandler"Remember, handlers can only be installed for objects that already exist. All the example code shown here is taken from examples/qt/addressbook/suite_*/tst_signal_handler where you can see it all in context.
How to Test Qt Widgets
In this section we will see how the Squish API makes it straightforward to check the values and states of individual widgets so that we can test our application's business rules. The principles covered in this chapter apply to all Qt GUI objects, not just those derived from QWidget.
As we saw in the tutorial, we can use Squish's recording facility to create tests. However, it is often useful to modify such tests, or create tests entirely from scratch in code, particularly when we want to test business rules that involve multiple widgets.
In general there is no need to test a widget's standard behavior. For example, if an unchecked two-valued checkbox isn't checked after being clicked, that's a bug in the toolkit, not in our code. If such a case arose we may need to write a workaround (and write tests for it), but normally we don't write tests just to check that our underlying API behaves as documented (unless we are developers of the API). On the other hand, what we do want to test is whether our application provides the business rules we intended to build into it. Some tests concern individual widgets in isolation—for example, testing that a combobox contains the appropriate items. Other tests concern inter-widget dependencies and interactions. For example, if we have a group of "payment method" radio buttons, we will want to test that if the Cash radio button is chosen, the Check and Credit Card- relevant widgets are hidden.
Whether we are testing individual widgets or inter-widget dependencies and interactions, we must first be able to identify the widgets we want to test. Once identified, we can then verify that they have the values and are in the states that we expect. One way to identify a widget is to record a test that involves its use and see what name Squish uses for it. But the easiest way to identify a widget so that we can use it in our test code is to use the Spy tool. For more information, see How to Use the Spy and Object waitForObject(objectOrName).
This section illustrates how to access various Qt widgets and perform common operations using these widgets—such as getting and setting their properties—with all of the scripting languages the Squish supports.
After completing this section you should be able to access Qt widgets, gather data from those Qt widgets, and perform tests against expected values.
To test and verify a widget and its properties or contents in code, first we need access to the widget in the test script. To obtain a reference to the widget, the Object waitForObject(objectOrName) function is used. This function finds the widget with the given name and returns a reference to it. For this purpose we need to know the name of the widget we want to test, and we can get the name using the Spy tool (see How to Use the Spy) and adding the object to the Object Map (so that Squish will remember it) and then copying the object's name (preferably its symbolic name) to the clipboard ready to be pasted into our test. If we need to gather the names of lots of widgets it is probably faster and easier to record a dummy test during which we make sure that we access every widget we want to verify in our manually written test script. This will cause Squish to add all the relevant names to the Object Map, which we can then copy and paste into our code.
How to Test Widget States and Properties
Each Qt widget has a set of properties and states associated with it that we can query with Squish to perform checks in our test scripts. These properties can be things like, focus (does the widget have the keyboard focus), enabled (is this widget enabled), visible (is the widget visible), height (what is the height of the widget), width (what is the width of the widget), etc. All of these properties are documented on the Qt Project web site. Just pick the version of Qt you are running (Qt 5 or Qt 6), and search for the Qt class of the object whose properties you want to verify.
For example, lets imagine we have a button in our application and you used the Spy tool to discover that the Qt class name for this widget is QPushButton. You will see that this widget has only a few properties, however, there are additional properties inherited from the QAbstractButton class, and many more properties inherited from the QWidget class, and one property inherited from the QObject class. By visiting each of these base classes, you will see all of the properties that you can query with Squish in your test scripts. We will see many examples of accessing and testing widget properties in the following sections.
Reading the toolkit's documentation is useful for seeing what properties a widget has and for learning about them. However, if we use the Squish Spy we can see all of the AUT's objects and for the selected object all of its properties and their values. Since most properties have sensible names this is often sufficient to see what properties a particular widget has and which of them we wish to verify. For details see the Spy Perspective and the views it cross-references.
How to Test Stateful and Single-Valued Widgets
In this section, we will see how to test the examples/qt/paymentform example program. This program uses many basic Qt widgets including QCheckBox, QComboBox, QDateEdit, QLineEdit, QPushButton, QRadioButton, and QSpinBox. As part of our coverage of the example we will show how to check the values and state of individual widgets. We will also demonstrate how to test a form's business rules.
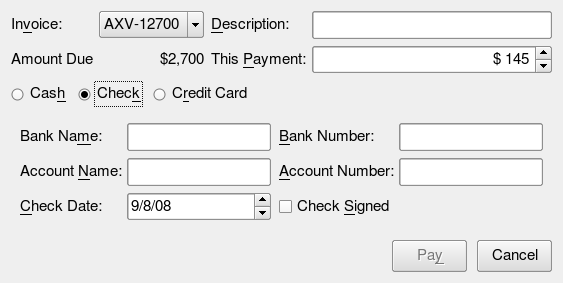
The paymentform example in "pay by check" mode.
The paymentform is invoked when an invoice is to be paid, either at a point of sale, or—for credit cards—by phone. The form's Pay button must only be enabled if the correct fields are filled in and have valid values. The business rules that we must test for are as follows:
- In "cash" mode, i.e., when the Cash QRadioButton is checked:
- No irrelevant widgets (e.g., account name, account number), must be visible. (Since the form uses a QStackedWidget we only have to check that the cash widget is visible and that the check and card widgets are hidden.)
- The minimum payment is one dollar and the maximum is $2000 or the amount due, whichever is smaller.
- In "check" mode, i.e., when the Check QRadioButton is checked:
- No irrelevant widgets (e.g., issue date, expiry date), must be visible. (In practice we only have to check that the check widget is visible and that the cash and card widgets are hidden.)
- The minimum payment is $10 and the maximum is $250 or the amount due, whichever is smaller.
- The check date must be no earlier than 30 days ago and no later than tomorrow.
- The bank name, bank number, account name, and account number line edits must all be nonempty.
- The check signed checkbox must be checked.
- In "card" mode, i.e., when the Card QRadioButton is checked:
- No irrelevant widgets (e.g., check date, check signed), must be visible. (In practice we only have to check that the card widget is visible and that the check and card widgets are hidden.)
- The minimum payment is $10 or 5% of the amount due whichever is larger, and the maximum is $5000 or the amount due, whichever is smaller.
- For non-Visa cards the issue date must be no earlier than three years ago.
- The expiry date must be at least one month later than today.
- The account name and account number line edits must be nonempty.
We will write three tests, one for each of the form's modes. And to make it slightly simpler to check the widgets in the QStackedWidget, we have explicitly given them object names (using QObject's setObjectName method)—"CashWidget", "CheckWidget", and "CardWidget". In the same way we have also given the name "AmountDueLabel" to the QLabel that displays the amount due.
The source code for the payment form is in the directory <SQUISHDIR>/examples/qt/paymentform, and the test suites are in subdirectories underneath—for example, the Python version of the tests is in the directory <SQUISHDIR>/examples/qt/paymentform/suite_py, and the JavaScript version of the tests is in <SQUISHDIR>/examples/qt/paymentform/suite_js, and so on.
We will begin by reviewing the test script for testing the form's "cash" mode. The code is all in one large main function. Don't worry that the code seems long. When we look at the next test script we will see how to break things down into manageable pieces. We will show the function in pieces, with each piece followed by anexplanation.
def main():
startApplication('"' + os.environ["SQUISH_PREFIX"] + '/examples/qt/paymentform/paymentform"')
# Make sure the Cash radio button is checked so we start in the mode
# we want to test
cashRadioButton = waitForObject(names.make_Payment_Cash_QRadioButton)
if not cashRadioButton.checked:
clickButton(cashRadioButton)
test.verify(cashRadioButton.checked)function main() {
startApplication('"' + OS.getenv("SQUISH_PREFIX") + '/examples/qt/paymentform/paymentform"');
// Make sure the Cash radio button is checked so we start in the mode
// we want to test
    var cashRadioButton = waitForObject(names.makePaymentCashQRadioButton);
    if (!cashRadioButton.checked) {
        clickButton(cashRadioButton);
    }
test.verify(cashRadioButton.checked);sub main {
startApplication("\"$ENV{'SQUISH_PREFIX'}/examples/qt/paymentform/paymentform\"");
# Make sure the Cash radio button is checked so we start in the mode
# we want to test
my $cashRadioButtonName = {'text'=>'Cash', 'type'=>'QRadioButton', 'visible'=>'1', 'window'=>$Names::make_payment_mainwindow};
    my $cashRadioButton = waitForObject($cashRadioButtonName);
    if (!$cashRadioButton->checked) {
        clickButton($cashRadioButton);
    }
test::compare($cashRadioButton->checked, 1);def main
startApplication("\"#{ENV['SQUISH_PREFIX']}/examples/qt/paymentform/paymentform\"")
# Make sure the Cash radio button is checked so we start in the mode
# we want to test
    cashRadioButton = waitForObject(Names::Make_Payment_Cash_QRadioButton)
    if not cashRadioButton.checked
        clickButton(cashRadioButton)
    end
Test.verify(cashRadioButton.checked)proc main {} {
startApplication "\"$::env(SQUISH_PREFIX)/examples/qt/paymentform/paymentform\""
# Make sure the Cash radio button is checked so we start in the mode
# we want to test
    set cashRadioButton [waitForObject $names::Make_Payment_Cash_QRadioButton]
    if {![property get $cashRadioButton checked]} {
        invoke clickButton $cashRadioButton
    }
test verify [property get $cashRadioButton checked]We must start by making sure that the form is in the mode we want to test. To access visible widgets the process is always the same: we create a variable holding the widget's name, then we call Object waitForObject(objectOrName) to get a reference to the widget. Generally it is best to use symbolic names, but multi-property (real) names make sense for widgets that have been uniquely named with the QObject::setObjectName function, and are also useful when we need to do wildcard matching.
Once we have the reference we can use it to access the widget's properties and to call the widget's methods. We use this approach to see if the cash radio button is checked, and if it is not, we click it. In either case we then use the Boolean test.compare(value1, value2) method to confirm that the cash radio button is checked and ensure that we do the rest of the tests with the form in the correct mode.
Note that the clickButton(objectOrName) function can be used to click any button that inherits QAbstractButton, that is, QCheckBox, QPushButton, QRadioButton, and QToolButton.
    # Business rule #1: only the QStackedWidget's CashWidget must be
    # visible in cash mode
    # (The name "CashWidget" was set with QObject::setObjectName())
    cashWidget = waitForObject({"name": "CashWidget", "type": "QLabel"})
    test.compare(cashWidget.visible, True)

    checkWidgetName = {'name':'CheckWidget', 'type':'QWidget'}
    # Object is hidden, so we use waitForObjectExists()
    checkWidget = waitForObjectExists(checkWidgetName)
    test.compare(checkWidget.visible, False)

    cardWidgetName = {'name':'CardWidget', 'type':'QWidget'}
    # Object is hidden, so we use waitForObjectExists()
    cardWidget = waitForObjectExists(cardWidgetName)
    test.compare(cardWidget.visible, False)
// Business rule #1: only the QStackedWidget's CashWidget must be
// visible in cash mode
// (The name "CashWidget" was set with QObject::setObjectName())
var cashWidget = waitForObject({'name':'CashWidget', 'type':'QLabel'});
test.compare(cashWidget.visible, true);
var checkWidgetName = {'name':'CheckWidget', 'type':'QWidget'};
// Object is hidden, so we use waitForObjectExists()
var checkWidget = waitForObjectExists(checkWidgetName);
test.compare(checkWidget.visible, false);
var cardWidgetName = {'name':'CardWidget', 'type':'QWidget'};
// Object is hidden, so we use waitForObjectExists()
cardWidget = waitForObjectExists(cardWidgetName);
test.compare(cardWidget.visible, false); # Business rule #1: only the QStackedWidget's CashWidget must be
# visible in cash mode
# (The name "CashWidget" was set with QObject::setObjectName())
my $cashWidget = waitForObject({'name'=>'CashWidget', 'type'=>'QLabel'});
test::compare($cashWidget->visible, 1);
my $checkWidgetName = {'name'=>'CheckWidget', 'type'=>'QWidget'};
# Object is hidden, so we use waitForObjectExists()
my $checkWidget = waitForObjectExists($checkWidgetName);
test::compare($checkWidget->visible, 0);
my $cardWidgetName = {'name'=>'CardWidget', 'type'=>'QWidget'};
# Object is hidden, so we use waitForObjectExists()
my $cardWidget = waitForObjectExists($cardWidgetName);
test::compare($cardWidget->visible, 0); # Business rule #1: only the QStackedWidget's CashWidget must be
# visible in cash mode
# (The name "CashWidget" was set with QObject::setObjectName())
cashWidget = waitForObject({:name=>'CashWidget', :type=>'QLabel'})
Test.compare(cashWidget.visible, true)
checkWidgetName = {:name=>'CheckWidget', :type=>'QWidget'}
# Object is hidden, so we use waitForObjectExists()
checkWidget = waitForObjectExists(checkWidgetName)
Test.compare(checkWidget.visible, false)
cardWidgetName = {:name=>'CardWidget', :type=>'QWidget'}
# Object is hidden, so we use waitForObjectExists()
cardWidget = waitForObjectExists(cardWidgetName)
Test.compare(cardWidget.visible, false) # Business rule #1: only the QStackedWidget's CashWidget must be
# visible in cash mode
# (The name "CashWidget" was set with QObject::setObjectName())
set cashWidget [waitForObject [::Squish::ObjectName name CashWidget type QLabel ]]
test compare [property get $cashWidget visible] true
# Object is hidden, so we use waitForObjectExists()
set checkWidget [waitForObjectExists $names::Make_Payment_CheckWidget_QWidget]
test compare [property get $checkWidget visible] false
# Object is hidden, so we use waitForObjectExists()
set cardWidget [waitForObjectExists $names::Make_Payment_CardWidget_QWidget]
test compare [property get $cardWidget visible] falseThe first business rule to be tested is that if the cash widget is visible, the check and card widgets must be hidden. Checking that a widget is visible is easily done by accessing the widget's visible property, and follows exactly the same pattern as we used to access checked. But for hidden widgets, the approach is slightly different—we do not (and must not) call Object waitForObject(objectOrName); instead we call Object findObject(objectName) immediately. We can use a similar approach to checking that a particular tab page widget in a QTabWidget or particular item widget in a QToolBox is visible.
    # Business rule #2: the minimum payment is $1 and the maximum is
    # $2000 or the amount due whichever is smaller
    amountDueLabel = waitForObject({'name':'AmountDueLabel', 'type':'QLabel'})
    chars = []
    for char in str(amountDueLabel.text):
        if char.isdigit():
            chars.append(char)
    amount_due = cast("".join(chars), int)
    maximum = min(2000, amount_due)

    paymentSpinBoxName = {"buddy": names.make_Payment_This_Payment_QLabel,
                          "type": "QSpinBox", "unnamed": 1}
    paymentSpinBox = waitForObject(paymentSpinBoxName)
    test.compare(paymentSpinBox.minimum, 1)
    test.compare(paymentSpinBox.maximum, maximum)
// Business rule #2: the minimum payment is $1 and the maximum is
// $2000 or the amount due whichever is smaller
var amountDueLabel = waitForObject({'name':'AmountDueLabel', 'type':'QLabel'});
var amount_due = 0 + String(amountDueLabel.text).replace(/\D/g, "");
var maximum = Math.min(2000, amount_due);
var paymentSpinBoxName = {'buddy':names.makePaymentThisPaymentQLabel,
'type':'QSpinBox', 'unnamed':'1'};
var paymentSpinBox = waitForObject(paymentSpinBoxName);
test.compare(paymentSpinBox.minimum, 1);
test.compare(paymentSpinBox.maximum, maximum); # Business rule #2: the minimum payment is $1 and the maximum is
# $2000 or the amount due whichever is smaller
my $amountDueLabel = waitForObject({'name'=>'AmountDueLabel', 'type'=>'QLabel'});
my $amount_due = $amountDueLabel->text;
$amount_due =~ s/\D//g; # remove non-digits
my $maximum = 2000 < $amount_due ? 2000 : $amount_due;
my $paymentSpinBoxName = {'buddy'=>$Names::make_payment_this_payment_qlabel,
'type'=>'QSpinBox', 'unnamed'=>'1'};
my $paymentSpinBox = waitForObject($paymentSpinBoxName);
test::compare($paymentSpinBox->minimum, 1);
test::compare($paymentSpinBox->maximum, $maximum); # Business rule #2: the minimum payment is $1 and the maximum is
# $2000 or the amount due whichever is smaller
amountDueLabel = waitForObject({:name=>'AmountDueLabel', :type=>'QLabel'})
amount_due = String(amountDueLabel.text).gsub(/\D/, "").to_f
maximum = 2000 < amount_due ? 2000 : amount_due
paymentSpinBoxName = {:buddy=>Names::Make_Payment_This_Payment_QLabel,
:type=>'QSpinBox', :unnamed=>'1'}
paymentSpinBox = waitForObject(paymentSpinBoxName)
Test.compare(paymentSpinBox.minimum, 1)
Test.compare(paymentSpinBox.maximum, maximum) # Business rule #2: the minimum payment is $1 and the maximum is
# $2000 or the amount due whichever is smaller
set amountDueLabel [waitForObject [::Squish::ObjectName name AmountDueLabel type QLabel]]
set amountText [toString [property get $amountDueLabel text]]
regsub -all {\D} $amountText "" amountText
set amount_due [expr $amountText]
set maximum [expr $amount_due < 2000 ? $amount_due : 2000]
set paymentSpinBoxName [::Squish::ObjectName type QSpinBox unnamed 1 \
buddy $names::Make_Payment_This_Payment_QLabel ]
set paymentSpinBox [waitForObject $paymentSpinBoxName]
test compare [property get $paymentSpinBox minimum] 1
test compare [property get $paymentSpinBox maximum] $maximumThe second business rule concerns the minimum and maximum allowed payment amounts. As usual we begin by using Object waitForObject(objectOrName) to get references to the widgets we want—in this case starting with the amount due label. This label's text might contain a currency symbol and grouping markers (for example, $1,700 or €1.700), so to convert this into an integer we must strip away any non-digit characters first. We do this in different ways depending on the underlying scripting language, but in all cases we retrieve the label's text property's characters and convert them to an integer. (For example, in Python, we iterate over each character and join all those that are digits into a single string and use the Object cast(object, type) function which takes an object and the type the object should be converted to, and returns an object of the requested type—or 0 on failure. We use a similar approach in JavaScript, but for Perl and Tcl we simply strip out non-digit characters using a regular expression.) The resulting integer is the amount due, so we can now trivially calculate the maximum amount that can be paid in cash.
With the minimum and maximum amounts known we next get a reference to the payment spinbox. (Notice how the spinbox has no name, but is uniquely identified by its buddy—the label beside it.) Once we have a reference to the spinbox we use Boolean test.compare(value1, value2) to compare the two values.
    # Business rule #3: the Pay button is enabled (since the above tests
    # ensure that the payment amount is in range)
    payButtonName = {"text": "Pay", "type": "QPushButton", "visible": 1}
    payButton = waitForObject(payButtonName)
    test.verify(payButton.enabled)
// Business rule #3: the Pay button is enabled (since the above tests
// ensure that the payment amount is in range)
var payButtonName = {'type':'QPushButton', 'text':'Pay', 'visible':'1'};
var payButton = waitForObject(payButtonName);
test.verify(payButton.enabled);
sendEvent("QCloseEvent", waitForObject(names.makePaymentMainWindow));
} # Business rule #3: the Pay button is enabled (since the above tests
# ensure that the payment amount is in range)
my $payButtonName = {'type'=>'QPushButton', 'text'=>'Pay', 'visible'=>'1'};
my $payButton = waitForObject($payButtonName);
test::compare($payButton->enabled, 1);
sendEvent("QCloseEvent", waitForObject($Names::make_payment_mainwindow));
} # Business rule #3: the Pay button is enabled (since the above tests
# ensure that the payment amount is in range)
payButtonName = {:type=>'QPushButton', :text=>'Pay', :visible=>'1'}
payButton = waitForObject(payButtonName)
Test.verify(payButton.enabled)
sendEvent("QCloseEvent", waitForObject(Names::Make_Payment_MainWindow))
end # Business rule #3: the Pay button is enabled (since the above tests
# ensure that the payment amount is in range)
set payButtonName [::Squish::ObjectName text Pay type QPushButton visible 1]
set payButton [waitForObject $payButtonName]
test verify [property get $payButton enabled]
sendEvent "QCloseEvent" [waitForObject $names::Make_Payment_MainWindow]
}Checking the last business rule is easy in this case since if the amount is in range (and it must be because we have just checked it), then payment is allowed so the Pay button should be enabled. Once again, we use the same approach to test this: first we call Object waitForObject(objectOrName) to get a reference to it, and then we conduct the test—in this case checking that the Pay button is enabled.
One interesting aspect of this last test is that if we use the Spy tool it does not give us the name of the Pay button but rather the name of the QDialogButtonBox that contains the button, so we must either give the button an object name or work out its identity for ourselves. We took the latter course, creating a property-name string giving values for the type, text (ignoring ampersands), unnamed, and visible properties. This is sufficient to uniquely identify the Pay button.
Although the "cash" mode test works well, there are a few places where we use essentially the same code. So before creating the test for "check" mode, we will create some common functions that we can use to refactor our tests with. (The process used to create shared code is described a little later in How to Create and Use Shared Data and Shared Scripts—essentially all we need to do is create a new script under the Test Suite's shared item's scripts item.) The Python common code is in common.py, the JavaScript common code is in common.js, and so on. We will also create some test-specific functions to make the main function smaller and easier to understand—and we will put these functions in the test.py file (or test.js and so on) above the main function.
import names

def clickRadioButton(text):
    radioButton = waitForObject({'text':text, 'type':'QRadioButton', 'visible':'1', 'window':names.make_Payment_MainWindow})
    if not radioButton.checked:
        clickButton(radioButton)
    test.verify(radioButton.checked)

def getAmountDue():
    amountDueLabel = waitForObject({'name':'AmountDueLabel', 'type':'QLabel'})
    chars = []
    for char in str(amountDueLabel.text):
        if char.isdigit():
            chars.append(char)
    return cast("".join(chars), int)

def checkVisibleWidget(visible, hidden):
    widget = waitForObject({'name':visible, 'type':'QWidget'})
    test.compare(widget.visible, True)
    for name in hidden:
        widget = waitForObjectExists({'name':name, 'type':'QWidget'})
        test.compare(widget.visible, False)

def checkPaymentRange(minimum, maximum):
    paymentSpinBox = waitForObject({'buddy':names.make_Payment_This_Payment_QLabel,
                                     'type':'QSpinBox', 'unnamed':'1', 'visible':'1'})
    test.compare(paymentSpinBox.minimum, minimum)
    test.compare(paymentSpinBox.maximum, maximum)
import * as names from 'names.js';
function clickRadioButton(text) {
var radioButton = waitForObject({'text':text, 'type':'QRadioButton',
"visible":'1', 'window':names.makePaymentMainWindow});
if (!radioButton.checked) {
clickButton(radioButton);
}
test.verify(radioButton.checked);
}
function getAmountDue() {
var amountDueLabel = waitForObject({'name':'AmountDueLabel', 'type':'QLabel'});
return 0 + String(amountDueLabel.text).replace(/\D/g, "");
}
function checkVisibleWidget(visible, hidden) {
var widget = waitForObject({'name':visible, 'type':'QWidget'});
test.compare(widget.visible, true);
for (var i = 0; i < hidden.length; ++i) {
var name = hidden[i];
widget = waitForObjectExists({'name':name, 'type':'QWidget'});
test.compare(widget.visible, false);
}
}
function checkPaymentRange(minimum, maximum) {
var paymentSpinBox = waitForObject(names.thisPaymentQSpinBox);
test.compare(paymentSpinBox.minimum, minimum);
test.compare(paymentSpinBox.maximum, maximum);
}require 'names.pl';
sub clickRadioButton {
my $text = shift(@_);
my $radioButton = waitForObject({'text'=>$text, 'type'=>'QRadioButton', 'visible'=>'1', 'window'=>$Names::make_payment_mainwindow});
if (!$radioButton->checked) {
clickButton($radioButton);
}
test::verify($radioButton->checked);
}
sub getAmountDue {
my $amountDueLabel = waitForObject({'name'=>'AmountDueLabel', 'type'=>'QLabel'});
my $amount_due = $amountDueLabel->text;
$amount_due =~ s/\D//g; # remove non-digits
return $amount_due;
}
sub checkVisibleWidget {
my ($visible, @hidden) = @_;
my $widget = waitForObject({'name'=>$visible, 'type'=>'QWidget'});
test::compare($widget->visible, 1);
foreach (@hidden) {
my $widget = waitForObjectExists({'name'=>$_, 'type'=>'QWidget'});
test::compare($widget->visible, 0);
}
}
sub checkPaymentRange {
my ($minimum, $maximum) = @_;
my $paymentSpinBox = waitForObject({'buddy'=>$Names::make_payment_this_payment_qlabel, 'type'=>'QSpinBox', 'unnamed'=>'1', 'visible'=>'1'});
test::compare($paymentSpinBox->minimum, $minimum);
test::compare($paymentSpinBox->maximum, $maximum);
}# encoding: UTF-8
require 'names'
require 'squish'
include Squish
def clickRadioButton(text)
radioButton = waitForObject({:text=>text, :type=>'QRadioButton',
:visible=>'1', :window=>Names::Make_Payment_MainWindow})
if not radioButton.checked
clickButton(radioButton)
end
Test.verify(radioButton.checked)
end
def getAmountDue
amountDueLabel = waitForObject({:name=>'AmountDueLabel', :type=>'QLabel'})
String(amountDueLabel.text).gsub(/\D/, "").to_f
end
def checkVisibleWidget(visible, hidden)
widget = waitForObject({:name=>visible, :type=>'QWidget'})
Test.compare(widget.visible, true)
for name in hidden
widget = waitForObjectExists({:name=>name, :type=>'QWidget'})
Test.compare(widget.visible, false)
end
end
def checkPaymentRange(minimum, maximum)
paymentSpinBox = waitForObject({:buddy=>Names::Make_Payment_This_Payment_QLabel,
:type=>'QSpinBox', :unnamed=>'1', :visible=>'1'})
Test.compare(paymentSpinBox.minimum, minimum)
Test.compare(paymentSpinBox.maximum, maximum)
end
def max(x, y)
x > y ? x : y
end
def min(x, y)
x < y ? x : y
endsource [findFile "scripts" "names.tcl"]
proc clickRadioButton {text} {
set radioButton [waitForObject [::Squish::ObjectName text $text type QRadioButton visible 1 window $names::Make_Payment_MainWindow]]
if (![property get $radioButton checked]) {
invoke clickButton $radioButton
}
test verify [property get $radioButton checked]
}
proc getAmountDue {} {
set amountDueLabel [waitForObject [::Squish::ObjectName name AmountDueLabel type QLabel]]
set amountText [toString [property get $amountDueLabel text]]
regsub -all {\D} $amountText "" amountText
return [expr $amountText]
}
proc checkVisibleWidget {visible hidden} {
set widget [waitForObject [::Squish::ObjectName name $visible type QWidget]]
test compare [property get $widget visible] true
foreach name $hidden {
set widget [waitForObjectExists [::Squish::ObjectName name $name type QWidget]]
test compare [property get $widget visible] false
}
}
proc checkPaymentRange {minimum maximum} {
set paymentSpinBox [waitForObject $names::This_Payment_QSpinBox]
test compare [property get $paymentSpinBox minimum] $minimum
test compare [property get $paymentSpinBox maximum] $maximum
}The clickRadioButton function is used to click the radio button with the given text—this is used to set the correct page in the widget stack. The getAmoutDue function reads the text from the amount due label, strips out formatting characters (e.g., commas), and converts the result to an integer. The checkVisibleWidget function checks that the visible widget is visible and that the hidden widgets are not visible. One subtle point is that for visible widgets we must always use the Object waitForObject(objectOrName) function but for hidden widgets we must not use it but rather use the Object findObject(objectName) function instead. Finally, the checkPaymentRange function checks that the payment spinbox's range matches the range we expect it to have.
Now we can write our test for "check" mode and put more of our effort into testing the business rules and less into some of the basic chores. The code we have put in the test.py (or test.js, and so on) file is broken down into several functions. The main function is special for Squish — this function is the only function that Squish calls in a test, so we are free to add other functions, as we have done here, to make our main function clearer.
We will first show the main function, and then we will show the functions it calls that are in the same test.py file (since we have already seen the functions that are called from common.py above). Note that in the actual files, the main function is last but we prefer to show it first for ease of explanation.
def main():
    startApplication('"' + os.environ["SQUISH_PREFIX"] + '/examples/qt/paymentform/paymentform"')

    # Import functionality needed by more than one test script
    source(findFile("scripts", "common.py"))

    # Make sure we start in the mode we want to test: check mode
    clickRadioButton("Check")

    # Business rule #1: only the CheckWidget must be visible in check mode
    checkVisibleWidget("CheckWidget", ("CashWidget", "CardWidget"))

    # Business rule #2: the minimum payment is $10 and the maximum is
    # $250 or the amount due whichever is smaller
    amount_due = getAmountDue()
    checkPaymentRange(10, min(250, amount_due))

    # Business rule #3: the check date must be no earlier than 30 days
    # ago and no later than tomorrow
    today = QDate.currentDate()
    checkDateRange(today.addDays(-30), today.addDays(1))

    # Business rule #4: the Pay button is disabled (since the form's data
    # isn't yet valid), so we use waitForObjectExists()
    payButton = waitForObjectExists(names.make_Payment_Pay_QPushButton)
    test.verify(not payButton.enabled)

    # Business rule #5: the check must be signed (and if it isn't we
    # will check the check box ready to test the next rule)
    ensureSignedCheckBoxIsChecked()

    # Business rule #6: the Pay button should be enabled since all the
    # previous tests pass, the check is signed and now we have filled in
    # the account details
    populateCheckFields()
    payButton = waitForObject(names.make_Payment_Pay_QPushButton)
    test.verify(payButton.enabled)
function main() {
startApplication('"' + OS.getenv("SQUISH_PREFIX") + '/examples/qt/paymentform/paymentform"');
// Import functionality needed by more than one test script
source(findFile("scripts", "common.js"));
// Make sure we start in the mode we want to test: check mode
clickRadioButton("Check");
// Business rule #1: only the CheckWidget must be visible in check mode
checkVisibleWidget("CheckWidget", ["CashWidget", "CardWidget"]);
// Business rule #2: the minimum payment is $10 and the maximum is
// $250 or the amount due whichever is smaller
var amount_due = getAmountDue();
checkPaymentRange(10, Math.min(250, amount_due));
// Business rule #3: the check date must be no earlier than 30 days
// ago and no later than tomorrow
var today = QDate.currentDate();
checkDateRange(today.addDays(-30), today.addDays(1));
// Business rule #4: the Pay button is disabled (since the form's data
// isn't yet valid), so we use waitForObjectExists()
var payButton = waitForObjectExists({'type':'QPushButton', 'text':'Pay', 'unnamed':'1',
'visible':'1'});
test.verify(!payButton.enabled);
// Business rule #5: the check must be signed (and if it isn't we
// will check the check box ready to test the next rule)
ensureSignedCheckBoxIsChecked();
// Business rule #6: the Pay button should be enabled since all the
// previous tests pass, the check is signed and now we have filled in
// the account details
populateCheckFields();
payButton = waitForObject({'type':'QPushButton', 'text':'Pay', 'unnamed':'1',
'visible':'1'});
test.verify(payButton.enabled);
sendEvent("QCloseEvent", waitForObject(names.makePaymentMainWindow));
}sub main {
startApplication("\"$ENV{'SQUISH_PREFIX'}/examples/qt/paymentform/paymentform\"");
# Import functionality needed by more than one test script
source(findFile("scripts", "common.pl"));
# Make sure we start in the mode we want to test: check mode
clickRadioButton("Check");
# Business rule #1: only the CheckWidget must be visible in check mode
checkVisibleWidget("CheckWidget", ("CashWidget", "CardWidget"));
# Business rule #2: the minimum payment is $10 and the maximum is
# $250 or the amount due whichever is smaller
my $amount_due = getAmountDue();
checkPaymentRange(10, 250 < $amount_due ? 250 : $amount_due);
# Business rule #3: the check date must be no earlier than 30 days
# ago and no later than tomorrow
my $today = QDate::currentDate();
checkDateRange($today->addDays(-30), $today->addDays(1));
# Business rule #4: the Pay button is disabled (since the form's data
# isn't yet valid), so we use waitForObjectExists()
my $payButton = waitForObjectExists({'type'=>'QPushButton', 'text'=>'Pay', 'unnamed'=>'1', 'visible'=>'1'});
test::verify(!$payButton->enabled);
# Business rule #5: the check must be signed (and if it isn't we
# will check the check box ready to test the next rule)
ensureSignedCheckBoxIsChecked();
# Business rule #6: the Pay button should be enabled since all the
# previous tests pass, the check is signed and now we have filled in
# the account details
populateCheckFields();
$payButton = waitForObject({'type'=>'QPushButton', 'text'=>'Pay', 'unnamed'=>'1', 'visible'=>'1'});
test::compare($payButton->enabled, 1);
sendEvent("QCloseEvent", waitForObject($Names::make_payment_mainwindow));
}def main
startApplication("\"#{ENV['SQUISH_PREFIX']}/examples/qt/paymentform/paymentform\"")
# Import functionality needed by more than one test script
require findFile("scripts", "common.rb")
# Make sure we start in the mode we want to test: check mode
clickRadioButton("Check")
# Business rule #1: only the CheckWidget must be visible in check mode
checkVisibleWidget("CheckWidget", ["CashWidget", "CardWidget"])
# Business rule #2: the minimum payment is $10 and the maximum is
# $250 or the amount due whichever is smaller
amount_due = getAmountDue
checkPaymentRange(10, min(250, amount_due))
# Business rule #3: the check date must be no earlier than 30 days
# ago and no later than tomorrow
today = QDate.currentDate()
checkDateRange(today.addDays(-30), today.addDays(1))
# Business rule #4: the Pay button is disabled (since the form's data
# isn't yet valid), so we use waitForObjectExists()
payButton = waitForObjectExists({:type=>'QPushButton', :text=>'Pay', :unnamed=>'1', :visible=>'1'})
Test.verify(!payButton.enabled)
# Business rule #5: the check must be signed (and if it isn't we
# will check the check box ready to test the next rule)
ensureSignedCheckBoxIsChecked
# Business rule #6: the Pay button should be enabled since all the
# previous tests pass, the check is signed and now we have filled in
# the account details
populateCheckFields
payButton = waitForObject({:type=>'QPushButton', :text=>'Pay', :unnamed=>'1', :visible=>'1'})
Test.verify(payButton.enabled)
sendEvent("QCloseEvent", waitForObject(Names::Make_Payment_MainWindow))
endproc main {} {
startApplication "\"$::env(SQUISH_PREFIX)/examples/qt/paymentform/paymentform\""
# Import functionality needed by more than one test script
source [findFile "scripts" "common.tcl"]
# Make sure we start in the mode we want to test: check mode
clickRadioButton "Check"
# Business rule #1: only the CheckWidget must be visible in check mode
checkVisibleWidget "CheckWidget" {"CashWidget" "CardWidget"}
# Business rule #2: the minimum payment is $10 and the maximum is
# $250 or the amount due whichever is smaller
set amount_due [getAmountDue]
set maximum [expr 250 > $amount_due ? $amount_due : 250]
checkPaymentRange 10 $maximum
# Business rule #3: the check date must be no earlier than 30 days
# ago and no later than tomorrow
set today [invoke QDate currentDate]
set thirtyDaysAgo [toString [invoke $today addDays -30]]
set tomorrow [toString [invoke $today addDays 1]]
checkDateRange $thirtyDaysAgo $tomorrow
# Business rule #4: the Pay button is disabled (since the form's data
# isn't yet valid), so we use waitForObjectExists()
set payButton [waitForObjectExists $names::Make_Payment_Pay_QPushButton]
test verify [expr ![property get $payButton enabled]]
# Business rule #5: the check must be signed (and if it isn't we
# will check the check box ready to test the next rule)
ensureSignedCheckBoxIsChecked
# Business rule #6: the Pay button should be enabled since all the
# previous tests pass, the check is signed and now we have filled in
# the account details
populateCheckFields
set payButton [waitForObject $names::Make_Payment_Pay_QPushButton]
test verify [property get $payButton enabled]
sendEvent "QCloseEvent" [waitForObject $names::Make_Payment_MainWindow]
}The source(filename) function is used to read in a script and execute it. (Ruby users can use the standard require function instead.) Normally such a script is used purely to define things—for example, functions—and these then become available to the test script.
Getting the form into the right mode is now a one-liner thanks to our custom clickRadioButton function.
All the business rules are similar to before, but in each case the code to test the rule has been reduced to one or two lines thanks to our use of common functions (clickRadioButton, checkVisibleWidget, getAmoutDue, and checkPaymentRange), and the use of test-specific functions (checkDateRange, populateCheckFields, and ensureSignedCheckBoxIsChecked). These supporting functions are shown below, each followed by a brief explanation.
def checkDateRange(minimum, maximum):
    checkDateEdit = waitForObject(names.check_Date_QDateEdit)
    test.compare(checkDateEdit.minimumDate, minimum)
    test.compare(checkDateEdit.maximumDate, maximum)
function checkDateRange(minimum, maximum) {
var checkDateEdit = waitForObject({buddy:names.makePaymentCheckDateQLabel,
'type':'QDateEdit', 'unnamed':'1', 'visible':'1'});
test.compare(checkDateEdit.minimumDate, minimum);
test.compare(checkDateEdit.maximumDate, maximum);
}sub checkDateRange {
my ($minimum, $maximum) = @_;
$checkDateEdit = waitForObject({'buddy'=>$Names::make_payment_check_date_qlabel,
'type'=>'QDateEdit', 'unnamed'=>'1', 'visible'=>'1'});
test::verify($checkDateEdit->minimumDate == $minimum);
test::verify($checkDateEdit->maximumDate == $maximum);
}def checkDateRange(minimum, maximum)
checkDateEdit = waitForObject({:buddy=>Names::Make_Payment_Check_Date_QLabel,
:type=>'QDateEdit', :unnamed=>'1', :visible=>'1'})
Test.verify(checkDateEdit.minimumDate == minimum)
Test.verify(checkDateEdit.maximumDate == maximum)
endproc checkDateRange {minimum maximum} {
set checkDateEdit [waitForObject [$names::Check_Date_QDateEdit]]
set minimumDate [toString [property get $checkDateEdit minimumDate]]
set maximumDate [toString [property get $checkDateEdit maximumDate]]
test verify [string equal $minimum $minimumDate]
test verify [string equal $maximum $maximumDate]
}The checkDateRange function shows how we can test the properties of a QDateEdit. (Note for Tcl users: we have compared dates by converting them to strings.)
def ensureSignedCheckBoxIsChecked():
    checkSignedCheckBox = waitForObject(names.make_Payment_Check_Signed_QCheckBox)
    if not checkSignedCheckBox.checked:
        clickButton(checkSignedCheckBox)
    test.verify(checkSignedCheckBox.checked)
function ensureSignedCheckBoxIsChecked() {
var checkSignedCheckBox = waitForObject({'text':'Check Signed',
'type':'QCheckBox', 'unnamed':'1', 'visible':'1',
'window':names.makePaymentMainWindow});
if (!checkSignedCheckBox.checked) {
clickButton(checkSignedCheckBox);
}
test.verify(checkSignedCheckBox.checked);
}sub ensureSignedCheckBoxIsChecked {
my $checkSignedCheckBox = waitForObject({'text'=>'Check Signed', 'type'=>'QCheckBox',
'unnamed'=>'1', 'visible'=>'1', 'window'=>$Names::make_payment_mainwindow});
if (!$checkSignedCheckBox->checked) {
clickButton($checkSignedCheckBox);
}
test::verify($checkSignedCheckBox->checked);
}def ensureSignedCheckBoxIsChecked
checkSignedCheckBox = waitForObject({:text=>'Check Signed', :type=>'QCheckBox',
:unnamed=>'1', :visible=>'1', :window=>Names::Make_Payment_MainWindow})
if not checkSignedCheckBox.checked
clickButton(checkSignedCheckBox)
end
Test.verify(checkSignedCheckBox.checked)
endproc ensureSignedCheckBoxIsChecked {} {
set checkSignedCheckBox [waitForObject $names::Make_Payment_Check_Signed_QCheckBox]
if (![property get $checkSignedCheckBox checked]) {
invoke clickButton $checkSignedCheckBox
}
test verify [property get $checkSignedCheckBox checked]
}The ensureSignedCheckBoxIsChecked function checks the checkbox if it isn't already checked—and then it verifies that the checkbox is checked.
def populateCheckFields():
bankNameLineEdit = waitForObject(names.bank_Name_QLineEdit)
type(bankNameLineEdit, "A Bank")
bankNumberLineEdit = waitForObject(names.bank_Number_QLineEdit_2)
type(bankNumberLineEdit, "88-91-33X")
accountNameLineEdit = waitForObject(names.account_Name_QLineEdit_2)
type(accountNameLineEdit, "An Account")
accountNumberLineEdit = waitForObject(names.account_Number_QLineEdit_2)
type(accountNumberLineEdit, "932745395")function populateCheckFields() {
var bankNameLineEdit = waitForObject({'buddy':names.makePaymentBankNameQLabel,
'type':'QLineEdit', 'unnamed':'1', 'visible':'1'});
type(bankNameLineEdit, "A Bank");
var bankNumberLineEdit = waitForObject({'buddy':names.makePaymentBankNumberQLabel,
'type':'QLineEdit', 'unnamed':'1', 'visible':'1'});
type(bankNumberLineEdit, "88-91-33X");
var accountNameLineEdit = waitForObject({'buddy':names.makePaymentAccountNameQLabel,
'type':'QLineEdit', 'unnamed':'1', 'visible':'1'});
type(accountNameLineEdit, "An Account");
var accountNumberLineEdit = waitForObject({'buddy':names.makePaymentAccountNumberQLabel,
'type':'QLineEdit', 'unnamed':'1', 'visible':'1'});
type(accountNumberLineEdit, "932745395");
}sub populateCheckFields {
my $bankNameLineEdit = waitForObject({'buddy'=>$Names::make_payment_bank_name_qlabel,
'type'=>'QLineEdit', 'unnamed'=>'1', 'visible'=>'1'});
type($bankNameLineEdit, "A Bank");
my $bankNumberLineEdit = waitForObject({'buddy'=>$Names::make_payment_bank_number_qlabel,
'type'=>'QLineEdit', 'unnamed'=>'1', 'visible'=>'1'});
type($bankNumberLineEdit, "88-91-33X");
my $accountNameLineEdit = waitForObject({'buddy'=>$Names::make_payment_account_name_qlabel,
'type'=>'QLineEdit', 'unnamed'=>'1', 'visible'=>'1'});
type($accountNameLineEdit, "An Account");
my $accountNumberLineEdit = waitForObject({'buddy'=>$Names::make_payment_account_number_qlabel,
'type'=>'QLineEdit', 'unnamed'=>'1', 'visible'=>'1'});
type($accountNumberLineEdit, "932745395");
}def populateCheckFields
bankNameLineEdit = waitForObject({:buddy=>Names::Make_Payment_Bank_Name_QLabel,
:type=>'QLineEdit', :unnamed=>'1', :visible=>'1'})
type(bankNameLineEdit, "A Bank")
bankNumberLineEdit = waitForObject({:buddy=>Names::Make_Payment_Bank_Number_QLabel,
:type=>'QLineEdit', :unnamed=>'1', :visible=>'1'})
type(bankNumberLineEdit, "88-91-33X")
accountNameLineEdit = waitForObject({:buddy=>Names::Make_Payment_Account_Name_QLabel,
:type=>'QLineEdit', :unnamed=>'1', :visible=>'1'})
type(accountNameLineEdit, "An Account")
accountNumberLineEdit = waitForObject({:buddy=>Names::Make_Payment_Account_Number_QLabel,
:type=>'QLineEdit', :unnamed=>'1', :visible=>'1'})
type(accountNumberLineEdit, "932745395")
endproc populateCheckFields {} {
set bankNameLineEdit [waitForObject $names::Bank_Name_QLineEdit]
invoke type $bankNameLineEdit "A Bank"
set bankNumberLineEdit [waitForObject $names::Bank_Number_QLineEdit]
invoke type $bankNumberLineEdit "88-91-33X"
set accountNameLineEdit [waitForObject $names::Account_Name_QLineEdit]
invoke type $accountNameLineEdit "An Account"
set accountNumberLineEdit [waitForObject $names::Account_Number_QLineEdit]
invoke type $accountNumberLineEdit "932745395"
}The populateCheckFields function uses the type(objectOrName, text) function to simulate the user entering text. It is almost always better to simulate user interaction than to set widget properties directly—after all, it is the application's behavior as experienced by the user that we normally want to test. Once the fields are populated the Pay button should be enabled, and this is checked in the main function's business rule six after calling the populateCheckFields function.
Another point to note is that in this form we have two unnamed line edits both with the label "Account Name", and two other's with the label "Account Number". Squish is able to distinguish them because only one of each is visible at any one time. We could of course use the QObject::setObjectName method in the AUT's source code to give them unique names if we wanted to.
def checkDateRange(minimum, maximum):
checkDateEdit = waitForObject(names.check_Date_QDateEdit)
test.compare(checkDateEdit.minimumDate, minimum)
test.compare(checkDateEdit.maximumDate, maximum)
def ensureSignedCheckBoxIsChecked():
checkSignedCheckBox = waitForObject(names.make_Payment_Check_Signed_QCheckBox)
if not checkSignedCheckBox.checked:
clickButton(checkSignedCheckBox)
test.verify(checkSignedCheckBox.checked)
def populateCheckFields():
bankNameLineEdit = waitForObject(names.bank_Name_QLineEdit)
type(bankNameLineEdit, "A Bank")
bankNumberLineEdit = waitForObject(names.bank_Number_QLineEdit_2)
type(bankNumberLineEdit, "88-91-33X")
accountNameLineEdit = waitForObject(names.account_Name_QLineEdit_2)
type(accountNameLineEdit, "An Account")
accountNumberLineEdit = waitForObject(names.account_Number_QLineEdit_2)
type(accountNumberLineEdit, "932745395")function checkDateRange(minimum, maximum) {
var checkDateEdit = waitForObject({buddy:names.makePaymentCheckDateQLabel,
'type':'QDateEdit', 'unnamed':'1', 'visible':'1'});
test.compare(checkDateEdit.minimumDate, minimum);
test.compare(checkDateEdit.maximumDate, maximum);
}
function ensureSignedCheckBoxIsChecked() {
    var checkSignedCheckBox = waitForObject({'text':'Check Signed',
        'type':'QCheckBox', 'unnamed':'1', 'visible':'1',
        'window':names.makePaymentMainWindow});
    if (!checkSignedCheckBox.checked) {
        clickButton(checkSignedCheckBox);
    }
    test.verify(checkSignedCheckBox.checked);
}
function populateCheckFields() {
var bankNameLineEdit = waitForObject({'buddy':names.makePaymentBankNameQLabel,
'type':'QLineEdit', 'unnamed':'1', 'visible':'1'});
type(bankNameLineEdit, "A Bank");
var bankNumberLineEdit = waitForObject({'buddy':names.makePaymentBankNumberQLabel,
'type':'QLineEdit', 'unnamed':'1', 'visible':'1'});
type(bankNumberLineEdit, "88-91-33X");
var accountNameLineEdit = waitForObject({'buddy':names.makePaymentAccountNameQLabel,
'type':'QLineEdit', 'unnamed':'1', 'visible':'1'});
type(accountNameLineEdit, "An Account");
var accountNumberLineEdit = waitForObject({'buddy':names.makePaymentAccountNumberQLabel,
'type':'QLineEdit', 'unnamed':'1', 'visible':'1'});
type(accountNumberLineEdit, "932745395");
}sub checkDateRange {
my ($minimum, $maximum) = @_;
$checkDateEdit = waitForObject({'buddy'=>$Names::make_payment_check_date_qlabel,
'type'=>'QDateEdit', 'unnamed'=>'1', 'visible'=>'1'});
test::verify($checkDateEdit->minimumDate == $minimum);
test::verify($checkDateEdit->maximumDate == $maximum);
}
sub ensureSignedCheckBoxIsChecked {
    my $checkSignedCheckBox = waitForObject({'text'=>'Check Signed', 'type'=>'QCheckBox',
        'unnamed'=>'1', 'visible'=>'1', 'window'=>$Names::make_payment_mainwindow});
    if (!$checkSignedCheckBox->checked) {
        clickButton($checkSignedCheckBox);
    }
    test::verify($checkSignedCheckBox->checked);
}
sub populateCheckFields {
my $bankNameLineEdit = waitForObject({'buddy'=>$Names::make_payment_bank_name_qlabel,
'type'=>'QLineEdit', 'unnamed'=>'1', 'visible'=>'1'});
type($bankNameLineEdit, "A Bank");
my $bankNumberLineEdit = waitForObject({'buddy'=>$Names::make_payment_bank_number_qlabel,
'type'=>'QLineEdit', 'unnamed'=>'1', 'visible'=>'1'});
type($bankNumberLineEdit, "88-91-33X");
my $accountNameLineEdit = waitForObject({'buddy'=>$Names::make_payment_account_name_qlabel,
'type'=>'QLineEdit', 'unnamed'=>'1', 'visible'=>'1'});
type($accountNameLineEdit, "An Account");
my $accountNumberLineEdit = waitForObject({'buddy'=>$Names::make_payment_account_number_qlabel,
'type'=>'QLineEdit', 'unnamed'=>'1', 'visible'=>'1'});
type($accountNumberLineEdit, "932745395");
}def checkDateRange(minimum, maximum)
checkDateEdit = waitForObject({:buddy=>Names::Make_Payment_Check_Date_QLabel,
:type=>'QDateEdit', :unnamed=>'1', :visible=>'1'})
Test.verify(checkDateEdit.minimumDate == minimum)
Test.verify(checkDateEdit.maximumDate == maximum)
end
def ensureSignedCheckBoxIsChecked
    checkSignedCheckBox = waitForObject({:text=>'Check Signed', :type=>'QCheckBox',
        :unnamed=>'1', :visible=>'1', :window=>Names::Make_Payment_MainWindow})
    if not checkSignedCheckBox.checked
        clickButton(checkSignedCheckBox)
    end
    Test.verify(checkSignedCheckBox.checked)
end
def populateCheckFields
bankNameLineEdit = waitForObject({:buddy=>Names::Make_Payment_Bank_Name_QLabel,
:type=>'QLineEdit', :unnamed=>'1', :visible=>'1'})
type(bankNameLineEdit, "A Bank")
bankNumberLineEdit = waitForObject({:buddy=>Names::Make_Payment_Bank_Number_QLabel,
:type=>'QLineEdit', :unnamed=>'1', :visible=>'1'})
type(bankNumberLineEdit, "88-91-33X")
accountNameLineEdit = waitForObject({:buddy=>Names::Make_Payment_Account_Name_QLabel,
:type=>'QLineEdit', :unnamed=>'1', :visible=>'1'})
type(accountNameLineEdit, "An Account")
accountNumberLineEdit = waitForObject({:buddy=>Names::Make_Payment_Account_Number_QLabel,
:type=>'QLineEdit', :unnamed=>'1', :visible=>'1'})
type(accountNumberLineEdit, "932745395")
endproc checkDateRange {minimum maximum} {
set checkDateEdit [waitForObject [$names::Check_Date_QDateEdit]]
set minimumDate [toString [property get $checkDateEdit minimumDate]]
set maximumDate [toString [property get $checkDateEdit maximumDate]]
test verify [string equal $minimum $minimumDate]
test verify [string equal $maximum $maximumDate]
}
proc ensureSignedCheckBoxIsChecked {} {
    set checkSignedCheckBox [waitForObject $names::Make_Payment_Check_Signed_QCheckBox]
    if (![property get $checkSignedCheckBox checked]) {
        invoke clickButton $checkSignedCheckBox
    }
    test verify [property get $checkSignedCheckBox checked]
}
proc populateCheckFields {} {
    set bankNameLineEdit [waitForObject $names::Bank_Name_QLineEdit]
    invoke type $bankNameLineEdit "A Bank"
    set bankNumberLineEdit [waitForObject $names::Bank_Number_QLineEdit]
    invoke type $bankNumberLineEdit "88-91-33X"
    set accountNameLineEdit [waitForObject $names::Account_Name_QLineEdit]
    invoke type $accountNameLineEdit "An Account"
    set accountNumberLineEdit [waitForObject $names::Account_Number_QLineEdit]
    invoke type $accountNumberLineEdit "932745395"
}We are now ready to look at the last test of the form's business logic—the test of "card" mode. Just as with "check" mode we have shortened and simplified the main function by using functions defined in the common.py (or common.js, and so on) file and by using test-specific functions in the test.py file (or test.js and so on).
def main():
    startApplication('"' + os.environ["SQUISH_PREFIX"] + '/examples/qt/paymentform/paymentform"')

    source(findFile("scripts", "common.py"))

    # Make sure we start in the mode we want to test: card mode
    clickRadioButton("Credit Card")

    # Business rule #1: only the CardWidget must be visible in check mode
    checkVisibleWidget("CardWidget", ("CashWidget", "CheckWidget"))

    # Business rule #2: the minimum payment is $10 or 5% of the amount due
    # whichever is larger and the maximum is $5000 or the amount due
    # whichever is smaller
    amount_due = getAmountDue()
    checkPaymentRange(max(10, amount_due / 20.0), min(5000, amount_due))

    # Business rule #3: for non-Visa cards the issue date must be no
    # earlier than 3 years ago
    # Business rule #4: the expiry date must be at least a month later
    # than today---we will make sure this is the case for the later tests
    checkCardDateEdits()

    # Business rule #5: the Pay button is disabled (since the form's data
    # isn't yet valid), so we use waitForObjectExists()
    payButton = waitForObjectExists(names.make_Payment_Pay_QPushButton)
    test.compare(payButton.enabled, False)

    # Business rule #6: the Pay button should be enabled since all the
    # previous tests pass, and now we have filled in the account details
    populateCardFields()
    payButton = waitForObject(names.make_Payment_Pay_QPushButton)
    test.verify(payButton.enabled)
function main() {
startApplication('"' + OS.getenv("SQUISH_PREFIX") + '/examples/qt/paymentform/paymentform"');
source(findFile("scripts", "common.js"));
// Make sure we start in the mode we want to test: card mode
clickRadioButton("Credit Card");
// Business rule #1: only the CardWidget must be visible in check mode
checkVisibleWidget("CardWidget", ["CashWidget", "CheckWidget"]);
// Business rule #2: the minimum payment is $10 or 5% of the amount due
// whichever is larger and the maximum is $5000 or the amount due
// whichever is smaller
var amount_due = getAmountDue();
checkPaymentRange(Math.max(10, amount_due / 20.0), Math.min(5000, amount_due));
// Business rule #3: for non-Visa cards the issue date must be no
// earlier than 3 years ago
// Business rule #4: the expiry date must be at least a month later
// than today---we will make sure this is the case for the later tests
checkCardDateEdits();
// Business rule #5: the Pay button is disabled (since the form's data
// isn't yet valid), so we use waitForObjectExists()
var payButton = waitForObjectExists(names.makePaymentPayQPushButton);
test.compare(payButton.enabled, false);
// Business rule #6: the Pay button should be enabled since all the
// previous tests pass, and now we have filled in the account details
populateCardFields();
payButton = waitForObject(names.makePaymentPayQPushButton);
test.verify(payButton.enabled);
sendEvent("QCloseEvent", waitForObject(names.makePaymentMainWindow));
}sub main
{
startApplication("\"$ENV{'SQUISH_PREFIX'}/examples/qt/paymentform/paymentform\"");
source(findFile("scripts", "common.pl"));
# Make sure we start in the mode we want to test: card mode
clickRadioButton("Credit Card");
# Business rule #1: only the CardWidget must be visible in check mode
checkVisibleWidget("CardWidget", ("CashWidget", "CheckWidget"));
# Business rule #2: the minimum payment is $10 or 5% of the amount due
# whichever is larger and the maximum is $5000 or the amount due
# whichever is smaller
my $amount_due = getAmountDue();
my $paymentSpinBox = waitForObject({'buddy'=>$Names::make_payment_this_payment_qlabel, 'type'=>'QSpinBox', 'unnamed'=>'1', 'visible'=>'1'});
my $fraction = $amount_due / 20.0;
checkPaymentRange(10 < $fraction ? $fraction : 10,
5000 < $amount_due ? 5000 : $amount_due);
# Business rule #3: for non-Visa cards the issue date must be no
# earlier than 3 years ago
# Business rule #4: the expiry date must be at least a month later
# than today---we will make sure this is the case for the later tests
checkCardDateEdits();
# Business rule #5: the Pay button is disabled (since the form's data
# isn't yet valid), so we use waitForObjectExists()
my $payButton = waitForObjectExists({'type'=>'QPushButton', 'text'=>'Pay', 'unnamed'=>'1', 'visible'=>'1'});
test::compare($payButton->enabled, 0);
# Business rule #6: the Pay button should be enabled since all the
# previous tests pass, and now we have filled in the account details
populateCardFields();
$payButton = waitForObject({'type'=>'QPushButton', 'text'=>'Pay', 'unnamed'=>'1', 'visible'=>'1'});
test::compare($payButton->enabled, 1);
sendEvent("QCloseEvent", waitForObject($Names::make_payment_mainwindow));
}def main
startApplication("\"#{ENV['SQUISH_PREFIX']}/examples/qt/paymentform/paymentform\"")
require findFile("scripts", "common.rb")
# Make sure we start in the mode we want to test: card mode
clickRadioButton("Credit Card")
# Business rule #1: only the CardWidget must be visible in check mode
checkVisibleWidget("CardWidget", ["CashWidget", "CheckWidget"])
# Business rule #2: the minimum payment is $10 or 5% of the amount due
# whichever is larger and the maximum is $5000 or the amount due
# whichever is smaller
amount_due = getAmountDue
checkPaymentRange(max(10, amount_due / 20.0), min(5000, amount_due))
# Business rule #3: for non-Visa cards the issue date must be no
# earlier than 3 years ago
# Business rule #4: the expiry date must be at least a month later
# than today---we will make sure this is the case for the later tests
checkCardDateEdits
# Business rule #5: the Pay button is disabled (since the form's data
# isn't yet valid), so we use waitForObjectExists()
payButton = waitForObjectExists({:type=>'QPushButton', :text=>'Pay', :unnamed=>'1'})
Test.compare(payButton.enabled, false)
# Business rule #6: the Pay button should be enabled since all the
# previous tests pass, and now we have filled in the account details
populateCardFields
payButton = waitForObject({:type=>'QPushButton', :text=>'Pay', :unnamed=>'1'})
Test.verify(payButton.enabled)
sendEvent("QCloseEvent", waitForObject(Names::Make_Payment_MainWindow))
endproc main {} {
startApplication "\"$::env(SQUISH_PREFIX)/examples/qt/paymentform/paymentform\""
source [findFile "scripts" "common.tcl"]
# Make sure we start in the mode we want to test: card mode
clickRadioButton "Credit Card"
# Business rule #1: only the CardWidget must be visible in check mode
checkVisibleWidget "CardWidget" {"CashWidget" "CheckWidget"}
# Business rule #2: the minimum payment is $10 or 5% of the amount due
# whichever is larger and the maximum is $5000 or the amount due
# whichever is smaller
set amount_due [getAmountDue]
set five_percent [expr $amount_due / 20.0]
set minimum [expr 10 < $five_percent ? $five_percent : 10]
set maximum [expr 5000 > $amount_due ? $amount_due : 5000]
checkPaymentRange $minimum $maximum
# Business rule #3: for non-Visa cards the issue date must be no
# earlier than 3 years ago
# Business rule #4: the expiry date must be at least a month later
# than today---we will make sure this is the case for the later tests
checkCardDateEdits
# Business rule #5: the Pay button is disabled (since the form's data
# isn't yet valid), so we use waitForObjectExists()
set payButton [waitForObjectExists $names::Make_Payment_Pay_QPushButton]
test compare [property get $payButton enabled] false
# Business rule #6: the Pay button should be enabled since all the
# previous tests pass, and now we have filled in the account details
populateCardFields
set payButton [waitForObject $names::Make_Payment_Pay_QPushButton]
test verify [property get $payButton enabled]
sendEvent "QCloseEvent" [waitForObject $names::Make_Payment_MainWindow]
}The testing of each business rule is very similar to what we did for "check" mode—for example, business rules one and two use the same functions but with different parameters. We have combined the test for business rules three and four into a single test-specific function, checkCardDateEdits, that we will see in a moment. Business rules five and six work exactly the same way as before only this time we must populate different widgets to enable the Pay button and have created the test-specific populateCardFields function to do this.
def checkCardDateEdits():
    cardTypeComboBox = waitForObject(names.card_Type_QComboBox)
    for index in range(cardTypeComboBox.count):
        if cardTypeComboBox.itemText(index) != "Visa":
            cardTypeComboBox.setCurrentIndex(index)
            break
    today = QDate.currentDate()
    issueDateEdit = waitForObject(names.issue_Date_QDateEdit)
    test.compare(issueDateEdit.minimumDate.toString(), today.addYears(-3).toString())

    expiryDateEdit = waitForObject(names.expiry_Date_QDateEdit)
    type(expiryDateEdit, today.addMonths(2).toString("MMM yyyy"))

def populateCardFields():
    cardAccountNameLineEdit = waitForObject(names.account_Name_QLineEdit_2)
    type(cardAccountNameLineEdit, "An Account")
    cardAccountNumberLineEdit = waitForObject(names.account_Number_QLineEdit_2)
    type(cardAccountNumberLineEdit, "1343 876 326 1323 32")
function checkCardDateEdits() {
var cardTypeComboBox = waitForObject(names.cardTypeQComboBox);
for (var index = 0; index < cardTypeComboBox.count; ++index) {
if (cardTypeComboBox.itemText(index) != "Visa") {
cardTypeComboBox.setCurrentIndex(index);
break;
}
}
var today = QDate.currentDate();
var issueDateEdit = waitForObject(names.issueDateQDateEdit);
test.compare(issueDateEdit.minimumDate.toString(), today.addYears(-3).toString());
var expiryDateEdit = waitForObject(names.expiryDateQDateEdit);
type(expiryDateEdit, today.addMonths(2).toString("MMM yyyy"));
}
function populateCardFields() {
var cardAccountNameLineEdit = waitForObject(names.accountNameQLineEdit);
type(cardAccountNameLineEdit, "An Account");
var cardAccountNumberLineEdit = waitForObject(names.accountNumberQLineEdit);
type(cardAccountNumberLineEdit, "1343 876 326 1323 32");
}sub checkCardDateEdits
{
my $cardTypeComboBox = waitForObject({'buddy'=>$Names::make_payment_card_type_qlabel,
'type'=>'QComboBox', 'unnamed'=>'1', 'visible'=>'1'});
for (my $index = 0; $index < $cardTypeComboBox->count; $index++) {
if ($cardTypeComboBox->itemText($index) != "Visa") {
$cardTypeComboBox->setCurrentIndex($index);
last;
}
}
my $today = QDate::currentDate();
my $issueDateEdit = waitForObject({'buddy'=>$Names::make_payment_issue_date_qlabel,
'type'=>'QDateEdit', 'unnamed'=>'1', 'visible'=>'1'});
test::compare($issueDateEdit->minimumDate->toString(), $today->addYears(-3)->toString());
my $expiryDateEdit = waitForObject({'buddy'=>$Names::make_payment_expiry_date_qlabel,
'type'=>'QDateEdit', 'unnamed'=>'1', 'visible'=>'1'});
type($expiryDateEdit, $today->addMonths(2)->toString("MMM yyyy"));
}
sub populateCardFields
{
my $cardAccountNameLineEdit = waitForObject({'buddy'=>$Names::make_payment_account_name_qlabel,
'type'=>'QLineEdit', 'unnamed'=>'1', 'visible'=>'1'});
type($cardAccountNameLineEdit, "An Account");
my $cardAccountNumberLineEdit = waitForObject({'buddy'=>$Names::make_payment_account_number_qlabel,
'type'=>'QLineEdit', 'unnamed'=>'1', 'visible'=>'1'});
type($cardAccountNumberLineEdit, "1343 876 326 1323 32");
}def checkCardDateEdits
cardTypeComboBox = waitForObject({:buddy=>Names::Make_Payment_Card_Type_QLabel,
:type=>'QComboBox', :unnamed=>'1', :visible=>'1'})
for index in 0...cardTypeComboBox.count
if cardTypeComboBox.itemText(index) != "Visa"
cardTypeComboBox.setCurrentIndex(index)
break
end
end
today = QDate.currentDate()
issueDateEdit = waitForObject({:buddy=>Names::Make_Payment_Issue_Date_QLabel,
:type=>'QDateEdit', :unnamed=>'1', :visible=>'1'})
Test.compare(issueDateEdit.minimumDate.toString(), today.addYears(-3).toString())
expiryDateEdit = waitForObject({:buddy=>Names::Make_Payment_Expiry_Date_QLabel,
:type=>'QDateEdit', :unnamed=>'1', :visible=>'1'})
type(expiryDateEdit, today.addMonths(2).toString("MMM yyyy"))
end
def populateCardFields
cardAccountNameLineEdit = waitForObject({:buddy=>Names::Make_Payment_Account_Name_QLabel,
:type=>'QLineEdit', :unnamed=>'1', :visible=>'1'})
type(cardAccountNameLineEdit, "An Account")
cardAccountNumberLineEdit = waitForObject({:buddy=>Names::Make_Payment_Account_Number_QLabel,
:type=>'QLineEdit', :unnamed=>'1', :visible=>'1'})
type(cardAccountNumberLineEdit, "1343 876 326 1323 32")
endproc checkCardDateEdits {} {
set cardTypeComboBox [waitForObject $names::Card_Type_QComboBox]
set count [property get $cardTypeComboBox count]
for {set index 0} {$index < $count} {incr index} {
if {[invoke $cardTypeComboBox itemText $index] != "Visa"} {
invoke $cardTypeComboBox setCurrentIndex $index
break
}
}
set today [invoke QDate currentDate]
set issueDateEdit [waitForObject $names::Issue_Date_QDateEdit]
set maximumIssueDate [toString [property get $issueDateEdit \
maximumDate]]
set threeYearsAgo [toString [invoke $today addYears -3]]
test verify [string equal $maximumIssueDate $threeYearsAgo]
set expiryDateEdit [waitForObject $names::Expiry_Date_QDateEdit]
set date [invoke $today addMonths 2]
invoke type $expiryDateEdit [invoke $date toString "MMM yyyy"]
}
proc populateCardFields {} {
set cardAccountNameLineEdit [waitForObject $names::Account_Name_QLineEdit]
invoke type $cardAccountNameLineEdit "An Account"
set cardAccountNumberLineEdit [waitForObject $names::Account_Number_QLineEdit]
invoke type $cardAccountNumberLineEdit "1343 876 326 1323 32"
}The checkCardDateEdits function is used for business rules three and four. For rule three we need the card type combobox to be on any card type except Visa, so we iterate over the combobox's items and set the current item to be the first non-Visa item we find. We then check that the minimum issue date has been correctly set to three years ago. Business rule four specifies that the expiry date must be at least a month ahead. We explicitly set the expiry to be a couple of months ahead so that the Pay button will be enabled later on. Initially though, the Pay button should be disabled, so the code for business rule five in the main function checks for this.
For the last business rule we need some fake data for the card account name and number, and this is what the populateCardFields function generates. After calling this function and having ensured that the dates are in range in the checkCardDateEdits function, the Pay button should now be enabled. At the end of the main function we check that this is the case.
We have now completed our review of testing business rules using stateful and single-valued widgets. Qt has other such widgets including QDateTimeEdit, QDial, QDoubleSpinBox, and QTimeEdit, but all of them are identified and tested using the same techniques we have seen here.
How to Test Items in Item Views, Item Widgets, and Models
In this section we will see how to iterate over every item in Qt's item widgets (e.g., QListWidget, QTableWidget, and QTreeWidget), Qt's item views (e.g., QListView, QTableView, and QTreeView), and to extract each item's text and check its checked state and whether it is selected.
For the Q*View classes, we access the underlying model, (e.g., QAbstractItemModel, QAbstractTableModel, and iterate over the model's data, since the views themselves display but don't actually hold data.
Although the examples only output each item's text and checked and selected statuses to Squish's log, they are very easy to adapt to do more sophisticated testing, such as comparing actual values against expected values. With one specified exception, all the code shown in this section is taken from the examples/qt/itemviews example's test suites.
How to Test Items in QListWidgets
It is very easy to iterate over all the items in a list widget and retrieve their texts and check their checked and selected statuses, as the following test example shows:
import os

def main():
    startApplication('"' + os.environ["SQUISH_PREFIX"] + '/examples/qt/itemviews/itemviews"')
    listWidgetName = "{type='QListWidget' unnamed='1' visible='1'}"
    listWidget = waitForObject(listWidgetName)
    for row in range(listWidget.count):
        item = listWidget.item(row)
        checked = selected = ""
        if item.checkState() == Qt.Checked:
            checked = " +checked"
        if item.isSelected():
            selected = " +selected"
        test.log("(%d) '%s'%s%s" % (row, item.text(), checked, selected))
    sendEvent("QCloseEvent", waitForObject(":Item Views_MainWindow"))
function main()
{
startApplication('"' + OS.getenv("SQUISH_PREFIX") + '/examples/qt/itemviews/itemviews"');
var listWidgetName = "{type='QListWidget' unnamed='1' visible='1'}";
var listWidget = waitForObject(listWidgetName);
for (var row = 0; row < listWidget.count; ++row) {
var item = listWidget.item(row);
var checked = "";
var selected = "";
if (item.checkState() == Qt.Checked) {
checked = " +checked";
}
if (item.isSelected()) {
selected = " +selected";
}
test.log("(" + String(row) + ") '" + item.text() + "'" +
checked + selected);
}
sendEvent("QCloseEvent", waitForObject(":Item Views_MainWindow"));
}sub main
{
startApplication("\"$ENV{'SQUISH_PREFIX'}/examples/qt/itemviews/itemviews\"");
my $listWidgetName = "{type='QListWidget' unnamed='1' visible='1'}";
my $listWidget = waitForObject($listWidgetName);
for ( my $row = 0 ; $row < $listWidget->count ; ++$row ) {
my $item = $listWidget->item($row);
my $checked = "";
my $selected = "";
if ( $item->checkState() == Qt::Checked ) {
$checked = " +checked";
}
if ( $item->isSelected() ) {
$selected = " +selected";
}
test::log( "($row) '" . $item->text() . "'$checked$selected" );
}
sendEvent( "QCloseEvent", waitForObject(":Item Views_MainWindow") );
}# encoding: UTF-8 require 'squish' include Squish def main startApplication("\"#{ENV['SQUISH_PREFIX']}/examples/qt/itemviews/itemviews\"") listWidgetName = "{type='QListWidget' unnamed='1' visible='1'}" listWidget = waitForObject(listWidgetName) for row in 0...listWidget.count do item = listWidget.item(row) checked = selected = "" if item.checkState() == Qt::CHECKED checked = " +checked" end if item.isSelected() selected = " +selected" end Test.log("(#{row}) '#{item.text()}'#{checked}#{selected}") end sendEvent("QCloseEvent", waitForObject(":Item Views_MainWindow")) end
proc main {} {
    startApplication "\"$::env(SQUISH_PREFIX)/examples/qt/itemviews/itemviews\""
    set listWidgetName {{type='QListWidget' unnamed='1' visible='1'}}
    set listWidget [waitForObject $listWidgetName]
    for {set row 0} {$row < [property get $listWidget count]} {incr row} {
        set item [invoke $listWidget item $row]
        set checked ""
        set selected ""
        if {[invoke $item checkState] == [enum Qt Checked]} {
            set checked " +checked"
        }
        if [invoke $item isSelected] {
            set selected " +selected"
        }
        set text [toString [invoke $item text]]
        test log "($row) '$text'$checked$selected"
    }
    sendEvent "QCloseEvent" [waitForObject ":Item Views_MainWindow"]
}
All the output goes to Squish's log, but clearly it is easy to change the script to test against a list of specific values and so on.
How to Test Items in QListViews (QAbstractItemModels and QItemSelectionModels)
The view classes don't hold any data themselves; instead they visualize the data held in a model. So if we want to access all the items associated with a view we must first retrieve the view's model, and then iterate over the model's items. Furthermore, selections are held separately from the data model—in a selection model. This is because a selection is about visual interaction and does not affect the underlying data. (Of course a user might make a selection and then apply a change to the selection, but from the data model's point of view the change is simply applied to one or more items and the model doesn't know or care how those items were chosen.)
import os

def main():
    startApplication('"' + os.environ["SQUISH_PREFIX"] + '/examples/qt/itemviews/itemviews"')
    listViewName = "{type='QListView' unnamed='1' visible='1'}"
    listView = waitForObject(listViewName)
    model = listView.model()
    selectionModel = listView.selectionModel()
    for row in range(model.rowCount()):
        index = model.index(row, 0)
        text = model.data(index).toString()
        checked = selected = ""
        checkState = model.data(index, Qt.CheckStateRole).toInt()
        if checkState == Qt.Checked:
            checked = " +checked"
        if selectionModel.isSelected(index):
            selected = " +selected"
        test.log("(%d) '%s'%s%s" % (row, text, checked, selected))
    sendEvent("QCloseEvent", waitForObject(":Item Views_MainWindow"))
function main()
{
startApplication('"' + OS.getenv("SQUISH_PREFIX") + '/examples/qt/itemviews/itemviews"');
var listViewName = "{type='QListView' unnamed='1' visible='1'}";
var listView = waitForObject(listViewName);
var model = listView.model();
var selectionModel = listView.selectionModel();
for (var row = 0; row < model.rowCount(); ++row) {
var index = model.index(row, 0);
var text = model.data(index).toString();
var checked = "";
var selected = "";
var checkState = model.data(index, Qt.CheckStateRole).toInt();
if (checkState == Qt.Checked) {
checked = " +checked";
}
if (selectionModel.isSelected(index)) {
selected = " +selected";
}
test.log("(" + String(row) + ") '" + text + "'" + checked +
selected);
}
sendEvent("QCloseEvent", waitForObject(":Item Views_MainWindow"));
}sub main {
startApplication("\"$ENV{'SQUISH_PREFIX'}/examples/qt/itemviews/itemviews\"");
my $listViewName = "{type='QListView' unnamed='1' visible='1'}";
my $listView = waitForObject($listViewName);
my $model = $listView->model();
my $selectionModel = $listView->selectionModel();
for ( my $row = 0 ; $row < $model->rowCount() ; ++$row ) {
my $index = $model->index( $row, 0 );
my $text = $model->data($index)->toString();
my $checked = "";
my $selected = "";
my $checkState = $model->data( $index, Qt::CheckStateRole )->toInt();
if ( $checkState == Qt::Checked ) {
$checked = " +checked";
}
if ( $selectionModel->isSelected($index) ) {
$selected = " +selected";
}
test::log("($row) '$text'$checked$selected");
}
sendEvent( "QCloseEvent", waitForObject(":Item Views_MainWindow") );
}# encoding: UTF-8 require 'squish' include Squish def main startApplication("\"#{ENV['SQUISH_PREFIX']}/examples/qt/itemviews/itemviews\"") listViewName = "{type='QListView' unnamed='1' visible='1'}" listView = waitForObject(listViewName) model = listView.model() selectionModel = listView.selectionModel() for row in 0...model.rowCount() do index = model.index(row, 0) text = model.data(index).toString() checked = selected = "" checkState = model.data(index, Qt::CHECK_STATE_ROLE).toInt() if checkState == Qt::CHECKED checked = " +checked" end if selectionModel.isSelected(index) selected = " +selected" end Test.log("(#{row}) '#{text}'#{checked}#{selected}") end sendEvent("QCloseEvent", waitForObject(":Item Views_MainWindow")) end
proc main {} {
    startApplication "\"$::env(SQUISH_PREFIX)/examples/qt/itemviews/itemviews\""
    set listViewName {{type='QListView' unnamed='1' visible='1'}}
    set listView [waitForObject $listViewName]
    set model [invoke $listView model]
    set selectionModel [invoke $listView selectionModel]
    for {set row 0} {$row < [invoke $model rowCount]} {incr row} {
        set index [invoke $model index $row 0]
        set text [toString [invoke [invoke $model data $index] toString]]
        set checked ""
        set selected ""
        set checkState [invoke [invoke $model data $index \
            [enum Qt CheckStateRole]] toInt]
        if {$checkState == [enum Qt Checked]} {
            set checked " +checked"
        }
        if [invoke $selectionModel isSelected $index] {
            set selected " +selected"
        }
        test log "($row) '$text'$checked$selected"
    }
    sendEvent "QCloseEvent" [waitForObject ":Item Views_MainWindow"]
}
Notice that all data in a model is accessed using a QModelIndex. A model index has three attributes: a row, a column, and a parent. For lists only the row is used—the column is always 0; for tables the row and column are used; and for trees all three are used.
Notice also that the checked state is an attribute of the data, so we use the QAbstractItemModel.data method to access it. (When we use this method without explicitly specifying a role, the role is taken to be Qt.DisplayRole which usually holds the item's text.) The QAbstractItemModel.data method returns a QVariant, so we must always convert it to the correct type before using it.
In this subsection and the previous one we have seen how to iterate over list widgets and list views to check each item. In the next couple of subsections we will write similar tests for table widgets and table views. In addition we show how to populate a table widget with data—and the same approach can be used for populating list or tree widgets. Populating models is not shown since it is very similar to what we have seen above—we simply call the QAbstractItemModel.setData method for each item whose value we want to set, giving an appropriate model index, role, and value.
How to Test Items in QTableWidgets
In this section we will look at two pieces of example code. The first example shows how to set the number of rows and columns a table has and how to populate a table with items—including making items checkable and selected—and also how to hide rows. The second example shows how to iterate over every item in a table (but skipping hidden rows), and printing the item's text and state information to Squish's log. (The code shown in this section is taken from the examples/qt/csvtable example's tst_iterating test suites.)
    tableWidget = waitForObject({'type': 'QTableWidget',
                 "unnamed":'1', 'visible':'1'})
    tableWidget.setRowCount(4)
    tableWidget.setColumnCount(3)
    count = 0
    for row in range(tableWidget.rowCount):
        for column in range(tableWidget.columnCount):
            tableItem = QTableWidgetItem("Item %d" % count)
            count += 1
            if column == 2:
                tableItem.setCheckState(Qt.Unchecked)
                if row == 1 or row == 3:
                    tableItem.setCheckState(Qt.Checked)
            tableWidget.setItem(row, column, tableItem)
            if count in (6, 10):
                tableItem.setSelected(True)
    tableWidget.setRowHidden(2, True)
var tableWidget = waitForObject("{type='QTableWidget' " +
"unnamed='1' visible='1'}");
tableWidget.setRowCount(4);
tableWidget.setColumnCount(3);
var count = 0;
for (var row = 0; row < tableWidget.rowCount; ++row) {
for (var column = 0; column < tableWidget.columnCount; ++column) {
tableItem = new QTableWidgetItem("Item " + new String(count));
++count;
if (column == 2) {
tableItem.setCheckState(Qt.Unchecked);
if (row == 1 || row == 3) {
tableItem.setCheckState(Qt.Checked);
}
}
tableWidget.setItem(row, column, tableItem);
if (count == 6 || count == 10) {
tableItem.setSelected(true);
}
}
}
tableWidget.setRowHidden(2, true); my $tableWidget = waitForObject("{type='QTableWidget' " .
"unnamed='1' visible='1'}");
$tableWidget->setRowCount(4);
$tableWidget->setColumnCount(3);
my $count = 0;
for (my $row = 0; $row < $tableWidget->rowCount; ++$row) {
for (my $column = 0; $column < $tableWidget->columnCount; ++$column)
{
my $tableItem = new QTableWidgetItem("Item $count");
++$count;
if ($column == 2) {
$tableItem->setCheckState(Qt::Unchecked);
if ($row == 1 || $row == 3) {
$tableItem->setCheckState(Qt::Checked);
}
}
$tableWidget->setItem($row, $column, $tableItem);
if ($count == 6 || $count == 10) {
$tableItem->setSelected(1);
}
}
}
$tableWidget->setRowHidden(2, 1); tableWidget = waitForObject("{type='QTableWidget' " +
"unnamed='1' visible='1'}")
tableWidget.setRowCount(4)
tableWidget.setColumnCount(3)
count = 0
0.upto(tableWidget.rowCount) do |row|
0.upto(tableWidget.columnCount) do |column|
tableItem = QTableWidgetItem.new("Item #{count}")
count += 1
if column == 2
tableItem.setCheckState(Qt::UNCHECKED)
if row == 1 or row == 3
tableItem.setCheckState(Qt::CHECKED)
end
end
tableWidget.setItem(row, column, tableItem)
if count == 6 or count == 10
tableItem.setSelected(true)
end
end
end
tableWidget.setRowHidden(2, true) set tableWidget [waitForObject {{type='QTableWidget' \
unnamed='1' visible='1'}}]
invoke $tableWidget setRowCount 4
invoke $tableWidget setColumnCount 3
set count 0
for {set row 0} {$row < [property get $tableWidget rowCount]} \
{incr row} {
for {set column 0} {$column < [property get $tableWidget \
columnCount]} {incr column} {
set tableItem [construct QTableWidgetItem "Item $count"]
incr count
if {$column == 2} {
invoke $tableItem setCheckState [enum Qt Unchecked]
if {$row == 1 || $row == 3} {
invoke $tableItem setCheckState \
[enum Qt Checked]
}
}
invoke $tableWidget setItem $row $column $tableItem
if {$count == 6 || $count == 10} {
invoke $tableItem setSelected 1
}
}
}
invoke $tableWidget setRowHidden 2 trueThe table that the code produces is shown in the screenshot below:
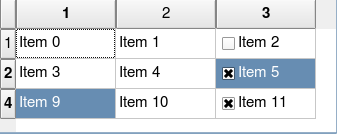
Naturally, the approach shown in these examples can be used to set other aspects of table widget items, such as their font, background color, text alignment and so on.
Whether we have set up a table using our own test code as shown above, or have a table of data that was populated by some other means (for example, by the AUT loading a data file), we need to be able to iterate over the table's items, and check their text and other attributes. This is exactly what the next example shows.
    tableWidget = waitForObject("{type='QTableWidget' " +
                                "unnamed='1' visible='1'}")
    for row in range(tableWidget.rowCount):
        if tableWidget.isRowHidden(row):
            test.log("Skipping hidden row %d" % row)
            continue
        for column in range(tableWidget.columnCount):
            tableItem = tableWidget.item(row, column)
            text = tableItem.text()
            checked = selected = ""
            if tableItem.checkState() == Qt.Checked:
                checked = " +checked"
            if tableItem.isSelected():
                selected = " +selected"
            test.log("(%d, %d) '%s'%s%s" % (row, column, text,
                                            checked, selected))
tableWidget = waitForObject("{type='QTableWidget' " +
"unnamed='1' visible='1'}");
for (var row = 0; row < tableWidget.rowCount; ++row) {
if (tableWidget.isRowHidden(row)) {
test.log("Skipping hidden row " + String(row));
continue;
}
for (var column = 0; column < tableWidget.columnCount; ++column) {
tableItem = tableWidget.item(row, column);
var text = new String(tableItem.text());
var checked = "";
var selected = "";
if (tableItem.checkState() == Qt.Checked) {
checked = " +checked";
}
if (tableItem.isSelected()) {
selected = " +selected";
}
test.log("(" + String(row) + ", " + String(column) + ") '" +
text + "' " + checked + selected);
}
} $tableWidget =
waitForObject( "{type='QTableWidget' " . "unnamed='1' visible='1'}" );
for ( my $row = 0 ; $row < $tableWidget->rowCount ; ++$row ) {
if ( $tableWidget->isRowHidden($row) ) {
test::log("Skipping hidden row $row");
next;
}
for ( my $column = 0 ; $column < $tableWidget->columnCount ; ++$column )
{
my $tableItem = $tableWidget->item( $row, $column );
my $text = $tableItem->text();
my $checked = "";
my $selected = "";
if ( $tableItem->checkState() == Qt::Checked ) {
$checked = " +checked";
}
if ( $tableItem->isSelected() ) {
$selected = " +selected";
}
test::log("($row, $column) '$text'$checked$selected");
}
} tableWidget = waitForObject("{type='QTableWidget' " +
"unnamed='1' visible='1'}")
0.upto(tableWidget.rowCount) do |row|
if tableWidget.isRowHidden(row)
Test.log("Skipping hidden row #{row}")
next
end
0.upto(tableWidget.columnCount) do |column|
tableItem = tableWidget.item(row, column)
if tableItem == nil
next
end
text = tableItem.text()
checked = selected = ""
if tableItem.checkState() == Qt::CHECKED
checked = " +checked"
end
if tableItem.isSelected()
selected = " +selected"
end
Test.log("(%d, %d) '%s'%s%s" % [row, column, text,
checked, selected])
end
end set tableWidget [waitForObject {{type='QTableWidget' \
unnamed='1' visible='1'}}]
for {set row 0} {$row < [property get $tableWidget rowCount]} \
{incr row} {
if {[invoke $tableWidget isRowHidden $row]} {
test log "Skipping hidden row $row"
continue
}
for {set column 0} {$column < [property get $tableWidget \
columnCount]} {incr column} {
set tableItem [invoke $tableWidget item $row $column]
set text [toString [invoke $tableItem text]]
set checked ""
set selected ""
if {[invoke $tableItem checkState] == [enum Qt Checked]} {
set checked " +checked"
}
if {[invoke $tableItem isSelected]} {
set selected " +selected"
}
test log "($row, $column) '$text'$checked$selected"
}
}The log output produced by the above is:
(0, 0) 'Item 0'
(0, 1) 'Item 1'
(0, 2) 'Item 2'
(1, 0) 'Item 3'
(1, 1) 'Item 4'
(1, 2) 'Item 5' checked selected
Skipping hidden row 2
(3, 0) 'Item 9' selected
(3, 1) 'Item 10'
(3, 2) 'Item 11' checked
And as we noted earlier, the same techniques can be used to test other attributes, such as each table item's font, background color, text alignment, and so on.
Another useful way to test an entire table is to compare all its items to a data file in .tsv (tab-separated values format), .csv (comma-separated values format), .xls or .xlsx (Microsoft Excel spreadsheet format). An example of how to do this is given in How to Test Table Widgets and Use External Data Files.
How to Test Items in QTableViews (QAbstractItemModels and QItemSelectionModels)
Table views, like all the other view classes, presents the data held in a model rather than holding any data itself. So the key to performing tests on the data shown by a table view is to get the table view's model, and work on the model's data. The example below—which is very similar to the list view example shown earlier—shows how to do this.
import os

def main():
    startApplication('"' + os.environ["SQUISH_PREFIX"] + '/examples/qt/itemviews/itemviews"')
    tableViewName = "{type='QTableView' unnamed='1' visible='1'}"
    tableView = waitForObject(tableViewName)
    model = tableView.model()
    selectionModel = tableView.selectionModel()
    for row in range(model.rowCount()):
        for column in range(model.columnCount()):
            index = model.index(row, column)
            text = model.data(index).toString()
            checked = selected = ""
            checkState = model.data(index, Qt.CheckStateRole).toInt()
            if checkState == Qt.Checked:
                checked = " +checked"
            if selectionModel.isSelected(index):
                selected = " +selected"
            test.log("(%d, %d) '%s'%s%s" % (row, column, text, checked,
                                            selected))
    sendEvent("QCloseEvent", waitForObject(":Item Views_MainWindow"))
function main()
{
startApplication('"' + OS.getenv("SQUISH_PREFIX") + '/examples/qt/itemviews/itemviews"');
var tableViewName = "{type='QTableView' unnamed='1' visible='1'}";
var tableView = waitForObject(tableViewName);
var model = tableView.model();
var selectionModel = tableView.selectionModel();
for (var row = 0; row < model.rowCount(); ++row) {
for (var column = 0; column < model.columnCount(); ++column) {
var index = model.index(row, column);
var text = model.data(index).toString();
var checked = "";
var selected = "";
var checkState = model.data(index, Qt.CheckStateRole).toInt();
if (checkState == Qt.Checked) {
checked = " +checked";
}
if (selectionModel.isSelected(index)) {
selected = " +selected";
}
test.log("(" + String(row) + ", " + String(column) + ") '" +
text + "'" + checked + selected);
}
}
sendEvent("QCloseEvent", waitForObject(":Item Views_MainWindow"));
}sub main {
startApplication("\"$ENV{'SQUISH_PREFIX'}/examples/qt/itemviews/itemviews\"");
my $tableViewName = "{type='QTableView' unnamed='1' visible='1'}";
my $tableView = waitForObject($tableViewName);
my $model = $tableView->model();
my $selectionModel = $tableView->selectionModel();
for ( my $row = 0 ; $row < $model->rowCount() ; ++$row ) {
for ( my $column = 0 ; $column < $model->columnCount() ; ++$column ) {
my $index = $model->index( $row, $column );
my $text = $model->data($index)->toString();
my $checked = "";
my $selected = "";
my $checkState =
$model->data( $index, Qt::CheckStateRole )->toInt();
if ( $checkState == Qt::Checked ) {
$checked = " +checked";
}
if ( $selectionModel->isSelected($index) ) {
$selected = " +selected";
}
test::log("($row, $column) '$text'$checked$selected");
}
}
sendEvent( "QCloseEvent", waitForObject(":Item Views_MainWindow") );
}# encoding: UTF-8 require 'squish' include Squish def main startApplication("\"#{ENV['SQUISH_PREFIX']}/examples/qt/itemviews/itemviews\"") tableViewName = "{type='QTableView' unnamed='1' visible='1'}" tableView = waitForObject(tableViewName) model = tableView.model() selectionModel = tableView.selectionModel() for row in 0...model.rowCount() for column in 0...model.columnCount() index = model.index(row, column) text = model.data(index).toString() checked = selected = "" checkState = model.data(index, Qt::CHECK_STATE_ROLE).toInt() if checkState == Qt::CHECKED checked = " +checked" end if selectionModel.isSelected(index) selected = " +selected" end Test.log("(#{row}, #{column}) '#{text}'#{checked}#{selected}") end end sendEvent("QCloseEvent", waitForObject(":Item Views_MainWindow")) end
proc main {} {
    startApplication "\"$::env(SQUISH_PREFIX)/examples/qt/itemviews/itemviews\""
    set tableViewName {{type='QTableView' unnamed='1' visible='1'}}
    set tableView [waitForObject $tableViewName]
    set model [invoke $tableView model]
    set selectionModel [invoke $tableView selectionModel]
    for {set row 0} {$row < [invoke $model rowCount]} {incr row} {
        for {set column 0} {$column < [invoke $model columnCount]} \
            {incr column} {
            set index [invoke $model index $row $column]
            set text [toString [invoke [invoke $model data $index] \
                toString]]
            set checked ""
            set selected ""
            set checkState [invoke [invoke $model data $index \
                [enum Qt CheckStateRole]] toInt]
            if {$checkState == [enum Qt Checked]} {
                set checked " +checked"
            }
            if [invoke $selectionModel isSelected $index] {
                set selected " +selected"
            }
            test log "($row, $column) '$text'$checked$selected"
        }
    }
    sendEvent "QCloseEvent" [waitForObject ":Item Views_MainWindow"]
}
If we compare the above to the equivalent list view example shown earlier, it is clear that the only difference is that whereas list models only have a single column—column 0—to account for, table models have one or more columns that must be considered.
How to Test Items in QTreeWidgets
Tree widgets (and models shown in tree views) are rather different to test than list or table widgets and views. This is because trees have a more complex underlying structure. The structure is essentially this: a sequence of rows (top-level items), each of which can have one or more columns, and each of which can have its own row of child items. Each child item can have one or more columns, and can have its own row of child items, and so on.
The easiest way to iterate over a tree is to use a recursive procedure (that its, a procedure that calls itself), starting it off with the tree's "invisible root item", and then working on every item's child items, and their child items, and so on. An example is shown below. (Note that when more than one function is defined in a test, Squish always (and only) calls the one called main—this function can then call the other functions as required.)
    import os

    def checkAnItem(indent, item, root):
        if indent > -1:
            checked = selected = ""
            if item.checkState(0) == Qt.Checked:
                checked = " +checked"
            if item.isSelected():
                selected = " +selected"
            test.log("|%s'%s'%s%s" % (" " * indent, item.text(0), checked,
                                      selected))
        else:
            indent = -4
        # Only show visible child items
        if item != root and item.isExpanded() or item == root:
            for row in range(item.childCount()):
                checkAnItem(indent + 4, item.child(row), root)

def main():
        startApplication('"' + os.environ["SQUISH_PREFIX"] + '/examples/qt/itemviews/itemviews"')
        treeWidgetName = "{type='QTreeWidget' unnamed='1' visible='1'}"
        treeWidget = waitForObject(treeWidgetName)
        root = treeWidget.invisibleRootItem()
        checkAnItem(-1, root, root)
        sendEvent("QCloseEvent", waitForObject(":Item Views_MainWindow"))
function checkAnItem(indent, item, root) { if (indent > -1) { var checked = ""; var selected = ""; if (item.checkState(0) == Qt.Checked) { checked = " +checked"; } if (item.isSelected()) { selected = " +selected"; } var pad = ""; for (var i = 0; i < indent; ++i) { pad += " "; } test.log("|" + pad + "'" + item.text(0) + "'" + checked + selected); } else { indent = -4; } // Only show visible child items if (item != root && item.isExpanded() || item == root) { for (var row = 0; row < item.childCount(); ++row) { checkAnItem(indent + 4, item.child(row), root); } } } function main() { startApplication('"' + OS.getenv("SQUISH_PREFIX") + '/examples/qt/itemviews/itemviews"'); var treeWidgetName = "{type='QTreeWidget' unnamed='1' visible='1'}"; var treeWidget = waitForObject(treeWidgetName); var root = treeWidget.invisibleRootItem(); checkAnItem(-1, root, root); sendEvent("QCloseEvent", waitForObject(":Item Views_MainWindow")); }
sub checkAnItem {
    my ( $indent, $item, $root ) = @_;
    if ( $indent > -1 ) {
        my $checked  = "";
        my $selected = "";
        if ( $item->checkState(0) == Qt::Checked ) {
            $checked = " +checked";
        }
        if ( $item->isSelected() ) {
            $selected = " +selected";
        }
        test::log( "|"
              . " " x $indent . "'"
              . $item->text(0) . "'"
              . $checked
              . $selected );
    }
    else {
        $indent = -4;
    }

    # Only show visible child items
    if ( $item != $root && $item->isExpanded() || $item == $root ) {
        for ( my $row = 0 ; $row < $item->childCount() ; ++$row ) {
            checkAnItem( $indent + 4, $item->child($row), $root );
        }
    }
}

sub main {
    startApplication("\"$ENV{'SQUISH_PREFIX'}/examples/qt/itemviews/itemviews\"");

    my $treeWidgetName = "{type='QTreeWidget' unnamed='1' visible='1'}";
    my $treeWidget     = waitForObject($treeWidgetName);
    my $root           = $treeWidget->invisibleRootItem();
    checkAnItem( -1, $root, $root );
    sendEvent( "QCloseEvent", waitForObject(":Item Views_MainWindow") );
}
# encoding: UTF-8 require 'squish' include Squish def checkAnItem(indent, item, root) if indent > -1 checked = selected = "" if item.checkState(0) == Qt::CHECKED checked = " +checked" end if item.isSelected() selected = " +selected" end Test.log("|%s'#{item.text(0)}'#{checked}#{selected}" % (" " * indent)) else indent = -4 end # Only show visible child items if item != root and item.isExpanded() or item == root for row in 0...item.childCount() checkAnItem(indent + 4, item.child(row), root) end end end def main startApplication("\"#{ENV['SQUISH_PREFIX']}/examples/qt/itemviews/itemviews\"") treeWidgetName = "{type='QTreeWidget' unnamed='1' visible='1'}" treeWidget = waitForObject(treeWidgetName) root = treeWidget.invisibleRootItem() checkAnItem(-1, root, root) sendEvent("QCloseEvent", waitForObject(":Item Views_MainWindow")) end
    proc checkAnItem {indent item root} {
        if {$indent > -1} {
            set checked ""
            set selected ""
            if {[invoke $item checkState 0] == [enum Qt Checked]} {
                set checked " +checked"
            }
            if [invoke $item isSelected] {
                set selected " +selected"
            }
            set text [toString [invoke $item text 0]]
            set pad [string repeat " " $indent]
            test log "|$pad'$text'$checked$selected"
        } else {
            set indent [expr -4]
        }
        # Only show visible child items
        if {$item != $root && [invoke $item isExpanded] || $item == $root} {
            for {set row 0} {$row < [invoke $item childCount]} {incr row} {
                checkAnItem [expr $indent + 4] [invoke $item child $row] \
                    $root
            }
        }
    }

proc main {} {
        startApplication "\"$::env(SQUISH_PREFIX)/examples/qt/itemviews/itemviews\""
        set treeWidgetName {{type='QTreeWidget' unnamed='1' visible='1'}}
        set treeWidget [waitForObject $treeWidgetName]
        set root [invoke $treeWidget invisibleRootItem]
        checkAnItem -1 $root $root
        sendEvent "QCloseEvent" [waitForObject ":Item Views_MainWindow"]
    }
The indent is used purely to show the tree's structure when printing out to Squish's log, and the leading |s are used because normally Squish strips whitespace from the ends of log messages and we don't want to do that here. For example:
|'Green algae'
|    'Chlorophytes'
|        'Chlorophyceae'
|        'Ulvophyceae'
|        'Trebouxiophyceae'
|    'Desmids & Charophytes'
|        'Closteriaceae' +checked
|        'Desmidiaceae'
|        'Gonaozygaceae' +selected
|        'Peniaceae'
|'Bryophytes'
|'Pteridophytes'
|    'Club Mosses'
|    'Ferns'
|'Seed plants'
|    'Cycads' +checked +selected
|    'Ginkgo'
|    'Conifers'
|    'Gnetophytes'
|    'Flowering Plants'
Notice that we only check items in the first column—if we need to check items in other columns, we must introduce a loop to iterate over the columns and use a column index rather than simply using the 0 (for the first column) that is shown in the example.
Another point to notice is that the 'Bryophytes' entry actually has three child items ('Liverworts', 'Hornworts', and, 'Mosses'), but these don't appear because the 'Bryophytes' item is collapsed (doesn't show its children and has a + to indicate it is expandable, whereas the others have - to indicate that they are expanded). In the code we ignore non-visible child items—we do this by only calling the checkAnItem function if the current item is the root of the tree (i.e., the notional parent of all top-level items), or if the current item is not the root, but is expanded (meaning that its child items are visible in the tree). And we could of course, not skip the non-visible child items, by just removing the last if statement in the checkAnItem function.
Keep in mind that even if an item is visible, it might not be visible to the user—for example, if the item is not in the tree's visible area. However, it will be visible if the user scrolls to it.
How to Test Items in QTreeViews (QAbstractItemModels and QItemSelectionModels)
Tree views use a tree-structured model and so the easiest way to iterate over all their model's items is to use a recursive procedure, just as we did for tree widgets in the previous subsection. Here's an example:
    import os

    def checkAnItem(indent, index, treeView, model, selectionModel):
        if indent > -1 and index.isValid():
            text = model.data(index).toString()
            checked = selected = ""
            checkState = model.data(index, Qt.CheckStateRole).toInt()
            if checkState == Qt.Checked:
                checked = " +checked"
            if selectionModel.isSelected(index):
                selected = " +selected"
            test.log("|%s'%s'%s%s" % (" " * indent, text, checked, selected))
        else:
            indent = -4
        # Only show visible child items
        if (index.isValid() and treeView.isExpanded(index) or
            not index.isValid()):
            for row in range(model.rowCount(index)):
                checkAnItem(indent + 4, model.index(row, 0, index),
                            treeView, model, selectionModel)


def main():
        startApplication('"' + os.environ["SQUISH_PREFIX"] + '/examples/qt/itemviews/itemviews"')
        treeViewName = "{type='QTreeView' unnamed='1' visible='1'}"
        treeView = waitForObject(treeViewName)
        model = treeView.model()
        selectionModel = treeView.selectionModel()
        checkAnItem(-1, QModelIndex(), treeView, model, selectionModel)
        sendEvent("QCloseEvent", waitForObject(":Item Views_MainWindow"))
function checkAnItem(indent, index, treeView, model, selectionModel) { if (indent > -1 && index.isValid()) { var text = model.data(index).toString(); var checked = ""; var selected = ""; var checkState = model.data(index, Qt.CheckStateRole).toInt(); if (checkState == Qt.Checked) { checked = " +checked"; } if (selectionModel.isSelected(index)) { selected = " +selected"; } var pad = ""; for (var i = 0; i < indent; ++i) { pad += " "; } test.log("|" + pad + "'" + text + "'" + checked + selected); } else { indent = -4; } // Only show visible child items if (index.isValid() && treeView.isExpanded(index) || !index.isValid()) { for (var row = 0; row < model.rowCount(index); ++row) { checkAnItem(indent + 4, model.index(row, 0, index), treeView, model, selectionModel); } } } function main() { startApplication('"' + OS.getenv("SQUISH_PREFIX") + '/examples/qt/itemviews/itemviews"'); var treeViewName = "{type='QTreeView' unnamed='1' visible='1'}"; var treeView = waitForObject(treeViewName); var model = treeView.model(); var selectionModel = treeView.selectionModel(); checkAnItem(-1, new QModelIndex(), treeView, model, selectionModel); sendEvent("QCloseEvent", waitForObject(":Item Views_MainWindow")); }
sub checkAnItem {
    my ( $indent, $index, $treeView, $model, $selectionModel ) = @_;
    if ( $indent > -1 && $index->isValid() ) {
        my $text       = $model->data($index)->toString();
        my $checked    = "";
        my $selected   = "";
        my $checkState = $model->data( $index, Qt::CheckStateRole )->toInt();
        if ( $checkState == Qt::Checked ) {
            $checked = " +checked";
        }
        if ( $selectionModel->isSelected($index) ) {
            $selected = " +selected";
        }
        test::log(
            "|" . " " x $indent . "'" . $text . "'" . $checked . $selected );
    }
    else {
        $indent = -4;
    }

    # Only show visible child items
    if ( $index->isValid() && $treeView->isExpanded($index)
        || !$index->isValid() )
    {
        for ( my $row = 0 ; $row < $model->rowCount($index) ; ++$row )
        {
            checkAnItem(
                $indent + 4,
                $model->index( $row, 0, $index ),
                $treeView, $model, $selectionModel
            );
        }
    }
}

sub main {
    startApplication("\"$ENV{'SQUISH_PREFIX'}/examples/qt/itemviews/itemviews\"");

    my $treeViewName   = "{type='QTreeView' unnamed='1' visible='1'}";
    my $treeView       = waitForObject($treeViewName);
    my $model          = $treeView->model();
    my $selectionModel = $treeView->selectionModel();
    checkAnItem( -1, new QModelIndex(), $treeView, $model, $selectionModel );
    sendEvent( "QCloseEvent", waitForObject( ":Item Views_MainWindow" ) );
}
# encoding: UTF-8 require 'squish' include Squish def checkAnItem(indent, index, treeView, model, selectionModel) if indent > -1 and index.isValid() text = model.data(index).toString() checked = selected = "" checkState = model.data(index, Qt::CHECK_STATE_ROLE).toInt() if checkState == Qt::CHECKED checked = " +checked" end if selectionModel.isSelected(index) selected = " +selected" end Test.log("|%s'#{text}'#{checked}#{selected}" % (" " * indent)) else indent = -4 end # Only show visible child items if index.isValid() and treeView.isExpanded(index) or not index.isValid() for row in 0...model.rowCount(index) checkAnItem(indent + 4, model.index(row, 0, index), treeView, model, selectionModel) end end end def main startApplication("\"#{ENV['SQUISH_PREFIX']}/examples/qt/itemviews/itemviews\"") treeViewName = "{type='QTreeView' unnamed='1' visible='1'}" treeView = waitForObject(treeViewName) model = treeView.model() selectionModel = treeView.selectionModel() checkAnItem(-1, QModelIndex.new, treeView, model, selectionModel) sendEvent("QCloseEvent", waitForObject(":Item Views_MainWindow")) end
    proc checkAnItem {indent index treeView model selectionModel} {
        if {$indent > -1 && [invoke $index isValid]} {
            set text [toString [invoke [invoke $model data $index] toString]]
            set checked ""
            set selected ""
            set checkState [invoke [invoke $model data $index \
                [enum Qt CheckStateRole]] toInt]
            if {$checkState == [enum Qt Checked]} {
                set checked " +checked"
            }
            if [invoke $selectionModel isSelected $index] {
                set selected " +selected"
            }
            set pad [string repeat " " $indent]
            test log "|$pad'$text'$checked$selected"
        } else {
            set indent [expr -4]
        }
        # Only show visible child items
        if {[invoke $index isValid] && \
            [invoke $treeView isExpanded $index] || \
            ![invoke $index isValid]} {
            for {set row 0} {$row < [invoke $model rowCount $index]} \
                {incr row} {
                checkAnItem [expr $indent + 4] [invoke $model index \
                    $row 0 $index] $treeView $model $selectionModel
            }
        }
    }

proc main {} {
        startApplication "\"$::env(SQUISH_PREFIX)/examples/qt/itemviews/itemviews\""
        set treeViewName {{type='QTreeView' unnamed='1' visible='1'}}
        set treeView [waitForObject $treeViewName]
        set model [invoke $treeView model]
        set selectionModel [invoke $treeView selectionModel]
        checkAnItem -1 [construct QModelIndex] $treeView $model \
            $selectionModel
        sendEvent "QCloseEvent" [waitForObject ":Item Views_MainWindow"]
    }
The code here is structurally almost the same as for iterating over the items in a tree widget, only here we use model indexes to identify items. In a model the "invisible root item" is represented by an invalid model index, that is, a model index created without any arguments. (The last statement in the main functions shown above show how to create an invalid model index.) By using a recursive procedure we ensure that we can iterate over the entire tree, no matter how deep it is.
And just as we did for the QTreeWidget example shown before, for the QTreeView we skip collapsed (non-visible) child items. And we could easily not skip them by just removing the last if statement in the checkAnItem function.
How to Test Table Widgets and Use External Data Files
In this section we will see how to test the csvtable program shown below. This program uses a QTableWidget to present the contents of a .csv (comma-separated values) file, and provides some basic functionality for manipulating the data—inserting and deleting rows, editing cells, and swapping columns.
Note: It is also possible to import test data files in .tsv (tab-separated values format), .csv (comma-separated values format), .xls or .xlsx (Microsoft Excel spreadsheet format). Both .csv and .tsv files are assumed to use the Unicode UTF-8 encoding—the same encoding used for all test scripts.
As we review the tests we will learn how to import test data, manipulate the data, and compare what the QTableWidget shows with what we expect its contents to be. And since the csvtable program is a main-window-style application, we will also learn how to test that menu options and toolbar buttons behave as expected (and implicitly that their underlying actions get carried out). In addition, we will develop some generic functions that may be useful in several different tests.
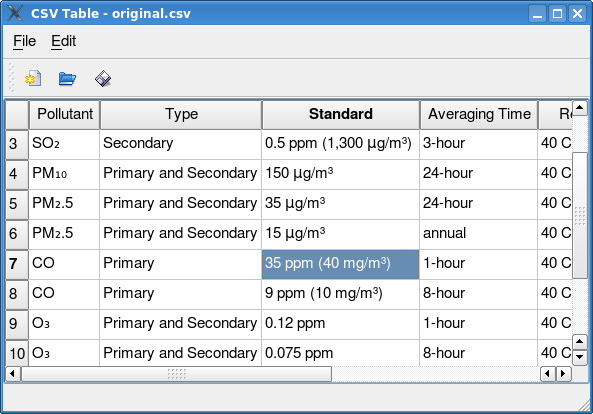
The source code for this example is in the directory <SQUISHDIR>/examples/qt/csvtable, and the test suites are in subdirectories underneath—for example, the Python version of the tests is in the directory <SQUISHDIR>/examples/qt/csvtable/suite_py, and the JavaScript version of the tests is in <SQUISHDIR>/examples/qt/csvtable/suite_js, and so on.
Note: Use table verification points to check an entire table. See How to Create and Use Table Verifications.
The first test we will look at is deceptively simple and consists of just four executable statements. This simplicity is achieved by putting almost all the functionality into a shared script, to avoid code duplication. Here is the code:
import os

def main():
    startApplication('"' + os.environ["SQUISH_PREFIX"] + '/examples/qt/csvtable/csvtable"')
    source(findFile("scripts", "common.py"))
    doFileOpen(findFile("testdata", "before.csv"))
    tableWidget = waitForObject("{type='QTableWidget' " +
                                "unnamed='1' visible='1'}")
    compareTableWithDataFile(tableWidget, "before.csv")
function main()
{
startApplication('"' + OS.getenv("SQUISH_PREFIX") + '/examples/qt/csvtable/csvtable"');
source(findFile("scripts", "common.js"));
doFileOpen("suite_js/shared/testdata/before.csv");
tableWidget = waitForObject("{type='QTableWidget' unnamed='1' " +
"visible='1'}");
compareTableWithDataFile(tableWidget, "before.csv");
}sub main
{
startApplication("\"$ENV{'SQUISH_PREFIX'}/examples/qt/csvtable/csvtable\"");
source(findFile("scripts", "common.pl"));
doFileOpen(findFile("testdata", "before.csv"));
my $tableWidget = waitForObject("{type='QTableWidget' " .
"unnamed='1' visible='1'}");
compareTableWithDataFile($tableWidget, "before.csv");
}# encoding: UTF-8 require 'squish' include Squish def main startApplication("\"#{ENV['SQUISH_PREFIX']}/examples/qt/csvtable/csvtable\"") require findFile("scripts", "common.rb") doFileOpen(findFile("testdata", "before.csv")) tableWidget = waitForObject("{type='QTableWidget' unnamed='1' visible='1'}") compareTableWithDataFile(tableWidget, "before.csv") end
proc main {} {
    startApplication "\"$::env(SQUISH_PREFIX)/examples/qt/csvtable/csvtable\""
    source [findFile "scripts" "common.tcl"]
    doFileOpen [findFile "testdata" "before.csv"]
    set tableWidget [waitForObject {{type='QTableWidget' \
        unnamed='1' visible='1'}}]
    compareTableWithDataFile $tableWidget "before.csv"
}
We begin by loading in the script that contains common functionality, just as we did in the previous section. Then we call a custom doFileOpen function that tells the program to open the given file—and this is done through the user interface as we will see. Next we get a reference to the table widget using the Object waitForObject(objectOrName) function, and finally we check that the table widget's contents match the contents of the data file held amongst the test suite's test data. Note that both the csvtable program and Squish load and parse the data file using their own completely independent code. See How to Create and Use Shared Data and Shared Scripts for how to import test data into Squish.
Now we will look at the custom functions we have used in the above test.
def doFileOpen(path_and_filename):
    activateItem(waitForObjectItem(names.cSV_Table_QMenuBar, "File"))
    activateItem(waitForObjectItem(names.cSV_Table_File_QMenu, "Open..."))

    waitForObject(names.fileNameEdit_QLineEdit)
    fn = os.path.join(squishinfo.testCase, path_and_filename)
    type(names.fileNameEdit_QLineEdit, fn)
    clickButton(names.cSV_Table_Choose_File_Open_QPushButton)

def compareTableWithDataFile(tableWidget, filename):
    for row, record in enumerate(testData.dataset(filename)):
        for column, name in enumerate(testData.fieldNames(record)):
            tableItem = tableWidget.item(row, column)
            test.compare(testData.field(record, name), tableItem.text())
function doFileOpen(path_and_filename)
{
activateItem(waitForObjectItem(names.cSVTableAfterCsvQMenuBar, "File"));
activateItem(waitForObjectItem(names.cSVTableAfterCsvFileQMenu, "Open..."));
waitForObject(names.fileNameEditQLineEdit);
components = path_and_filename.split("/");
for (var i = 0; i < components.length; ++i) {
type(names.fileNameEditQLineEdit, components[i]);
waitForObject(names.fileNameEditQLineEdit);
type(names.fileNameEditQLineEdit, "<Return>");
}
}
function chooseMenuOptionByKey(menuTitle, menuKey, optionKey)
{
windowName = "{type='MainWindow' unnamed='1' visible='1' " +
"windowTitle?='CSV Table*'}";
waitForObject(windowName);
type(windowName, "<Alt+" + menuKey + ">");
menuName = "{title='" + menuTitle + "' type='QMenu' unnamed='1' " +
"visible='1'}";
waitForObject(menuName);
type(menuName, optionKey);
}
function compareTableWithDataFile(tableWidget, filename)
{
records = testData.dataset(filename);
for (var row = 0; row < records.length; ++row) {
columnNames = testData.fieldNames(records[row]);
for (var column = 0; column < columnNames.length; ++column) {
tableItem = tableWidget.item(row, column);
test.compare(testData.field(records[row], column),
tableItem.text());
}
}
}sub doFileOpen
{
my $path_and_filename = shift(@_);
activateItem(waitForObjectItem( $Names::csv_table_after_csv_qmenubar, "File" ));
activateItem(waitForObjectItem( $Names::csv_table_after_csv_file_qmenu, "Open..." ));
my $fn = File::Spec->catfile(squishinfo->testCase, $path_and_filename);
type($Names::filenameedit_qlineedit, $fn );
clickButton($Names::csv_table_choose_file_open_qpushbutton);
}
sub compareTableWithDataFile {
my ( $tableWidget, $filename ) = @_;
my @records = testData::dataset($filename);
for ( my $row = 0 ; $row < scalar(@records) ; $row++ ) {
my @columnNames = testData::fieldNames( $records[$row] );
for ( my $column = 0 ; $column < scalar(@columnNames) ; $column++ ) {
my $tableItem = $tableWidget->item( $row, $column );
test::compare( $tableItem->text(),
testData::field( $records[$row], $column ) );
}
}
}def doFileOpen(path_and_filename)
activateItem(waitForObjectItem(Names::CSV_Table_QMenuBar, "File"))
activateItem(waitForObjectItem(Names::CSV_Table_File_QMenu, "Open..."))
fn = File.join(Squishinfo.testCase, path_and_filename)
type(Names::FileNameEdit_QLineEdit, fn);
clickButton(Names::CSV_Table_Choose_File_Open_QPushButton)
end
def compareTableWithDataFile(tableWidget, filename)
TestData.dataset(filename).each_with_index do
|record, row|
for column in 0...TestData.fieldNames(record).length
tableItem = tableWidget.item(row, column)
Test.compare(TestData.field(record, column), tableItem.text())
end
end
endproc doFileOpen {path_and_filename} {
invoke activateItem [waitForObjectItem $names::CSV_Table_QMenuBar "File"]
invoke activateItem [waitForObjectItem $names::CSV_Table_File_QMenu "Open..."]
set fn [file join [squishinfo testCase] $path_and_filename]
invoke type $names::fileNameEdit_QLineEdit $fn
invoke clickButton $names::CSV_Table_Choose_File_Open_QPushButton
}
proc chooseMenuOptionByKey {menuTitle menuKey optionKey} {
set windowName "{type='MainWindow' unnamed='1' visible='1' \
windowTitle?='CSV Table*'}"
waitForObject $windowName
invoke type $windowName "<Alt+$menuKey>"
set menuName "{title='$menuTitle' type='QMenu' unnamed='1' \
visible='1'}"
waitForObject $menuName
invoke type $menuName $optionKey
}
proc compareTableWithDataFile {tableWidget filename} {
set data [testData dataset $filename]
for {set row 0} {$row < [llength $data]} {incr row} {
set columnNames [testData fieldNames [lindex $data $row]]
for {set column 0} {$column < [llength $columnNames]} {incr column} {
set tableItem [invoke $tableWidget item $row $column]
test compare [testData field [lindex $data $row] $column] \
[invoke $tableItem text]
}
}
}The doFileOpen function begins by opening a file through the user interface. This is done by using the custom chooseMenuOptionByKey function. One point to note about the chooseMenuOptionByKey function is that it uses wildcard matching for the windowTitle property (using ?= instead of equality testing with =; see Improving Object Identification for more details.). This is particularly useful for windows that show the current filename or other text that can vary. This function simulates the user clicking Alt+k (where k is a character, for example "F" for the file menu), and then the character that corresponds to the required action, (for example, "o" for "Open"). Once the file open dialog has popped up, for each component of the path and file we want, the doFileOpen function types in a component followed by Return, and this leads to the file being opened.
When the file is opened, the program is expected to load the file's data. We check that the data has been loaded correctly by comparing the data shown in the table widget and the data file itself. This comparison is done by the custom compareTableWithDataFile function. This function uses Squish's Dataset testData.dataset(filename) function to load in the data so that it can be accessed through the Squish API. We expect every cell in the table to match the corresponding item in the data, and we check that this is the case using the Boolean test.compare(value1, value2) function.
Now that we know how to compare a table's data with the data in a file we can perform some more ambitious tests. We will load in the before.csv file, delete the first, last, and a middle row, insert a new row at the beginning and in the middle, and append a new row at the end. Then we will swap three pairs of columns. At the end the data should match the after.csv file.
Rather than writing code to do all these things we can simply record a test script that opens the file and performs all the deletions, insertions, and column swaps. Then we can edit the recorded test script to add a few lines of code to compare the actual results with the expected results. The added lines are shown below, in context:
    # Added by hand
    source(findFile("scripts", "common.py"))
    tableWidget = waitForObject("{type='QTableWidget' " +
                                "unnamed='1' visible='1'}")
    compareTableWithDataFile(tableWidget, "after.csv")
    # End of added by hand
    waitForObject(names.cSV_Table_before_csv_File_QTableWidget)

    sendEvent("QCloseEvent", waitForObject(names.cSV_Table_MainWindow))

    waitForObject("{type='QPushButton' unnamed='1' text='No'}")
    clickButton("{type='QPushButton' unnamed='1' text='No'}")
// Added by hand
source(findFile("scripts", "common.js"));
tableWidget = waitForObject({"type":'QTableWidget', "unnamed":'1', "visible":'1'});
compareTableWithDataFile(tableWidget, "after.csv");
// End of added by hand
sendEvent("QCloseEvent", waitForObject(names.cSVTableMainWindow));
waitForObject({"type":'QPushButton', "unnamed":'1', "text":'No'});
clickButton({"type":'QPushButton', "unnamed":'1', "text":'No'}); # Added by hand
source(findFile("scripts", "common.pl"));
$tableWidget = waitForObject("{type='QTableWidget' " .
"unnamed='1' visible='1'}");
compareTableWithDataFile($tableWidget, "after.csv");
sendEvent( "QCloseEvent", waitForObject($Names::csv_table_mainwindow) );
waitForObject("{type='QPushButton' unnamed='1' text='No'}");
clickButton("{type='QPushButton' unnamed='1' text='No'}"); require findFile("scripts", "common.rb")
# Added by hand
tableWidget = waitForObject("{type='QTableWidget' " +
"unnamed='1' visible='1'}")
compareTableWithDataFile(tableWidget, "after.csv")
sendEvent("QCloseEvent", waitForObject(Names::CSV_Table_MainWindow))
waitForObject("{type='QPushButton' unnamed='1' text='No'}")
clickButton("{type='QPushButton' unnamed='1' text='No'}") # Added by hand
source [findFile "scripts" "common.tcl"]
set tableWidget [waitForObject {{type='QTableWidget' \
unnamed='1' visible='1'}}]
compareTableWithDataFile $tableWidget "after.csv"
sendEvent QCloseEvent [waitForObject $names::CSV_Table_MainWindow]
waitForObject "{type='QPushButton' unnamed='1' text='No'}"
invoke clickButton "{type='QPushButton' unnamed='1' text='No'}"As the extract indicates, the added lines are not inserted at the end of the recorded test script, but rather just before the program is terminated.
We can do other tests of course, for example, checking some of the table's properties. Here is an example that checks that the row and column counts are what we expect them to be:
    tableWidget = waitForObject("{type='QTableWidget' " +
                                "unnamed='1' visible='1'}")
    test.compare(tableWidget.rowCount, 12)
    test.compare(tableWidget.columnCount, 5)
tableWidget = waitForObject({"type":'QTableWidget', "unnamed":'1', "visible":'1'});
test.compare(tableWidget.rowCount, 12);
test.compare(tableWidget.columnCount, 5); my $tableWidget = waitForObject("{type='QTableWidget' unnamed='1' visible='1'}");
test::compare($tableWidget->rowCount, 12);
test::compare($tableWidget->columnCount, 5); tableWidget = waitForObject("{type='QTableWidget' unnamed='1' visible='1'}")
Test.compare(tableWidget.rowCount, 12)
Test.compare(tableWidget.columnCount, 5) set tableWidget [waitForObject {{type='QTableWidget' \
unnamed='1' visible='1'}}]
test compare [property get $tableWidget rowCount] 12
test compare [property get $tableWidget columnCount] 5This example shows the power of combining recording with hand editing. If at a later date a new feature was added to the program we could incorporate tests for it in a number of ways. The simplest would be to just add another test script, do the recording, and then add in the three lines needed to compare the table with the expected data. Another approach would be to record the use of the new feature in a temporary test and then copy and paste the recording into the existing test at a suitable place and then change the file to be compared at the end to one that accounts for all the changes to the original data and also the changes that are a result of using the new feature. Or we can use the Squish IDE to record a snippet in the middle of the existing test.
How to Test QAction, QMenu, and QMenuBar
If we want to check the properties of a menu's items, we can do so using the Squish IDE and inserting verification points, or we can write our verification directly in code. Here we will show how to write them in code.
QMenus (and also QWidgets) have a list of QAction objects. We can retrieve this list and iterate over its actions using the QList API, and for each action we can query or set its properties. First we will look at an example of accessing an action's properties, and then we will see the implementation of the custom getAction function that the example depends on.
editMenu = waitForObject(":CSV Table - Unnamed.Edit_QMenu")
removeAction = getAction(editMenu, "&Remove Row")
test.verify(not removeAction.enabled)
test.verify(not removeAction.checked)
insertRowAction = getAction(editMenu, "&Insert Row")
test.verify(insertRowAction.enabled)
test.verify(not insertRowAction.checked)
var editMenu = waitForObject(":CSV Table - Unnamed.Edit_QMenu");
var removeAction = getAction(editMenu, "&Remove Row");
test.verify(!removeAction.enabled);
test.verify(!removeAction.checked);
var insertRowAction = getAction(editMenu, "&Insert Row");
test.verify(insertRowAction.enabled);
test.verify(!insertRowAction.checked);
my $editMenu = waitForObject(":CSV Table - Unnamed.Edit_QMenu");
my $removeAction = getAction($editMenu, "&Remove Row");
test::verify(!$removeAction->enabled);
test::verify(!$removeAction->checked);
my $insertRowAction = getAction($editMenu, "&Insert Row");
test::verify($insertRowAction->enabled);
test::verify(!$insertRowAction->checked);
editMenu = waitForObject(":CSV Table - Unnamed.Edit_QMenu")
removeAction = getAction(editMenu, "&Remove Row")
Test.verify(!removeAction.enabled)
Test.verify(!removeAction.checked)
insertRowAction = getAction(editMenu, "&Insert Row")
Test.verify(insertRowAction.enabled)
Test.verify(!insertRowAction.checked)
set menu [waitForObject ":CSV Table.Edit_QMenu"]
set removeAction [getAction $menu "Disabled"]
test compare [property get $removeAction enabled] 0
test compare [property get $removeAction checked] 0
set insertRowAction [getAction $menu "&Insert Row"]
test compare [property get $insertRowAction enabled] 1
test compare [property get $insertRowAction checked] 0
Here we get a reference to the application's Edit menu and check that the remove row action is disabled and unchecked and that the insert row action is enabled and unchecked.
def getAction(widget, text):
    actions = widget.actions()
    for i in range(actions.count()):
        action = actions.at(i)
        if action.text == text:
            return action
function getAction(widget, text)
{
    var actions = widget.actions();
    for (var i = 0; i < actions.count(); ++i) {
        var action = actions.at(i);
        if (action.text == text) {
            return action;
        }
    }
}
sub getAction
{
    my ($widget, $text) = @_;
    my $actions = $widget->actions();
    for (my $i = 0; $i < $actions->count(); ++$i) {
        my $action = $actions->at($i);
        if ($action->text eq $text) {
            return $action;
        }
    }
}
def getAction(widget, text) actions = widget.actions() for i in 0...actions.count() action = actions.at(i) if action.text == text return action end end end
proc getAction {widget text} {
    set actions [invoke $widget actions]
    for {set index 0} {$index < [invoke $actions count]} \
            {incr index} {
        set action [invoke $actions at $index]
        set action_text [toString [property get $action text]]
        if {[string equal $action_text $text]} {
            return $action
        }
    }
}
This tiny function retrieves the list of actions for the given widget (or menu), and iterates over them until it finds one with the matching text. It then returns the corresponding action (or null if it doesn't find a match).
How to Test Graphics Views, Graphics Scenes and Graphics Items
The graphics/view architecture uses QGraphicsView, QGraphicsScene, and QGraphicsItem classes—and also many QGraphicsItem subclasses. Squish provides full support for testing applications that use this architecture.
In this section we will test a simple example application (examples/qt/shapes) which uses a graphics view as its main window's central area. The scene includes standard widgets, and these provide the means to add additional QGraphicsItems. The shapes application shown in the screenshot has had several graphics items added and moved.
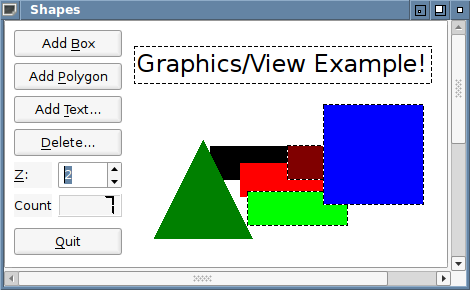
The shapes application's buttons, labels, spinbox, and LCD number widgets are all standard QWidget subclasses, added to the view as QGraphicsProxyWidgets. The user can add boxes (QGraphicsRectItems), polygons (these are application-specific custom RegularPolygonItem items—they always start out as triangles, but have a context menu for changing them to squares or back to triangles), and text items QGraphicsTextItems, by clicking the appropriate button. Rubber band selection has been switched on for the view to make it easier to select multiple items (but not the widgets of course). The user can move items by dragging them, delete them by selecting them and clicking the Delete button, and change their z order by selecting them and manipulating the spinbox.
In this section we will carry out the following simple test scenario to try various features of the shapes application, and to show how the testing of Qt's graphics/view architecture can be done.
- At startup verify that the Add Box, Add Polygon, Add Text, and Quit buttons are enabled and that the Delete button and Z spinbox are disabled.
- Add two boxes and verify that the second one's x and y coordinates are 5 pixels more than the first, and that the second one's z value is one more than the first one's.
- Add a polygon and confirm that it is a triangle, i.e., that its polygon has exactly three points.
- Right-click the triangle and choose the context menu's Square option; then confirm that it has changed to a square, i.e., that its polygon has exactly four points.
- Add a text item and confirm that the text entered in the input dialog matches that shown by the text item.
- Confirm that the Count LCD shows 4 items and that the Delete button and Z spinbox are enabled.
- Select all the items using rubber band selection, i.e., double-click on the background, then click and drag until all the items are selected, then drag them into the middle. Now select just the two boxes using rubber band selection, then click Delete, then click Yes to All. Verify that the Count now shows just 2 items and the Delete button and Z spinbox are disabled.
- Quit the application.
We can automate the test using the Squish IDE as follows. Create a new test suite and a new test case (e.g., a test suite called suite_py—or something more sensible—and a test case called tst_everything). Follow the steps above. While you are recording interactions with the AUT, when it is time to verify something, click Verify ( ) from the Squish Control Bar, and choose Properties from the drop-down, to insert a verification point.
For this example we inserted the verifications manually by adding lines of code in four different places in the recorded test script to perform the verifications we needed. We began as soon as the application had started, verifying that all the buttons were enabled—except for the Delete button—and that the Z spinbox is disabled. Here's the code we inserted to achieve this:
    test.verify(waitForObject(names.add_Box_QPushButton).enabled)
    test.verify(waitForObject(names.add_Polygon_QPushButton).enabled)
    test.verify(waitForObject(names.add_Text_QPushButton).enabled)
    test.verify(waitForObject(names.quit_QPushButton).enabled)
    test.verify(not waitForObjectExists(names.delete_QPushButton).enabled)
    test.verify(not waitForObjectExists(names.o_QSpinBox).enabled)
test.verify(waitForObject(names.addBoxQPushButton).enabled);
test.verify(waitForObject(names.addPolygonQPushButton).enabled);
test.verify(waitForObject(names.addTextQPushButton).enabled);
test.verify(waitForObject(names.quitQPushButton).enabled);
test.verify(!waitForObjectExists(names.deleteQPushButton).enabled);
test.verify(!waitForObjectExists(names.qSpinBox).enabled); test::verify(waitForObject($Names::add_box_qpushbutton)->enabled);
test::verify(waitForObject($Names::add_polygon_qpushbutton)->enabled);
test::verify(waitForObject($Names::add_text_qpushbutton)->enabled);
test::verify(waitForObject($Names::quit_qpushbutton)->enabled);
test::verify(!waitForObjectExists($Names::delete_qpushbutton)->enabled);
test::verify(!waitForObjectExists($Names::o_qspinbox)->enabled); Test.verify(waitForObject(Names::Add_Box_QPushButton).enabled)
Test.verify(waitForObject(Names::Add_Polygon_QPushButton).enabled)
Test.verify(waitForObject(Names::Add_Text_QPushButton).enabled)
Test.verify(waitForObject(Names::Quit_QPushButton).enabled)
Test.verify(!waitForObjectExists(Names::Delete_QPushButton).enabled)
Test.verify(!waitForObjectExists(Names::O_QSpinBox).enabled) test verify [property get [waitForObject $names::Add_Box_QPushButton] enabled]
test verify [property get [waitForObject $names::Add_Polygon_QPushButton] enabled]
test verify [property get [waitForObject $names::Add_Text_QPushButton] enabled]
test verify [property get [waitForObject $names::Quit_QPushButton] enabled]
test compare [property get [waitForObjectExists $names::Delete_QPushButton] enabled] 0
test compare [property get [waitForObjectExists $names::QSpinBox] enabled] 0For those objects we expect to be enabled, we use the waitForObject(objectOrName) function, but for those we expect to be disabled, we must use the findObject(objectName) function instead. In all cases, we retrieved the object and tested its enabled property.
After two boxes and a polygon are added, we inserted some additional code to check that the second box was properly offset from the first and that the polygon is a triangle (i.e., has three points).
    rectItem1 = waitForObject(names.o_QGraphicsRectItem)
    rectItem2 = waitForObject(names.o_QGraphicsRectItem_2)
    test.compare(rectItem1.rect.x + 5, rectItem2.rect.x)
    test.compare(rectItem1.rect.y + 5, rectItem2.rect.y)
    test.verify(rectItem1.zValue < rectItem2.zValue)
    polygonItem = waitForObject(names.o_QGraphicsPolygonItem)
    test.compare(polygonItem.polygon.count(), 3)
var rectItem1 = waitForObject(names.qGraphicsRectItem);
var rectItem2 = waitForObject(names.qGraphicsRectItem2);
test.compare(rectItem1.rect.x + 5, rectItem2.rect.x);
test.compare(rectItem1.rect.y + 5, rectItem2.rect.y);
test.verify(rectItem1.zValue < rectItem2.zValue);
var polygonItem = waitForObject(names.qGraphicsPolygonItem)
test.verify(polygonItem.polygon.count() == 3); my $rectItem1 = waitForObject($Names::o_qgraphicsrectitem);
my $rectItem2 = waitForObject($Names::o_qgraphicsrectitem_2);
test::compare($rectItem1->rect->x + 5, $rectItem2->rect->x);
test::compare($rectItem1->rect->y + 5, $rectItem2->rect->y);
test::verify($rectItem1->zValue lt $rectItem2->zValue);
my $polygonItem = waitForObject($Names::o_qgraphicspolygonitem);
test::compare($polygonItem->polygon->count(), 3); rectItem1 = waitForObject(Names::O_QGraphicsRectItem)
rectItem2 = waitForObject(Names::O_QGraphicsRectItem_2)
Test.compare(rectItem1.rect.x + 5, rectItem2.rect.x)
Test.compare(rectItem1.rect.y + 5, rectItem2.rect.y)
Test.verify(rectItem1.zValue < rectItem2.zValue)
polygonItem = waitForObject(Names::O_QGraphicsPolygonItem)
Test.compare(polygonItem.polygon.count(), 3) set rectItem1 [waitForObject $names::QGraphicsRectItem]
set rectItem2 [waitForObject $names::QGraphicsRectItem_2]
set rectItem1X [property get [property get $rectItem1 rect] x]
set rectItem1Y [property get [property get $rectItem1 rect] y]
set rectItem2X [property get [property get $rectItem2 rect] x]
set rectItem2Y [property get [property get $rectItem2 rect] y]
test compare $rectItem2X [expr $rectItem1X + 5]
test compare $rectItem2Y [expr $rectItem1Y + 5]
test verify [expr [property get $rectItem1 zValue] < [property get $rectItem2 zValue]]
set polygonItem [waitForObject $names::QGraphicsPolygonItem]
test compare [invoke [property get $polygonItem polygon] count] 3Here we wait for each of the boxes to be created and then verify that the second box's x and y coordinates are 5 pixels greater than the first box's, and that the second box has a higher z value. We also check that the polygon item's polygon has three points.
The recorded code now right-clicks the polygon item and uses its context menu to change it into a square. It also adds a new text item with the text "Some Text". So we have added a third block of code by hand to check that everything is as it should be.
    test.compare(polygonItem.polygon.count(), 4)
    textItem = waitForObject(names.o_QGraphicsTextItem)
    test.compare(textItem.toPlainText(), "Some Text")
    countLCD = waitForObject(names.o_QLCDNumber)
    test.compare(countLCD.intValue, 4)
    test.verify(waitForObject(names.delete_QPushButton).enabled)
    test.verify(waitForObject(names.o_QSpinBox).enabled)
test.compare(polygonItem.polygon.count(), 4);
var textItem = waitForObject(names.qGraphicsTextItem);
test.compare(textItem.toPlainText(), "Some Text");
var countLCD = waitForObject(names.qLCDNumber);
test.compare(countLCD.intValue, 4);
test.verify(waitForObject(names.deleteQPushButton).enabled);
test.verify(waitForObject(names.qSpinBox).enabled); test::compare($polygonItem->polygon->count(), 4);
my $textItem = waitForObject($Names::o_qgraphicstextitem);
test::compare($textItem->toPlainText(), "Some Text");
my $countLCD = waitForObject($Names::o_qlcdnumber);
test::compare($countLCD->intValue, 4);
test::verify(waitForObject($Names::delete_qpushbutton)->enabled);
test::verify(waitForObject($Names::o_qspinbox)->enabled); Test.compare(polygonItem.polygon.count(), 4)
textItem = waitForObject(Names::O_QGraphicsTextItem)
Test.compare(textItem.toPlainText(), "Some Text")
countLCD = waitForObject(Names::O_QLCDNumber)
Test.compare(countLCD.intValue, 4)
Test.verify(waitForObject(Names::Delete_QPushButton).enabled)
Test.verify(waitForObject(Names::O_QSpinBox).enabled) test compare [invoke [property get $polygonItem polygon] count] 4
set textItem [waitForObject $names::QGraphicsTextItem]
test compare [invoke $textItem toPlainText] "Some Text"
set countLCD [waitForObject $names::QLCDNumber]
test compare [invoke $countLCD intValue] 4
test verify [property get [waitForObject $names::Delete_QPushButton] enabled]
test verify [property get [waitForObject $names::QSpinBox] enabled]We begin by verifying that the polygon item now has four points (i.e., that it is now a square). Then we retrieve the text item and verify that its text is what we entered. The QLCDNumber is used to show how many items are present, so we check that it shows the correct number. And finally, we verify that the Delete button and Z spinbox are both enabled.
After deleting a couple of items and clicking the view (so that no items are selected), we insert our final lines of verification code.
    countLCD = waitForObject(names.o_QLCDNumber)
    test.compare(countLCD.intValue, 2)
    test.verify(not waitForObjectExists(names.delete_QPushButton).enabled)
    test.verify(not waitForObjectExists(names.o_QSpinBox).enabled)
var countLCD = waitForObject(names.qLCDNumber);
test.compare(countLCD.intValue, 2);
test.verify(!waitForObjectExists(names.deleteQPushButton).enabled);
test.verify(!waitForObjectExists(names.qSpinBox).enabled); $countLCD = waitForObject($Names::o_qlcdnumber);
test::compare($countLCD->intValue, 2);
test::verify(!waitForObjectExists($Names::delete_qpushbutton)->enabled);
test::verify(!waitForObjectExists($Names::o_qspinbox)->enabled);Having deleted two items there should only be two left, and so we verify that the QLCDNumber correctly reflects this. Also, with no items selected both the Delete button and the Z spinbox should be disabled, so again we verify this.
These verifications are inserted just before the last line of the recorded script (which clicks the Quit button).
The entire script, containing the recorded and hand added parts is in examples/qt/shapes/suite_py/tst_everything/test.py (or in suite_js/tst_everything/test.js for JavaScript, and so on for the other languages). Although we added our verifications by hand we could just as easily have added them by inserting breakpoints, navigating to the widgets or items of interest, clicking the properties we wanted to verify and then inserting a scriptified verification point. Or we could have simply inserted the verifications during recording by clicking one of the Control Bar Window's toolbar buttons for inserting verification points. It is usually best to use scriptified verifications since they are easiest to hand edit later on if we want to change them.
Testing graphics/view scenes is no more difficult than testing any other Qt widgets or items. Squish gives sensible symbolic names to each graphics item, so it isn't difficult to identify them—and of course, we can always insert a breakpoint and use the Spy to identify any item we are interested in and to add it to the Object Map.
For some more information about testing graphics/view items, see also the QObject castToQObject(object) function.
How to Test non-Qt Widgets in Qt Applications
Squish for Qt is designed to support automating tests on Qt applications. However, on some platforms, Qt applications are built using a mixture of Qt and native widgets—for example, on Windows a Qt application may use native Windows dialogs and embedded ActiveX widgets, in addition to Qt widgets.
Fortunately, Squish supports recording and replaying keyboard and mouse operations on all native Windows controls. And in addition, it is possible to inspect the properties of standard Windows controls using the Squish Spy, and to insert verifications regarding these controls, and to access their properties inside test scripts. Note also, that there is a specific Squish for Windows edition that works with standard Windows applications such as those created using the MFC or .NET technologies.
How to Do Automatic Stress Testing on Qt
This section explains how to use Squish to implement fully automatic stress tests for your application.
The type of stress testing implemented here is called Monkey Testing. This name comes from the idea that if you have a roomful of monkeys and typewriters, given almost infinite time and replacements, they'll eventually type out all the great works of literature.
Note: Currently Squish provides example Monkey Testers for the Qt toolkit using JavaScript and Python-based test suites. It should be straightforward to adapt these examples to create a Monkey Tester for another supported script language, or an AUT that uses another Squish-supported toolkit.
In stress testing, there are smart monkeys and dumb monkeys. Smart monkeys are valuable for load and stress testing; they will find a significant number of bugs, but they are also very expensive to develop. They usually require a certain amount of knowledge about your application, what it can do, and what it can't. Dumb monkeys, on the other hand, are inexpensive to develop, and are able to do some basic testing—but they will find fewer bugs. What is interesting is that the bugs that dumb monkeys do find are often hangs and crashes - the kind of bugs you most want to find! Dumb monkeys also don't need to know much (if anything) about your application, so they are much easier to create.
Note: Even though monkey testing is a valuable addition to your testing setup, it should never be used as your only form of testing, nor should it replace any sort of acceptance testing.
The monkey test shown here is slightly smarter than a dumb monkey, because of its knowledge of Qt APIs. It does know about some things that are common to all Qt applications, such as what buttons, input fields, and check boxes are, and how to interact with them. So this monkey will not simply click randomly onto your GUI, but rather it will choose user-accessible widgets and interact with them.
Starting the Monkey
Note: For AUTs using Qt Widgets, full support of the Python version of the monkey test suite is available for Qt 5 and newer. For applications using Qt Quick, Qt Quick Controls 2 and newer are supported.
The easiest way to monkey test your AUT is to modify the examples/suite_monkeytest_py test suite's tst_runmonkey test case as follows:
- Make sure that the application you want to test is registered in the
squishserver. If this isn't already the case, see the AUTs and Settings section for how to do this. - Open the test suite
examples/suite_monkeytest_py. This example is supplied with Squish. - Go to the
tst_runmonkeytest case and open thetest.pytest script. - Fix up the
startApplication()line so it starts or attaches to your AUT. - If your AUT uses QtQuick instead of Widgets, go to the
monkey = Monkey(...)line and changeQtWidgetToolkittoQtQuickToolkit, there and also on theimportline. - Run the test suite by clicking on the Squish IDE's Run toolbar button.
The Python version of the monkey can be given a configuration object specifying the monkey testing process. In particular, you can set the seed for the random number generator, e.g., monkey = Monkey(QtWidgetToolkit, MonkeyConfig(random_generator_seed=123). If no value is given, a random seed is picked. In both cases, the seed is logged. This allows for creating reproducible monkey testing scripts and reproducing previous (random) sequences. Other configurations options are documented in the MonkeyConfig class.
The easiest way to monkey test your AUT is to modify the examples/suite_monkeytest_js test suite's tst_runmonkey test case as follows:
- Make sure that the application you want to test is registered in the
squishserver. If this isn't already the case, see the AUTs and Settings section for how to do this. - Open the test suite
examples/suite_monkeytest_js. This example is supplied with Squish. - Go to the
tst_runmonkeytest case and open thetest.jstest script. - Fix up the
startApplication()line so it starts or attaches to your AUT. - If your AUT uses QtQuick, fix up the
var monkey = new Monkey(...) and changenew QtWidgetToolkittonew QtQuickToolkit. - Run the test suite by clicking on the Squish IDE's Run toolbar button.
When the monkey test runs you should see that your application is started, and that random user actions are applied to it: random button clicks, entering random text into input fields, opening random dialogs, and so on. The monkey will only interact with the widgets that are visible to the user and that are enabled. Every single action done by the monkey is recorded in the test log.
Recording the Monkey's Actions
The messages written to the test log are plain script statements. You can write them into a log file, which can later on be used as a test script itself for reproducing the actions performed by the monkey in case a defect is revealed. To do this, modify the tst_runmonkey/test.py file.
For example, replace the following statement:
monkey.log_statement = test.log
with:
def custom_logging(s):
    test.log(s)
    with open("logfile.txt", "a") as file:
        file.write(f"{s}\n")

monkey.log_statement = custom_logging
This new code will ensure that not only are all the monkey's actions logged to the Squish IDE's test log as usual, but also that every action is appended to a file called logfile.txt. This file is stored in the directory where the test case is located (for example, examples/suite_monkeytest_py/tst_runmonkey).
To convert the logfile.txt into a test that Squish can run, wrap the content of the log file with a main() function definition:
def main():
  <logfile.txt content>
Delete any irrelevant lines to make the test run faster.
For more information, see Processing the Monkey Log.
The messages written to the test log are plain script statements. You can write them into a log file, which can later on be used as a test script itself for reproducing the actions performed by the monkey in case a defect is revealed. To do this, modify the tst_runmonkey/test.js file.
For example, replace the following statement:
monkey.logStatement = function(s) { test.log(s); }
with:
monkey.logStatement = function(s) {
    test.log(s);
    File.open("logfile.txt", "a").write(s + "\n");
}
This new code will ensure that not only are all the monkey's actions logged to the Squish IDE's test log as usual, but also that every action is appended to a file called logfile.txt. This file is stored in the directory where the test case is located (for example, examples/suite_monkeytest_js/tst_runmonkey).
To convert the logfile.txt into a test that Squish can run, wrap the content of the log file with a main() function definition:
function main() {
  <logfile.txt content>
}
Delete any irrelevant lines to make the test run faster.
For more information, see Processing the Monkey Log.
Stopping the Monkey
Once the monkey has started, it will simply continue forever, or until you click the Squish control bar's Stop toolbar button, or until the monkey either crashes the application, or gets it into a state where it stops responding to user commands because it got stuck somewhere. If the monkey crashes the application or stops it from responding, the monkey will stop and will write a corresponding message to the log file.
You need to allow a fair amount of time for the monkey to run—especially if your AUT is mature and robust. If you want to stop the monkey manually it can be tricky to click the Stop button because the monkey keeps grabbing the mouse—try to just pull the mouse outside the AUT's window and press Esc to stop the test.
If the monkey manages to break the application, the next step is to process the produced log file to find out why.
Processing the Monkey Log
After a monkey test run, the log file must be inspected and interpreted so as to discover the cause of the problem. Usually, the first step in doing this is to create a new empty test case in your application's test suite, copy the script statements from the monkey log (or from a logfile.txt file) into your test script's main() function, and execute the test. If everything goes as expected, this will reproduce the problem.
If the problem is not reproduced by this script, it probably means that some external factor which existed during the monkey test run was not in operation when you ran the test again from the application's test suite. This might be because the problem only occurs at certain times (e.g., A.M. but not P.M.), or only under certain hardware conditions (e.g., when there is less than 10MB of free disk space), or if the Internet was available during monkey testing but isn't now (or vice versa), or some other similar external factor.
Note: To reduce the number of transient external factors, we strongly recommend that you have some sort of clean room environment (which you can recreate at will) and do all the monkey test runs in there. Virtualization software, such as Xen, VirtualBox, or VMware, can be a great help when doing this.
Assuming that you successfully reproduced the problem, the next step is to minimize the script so that it does the least amount of work required to reproduce the problem. Such a minimized script has a number of advantages over the raw monkey test script that you started out with:
- It is faster to execute, because it has fewer script statements. This also means that it is much more convenient to run as a test case to see if the bug is fixed or not since it takes much less time than the original monkey test script.
- It makes it much easier to spot duplicate problems. Sometimes two different monkey tests will produce the same crash, but in different ways. After stripping away all the irrelevant parts, it often becomes apparent which actions caused the problem, and if these are the same in the two minimized monkey tests we know that only one problem has been found, not two.
- It often gives the AUT's developers a very good idea of where to look in the source code when trying to fix the problem. So a minimized test case can often reduce the time needed to create a fix for the problem, since the developers only have to focus on the statements left in the test, not the whole lot of statements in the original monkey test.
A crude but effective way of minimizing a monkey test script that is easy to do and not very time consuming is as follows. Comment out the first half of the script and run it again. If the problem is still present then you can delete the first half of the script; otherwise, uncomment the first half and comment out the second half and run that. If the problem is still present then you can delete the second half; otherwise it is on the border, so comment out the first and last quarters and try again with the middle. Once you have deleted a half, repeat the process on that half: comment out the first half of it, and if that doesn't produce the problem, uncomment it and try commenting the second half, and so on. Although it sounds a lot written down, this process will only have to be repeated a few times (typically two to five deletions), until you get down to just those statements that cause the problem.
How the Monkey Does Its Work
Internally, the main logic of the monkey test is encapsulated in the Monkey class (defined in monkey.py). To instantiate objects of this class, an application name as well as a "toolkit object" have to passed. After creating a monkey object, the run function basically works like this:
- Assemble a list of interesting objects, that is, objects which the monkey can interact with such as buttons (including toolbar buttons), input fields, lists, tables, trees etc.
- Choose a random object from the list. The object must be ready (visible and enabled).
- Decide on a script statement to execute on the chosen object; for buttons a
clickButtonfunction call would be appropriate, input fields could be automated by calling thetypefunction with randomly generated text, and so on. - Log the generated script statement using the user-supplied
log_statementfunction, then execute the statement.
The toolkit-specific steps (assembling a list of interesting objects, choosing an object from the list, generating a script statement) have been factored out into dedicated "toolkit objects". You can find sample implementations for Qt applications in the script file qtsupport.py. Hence, in order to make the monkey recognize new kinds of objects (so that more objects are added to the list of interesting objects), adapt the appropriate toolkit object functions.
Internally, the main logic of the monkey test is encapsulated in the Monkey class (defined in monkey.js). To instantiate objects of this class, an application name as well as a "toolkit object" have to passed. After creating a monkey object, the run function basically works like this:
- Assemble a list of interesting objects, that is, objects which the monkey can interact with such as buttons (including toolbar buttons), input fields, lists, tables, trees etc.
- Choose a random object from the list. The object must be ready (visible and enabled).
- Decide on a script statement to execute on the chosen object; for buttons a
clickButtonfunction call would be appropriate, input fields could be automated by calling thetypefunction with randomly generated text, and so on. - Log the generated script statement using the user-supplied
logStatementfunction, then execute the statement.
The toolkit-specific steps (assembling a list of interesting objects, choosing an object from the list, generating a script statement) have been factored out into dedicated "toolkit objects". You can find sample implementations for Qt applications in the script file qtsupport.js. Hence, in order to make the monkey recognize new kinds of objects (so that more objects are added to the list of interesting objects), adapt the appropriate toolkit object functions.
How to Test Internationalized Qt AUTs
Qt includes support for creating internationalized applications. This means, for example, that developers can create an application with Qt that displays English texts for menu options and dialog labels in English-language locales (such as the U.S.), and displays German texts in German locales, and so on.
Internationalized AUTs can cause problems when it comes to testing since Squish uses AUT object properties—including their texts—to identify objects. So, for example, the File menu item will have the text "File" in English locales and, say, "Fichier", in French locales. If tests were recorded for the AUT using an English locale the tests would not play back in a Spanish locale because Squish would be looking for objects with English texts when the AUTs texts were all Spanish.
Squish provides three ways of dealing with internationalization.
Automatic Reverse Translations
This is the simplest way to deal with internationalized AUTs, although it does suffer from an important limitation.
An internationalized AUT's tests should be created (e.g., recorded) using the same locale as that used for the AUT's development. For example, if the AUT is developed in the U.S. with all its texts in English, tests should be created in an English-language locale. The original English texts are stored inside the AUT and are potentially accessible, even if the AUT is run in a different locale, say, Swedish, and shows Swedish texts for menu options and dialog labels.
We can tell Squish to use the AUT's original (e.g., English) texts, even in a different locale (e.g., Swedish), by setting the SQUISH_TRANSLATION_AWARE_LOOKUP environment variable to 1. (See also, Environment Variables.)
In some cases the same text will need different translations depending on the context. To support this Qt's internationalization function, QObject.tr, allows a second string to be used to disambiguate. Unfortunately, unlike the original text, the disambiguation text is not stored in the AUT so Squish cannot tell which of the disambiguated texts to use. The only ways to avoid this problem are to not use disambiguation texts or to use one of the other approaches for testing internationalized AUTs that are covered next.
Using Object Names Instead of Texts
The easiest way to solve this problem is for the AUT's developers to give unique names to the AUT objects they create using Qt's QObject.setObjectName method. It doesn't matter what language is used for the text given to this method since it is not translated and so remains the same no matter what locale the AUT is run in. Here is an example of how the AUT's developers can achieve this:
fileMenu = new QMenu(tr("File"));                // Text will be translated
fileMenu->setObjectName("file_menu_mainwindow"); // Text won't be translated
Unfortunately, this isn't quite the end of the story because even when Qt objects are given explicit names Squish continues to use their text properties. One way of solving this is to simply remove all properties from the Squish object names except for the type and name properties (the name property is Squish's name for the Qt object name property). A more convenient solution is to take control of how Squish generates object names so that it will automatically use only the type and name properties for AUT objects that have nonempty Qt object names and fall back to using Squish's standard approach for those that have empty Qt object names. See Object Name Generation.
Programmatically Translating Object Names
Another approach to handling internationalized AUTs is to create locale-specific object maps automatically as needed and to load the locale-relevant object map in place of the default object map.
One way of achieving this is to write a test script function (perhaps stored as a global script—see Global Scripts view), which reads in the original object map (which uses, say, English texts), and then writes out a new object map using the language of the current locale (say, Finnish), and then loads in the newly created object map.
Unfortunately, translating the object map isn't sufficient since the texts of "items" may not be in the object map. For these cases we would need to use our own custom translation function and apply it to the relevant texts. For example, given the recorded line:
activateItem(waitForObjectItem(":File_QMenu", "Quit"));
we would need to change it to:
activateItem(waitForObjectItem(":File_QMenu", i18n("Quit")));
assuming that our custom translation function was called i18n.
© 2025 The Qt Company Ltd.
Documentation contributions included herein are the copyrights of
their respective owners.
The documentation provided herein is licensed under the terms of the GNU Free Documentation License version 1.3 as published by the Free Software Foundation.
Qt and respective logos are trademarks of The Qt Company Ltd. in Finland and/or other countries worldwide. All other trademarks are property
of their respective owners.
