Application Objects
The Application Objects view is shown in the Spy Perspective and Test Debugging Perspective.
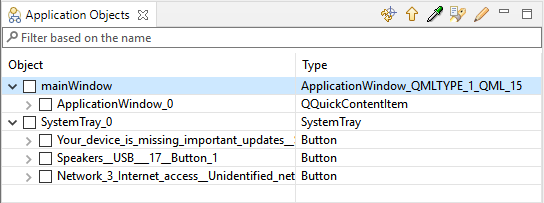
The Application Objects view
Select an object in the application object hierarchy to view its properties in the Properties view. The tree of objects is lazily populated to improve performance. This means that if you expand an item that has lots of child items (e.g., a tree, table, or list widget), it might take a moment before the items become visible.
If you interact with the AUT after the Application Objects view opens—for example by opening an AUT dialog—the new application objects may not be visible in the view. To show them, click the Refresh ( ) button.
Finding objects
The Up button ( ) retrieves the parent object of the currently selected one. There are valid reasons why picking (
 ) an object doesn't hit the intended one. Move upwards in the object hierarchy until the correct object is shown in the Application Objects view.
To find an object visually without drilling through the object tree, interact with the AUT as necessary to make the widget visible, and then click the Object Picker () button. Next, click the AUT to give it focus. When you move the mouse over the AUT's widgets, the widget under the mouse is shown outlined in red, and a tooltip shows the widget's real (multi-property) name. Click a widget to show it in the Application Objects view and its properties in the Properties view. To see all the application objects again, click the Refresh () button.
Highlighting objects
Click the Highlight Object button ( ) to enable the highlighting of the objects inside the AUT. When you click an object in the Application Objects view with Highlight Object being activated, Squish highlights the corresponding object in the AUT. Squish is not trying to set focus to the AUT or bring it to the foreground, so you might have to rearrange windows to correctly see the highlighting. The button's toggle behavior means you only have to enable the highlighting once, and then get the highlighting shown for any object that is clicked in the Application Objects view.
Copying object names
Right-click in the Application Objects view to open a context menu, and then select Copy Real Name or Copy Symbolic Name to copy the real or symbolic name of an object to the clipboard. This enables you to insert an object's name into a test script you are editing. It is usually more convenient to use the symbolic name in such cases. If you do intend to copy-paste an object name into a test script, make sure that you add the name to the object map using the Add to Object Map context menu option so that Squish will remember it when the test is run.
Saving object snapshots
Select the Save Object Snapshot button ( ) or context menu option to open the Save Object Snapshot dialog where you can create a snapshot of the object hierarchy beneath the selected object in the Application Objects view. The snapshot includes all objects, their properties, and optionally a screenshot of each object and the object names. On the hard disk, the snapshot is just an XML file that represents the object hierarchy.
Object snapshots can be very useful for debugging problems. The snapshots can be shown in a dedicated browser program which shows the object hierarchy as well as any other contained information.
See also, How to Use the Spy.
© 2025 The Qt Company Ltd.
Documentation contributions included herein are the copyrights of
their respective owners.
The documentation provided herein is licensed under the terms of the GNU Free Documentation License version 1.3 as published by the Free Software Foundation.
Qt and respective logos are trademarks of The Qt Company Ltd. in Finland and/or other countries worldwide. All other trademarks are property
of their respective owners.
